Tag Archives: lunch

Squash-crusted Pesto Pizza

18 Feb

IMG_1584

My friend Tyffanie and I were batting around ideas the other day for how to use up the winter produce that we received in our Corbin Hill farm share boxes this month. She suggested making this butternut squash pizza crust. I enjoy making pizza at home, and I am partial to making my own “no-knead” pizza crust with bread flour, but this gluten-free squash-crusted pizza looked like an intriguing and new-to-me cooking project for a too-cold-to-leave-the-house Sunday afternoon.

Who knew winter produce could look this good?! Continue reading

Advertisement

Cauliflower “Rice” Sauté: Food For the Summer-Fall Transition

25 Sep

Processed with VSCOcam with f2 preset

Making Cauliflower Pesto a few weeks ago turned me on to a whole world of cauliflower possibilities.

My post-pesto experiment? Rice! Or couscous, or whatever you want to call the small, fluffy tufts of pulsed, grated cauliflower.

The below links provided me with some background and technique on making grain-like cauliflower salads:

The Kitchn provides an easy how-to tutorial on cauliflower couscous

Food52 makes an easy spiced couscous with cumin, za’atar, and lemon

Joy the Baker turns colorful cauliflower  into a rice burrito bowl

The First Mess knows how to make a mean “rice and peas” with all of the best crunchy elements

Clearly, I wanted to be among those in the use-cauliflower-like-a-grain club. So, I picked out the biggest head of cauliflower at the farmer’s market and set to work.

An efficient person would likely use a food processor or blender to pulse the cauliflower into tiny pieces. I, on the other hand, used my box grater, justifying the mess I made all over the counter and the floor as a yearning for the old-fashioned and an excuse to exercise my arm and core muscles. To make less of a mess when grating my hand, try setting the box grater in a large bowl to catch fly-away cauliflower bits.

The cauliflower “rice” can be eaten raw, but I prefer it lightly sautéed.

Use the “rice” plain as a bed for a curry, or stir the “rice” into some seasonal vegetables and add-ins to create a full meal.

I cooked up some onion with zucchini, corn, and tomato, and mixed in the cauliflower “rice” with some chili powder, paprika, and my friend Amy’s uncle’s special Maryland spice blend (you can use something like Old Bay). Shave some Parmesan on top if you want. I took this for lunch every day this week, sometimes adding a little avocado or hummus on top to make things interesting.

Cauliflower is hot, hot, hot right now, as it should be. Jump on board.

Cauliflower “Rice” Sauté: Food For the Summer-Fall Transition

1/2 very large or 1 regular size head of cauliflower

1 tablespoon oil, olive or canola

1 small onion, chopped

1 small zucchini, chopped small

1/2 cup small tomatoes, sliced in half or quartered

1 ear corn, sliced off the cob

1 teaspoon each: chili powder, paprika, Old Bay

salt and pepper, to taste

optional: fresh grated Parmesan cheese and/or hot sauce

Wash the cauliflower and take off the stalk and leaves. Cut or tear the cauliflower into large florets. In batches, pulse the cauliflower florets until finely chopped and they look approximately the size of rice or couscous. **You can also use a box grater to grate the florets by hand. You should get about 4 cups, more or less. Set the “rice” aside.

In a large skillet, heat the oil over medium-high heat. Add the onion and sauté for 2-3 minutes. Add the zucchini, corn, and tomatoes and sauté for another 5 minutes.

Slowly toss the cauliflower “rice” into the skillet with the spices. Continue cooking everything for another few minutes. Taste and add salt and pepper as needed. Finish with Parmesan and/or hot sauce.

Drink Up! Green Smoothie

2 Jul

Processed with VSCOcam with f2 preset

Well I finally gave green smoothies a whirl at home, and…they’re great!

I first started adding just a small handful of baby spinach into a smoothie, but now I’ve expanded to kale and purslane.

A few weeks ago, I got a deal at the farmer’s market: two huge bundles of greens for $5. I bought collards and kale. I cooked the collards, and used some of the kale for salads.  I washed, de-stemmed and tore the remaining kale leaves into pieces and stuck them in a ziplock bag in my freezer (my friend Brianna gave me that genius tip!). Now I have a cold green leafy veggie in my freezer for when the smoothie pangs hit (I would imagine that frozen kale is easy to toss into a soup or pasta recipe, too).

Having frozen smoothie ingredients on hand  (i.e. chopped kale, chopped banana, frozen fruit) is key to keeping things cold. Sometimes I add ice at the very end to get the smoothie extra cold, but it is not always necessary.

If you are wary of the greens, don’t worry because you can’t taste them, especially if you use strong fruits like banana or mango and a nut butter like peanut or almond. The greens just make the smoothie turn, well, green.

Tip: blend the greens with the liquid first. Get it really nice and blended before adding in the remaining fruits and accouterment. This helps decrease the leafiness of the greens. I just use a regular blender.

A half portion of this smoothie fills me up in the morning when I drink it with coffee. I also make the full serving for a light lunch before a workout. Experiment with different greens and fruits and add-ins like chia seeds. Have fun, stay cool, and drink up!

Drink Up! Green Smoothie

Makes 1 large portion, or 2 small snack-size portions

1 cup of greens (I used 3/4 cup frozen kale and 1/4 cup fresh purslane)

1 cup liquid (I used 3/4 cup low-fat milk and 1/4 cup Greek yogurt)

1 heaping cup of fruit (I used about 1 cup frozen banana pieces and 1 poached fig)

1 heaping tablespoon nut/seed butter (I used peanut butter, but almond butter is great in smoothies, too)

optional: Ice

optional: a sprinkle of chia seeds (I didn’t use any in this smoothie because purslane is high in omega-3 fatty acids)

Blend the greens and the liquid in the blender. Get it nice and blended, may take 1-2 minutes. Next, add in the fruit and the nut/seed butter and the chia seeds (if using). Blend again to incorporate. If you want the smoothie extra cold, add in a few ice cubes and blend again. You can top the smoothie with extra chia seeds if you like.

 NOTE: The full recipe, if you use nut butter, could add up to 350-400 calories, making this smoothie more of a mini meal than a snack. 

Mustard Roasted Salmon with Asparagus and Fingerlings

29 Jun

Processed with VSCOcam with f2 preset

It’s hot here in New York, but I am still turning on the oven…for now. The temperature has not yet escalated to the point where I refuse to be in the kitchen under heat. So, a simple, roasted dinner I made.

As per my last post, I am trying to incorporate more fish into my diet. Salmon is in season in the summertime, and the pink, fatty fish looks so nice next to green and gold asparagus and fingerling potatoes.

I was in the Upper West Side area on a Friday afternoon, and after seeing every other person on the street with a shopping bag from New York City’s famous Zabar’s, I just had to go in and pick up some fish for dinner.

Processed with VSCOcam with f2 preset

The vegetables were from the Columbia greenmarket. Fingerlings are one of my favorite potato varieties. They really do look like little fingers! I had some leftover kale ribbons, so I spread my roasted vegetables on a small bed of raw kale.

Processed with VSCOcam with c1 preset

A no-fuss oven to plate dinner.


Mustard Roasted Salmon with Asparagus and Fingerlings

The salmon served 2, the vegetables served 4 (I saved for leftovers the next day)…you can always adjust the amounts if you want 

For the vegetables:

1 bunch of asparagus, trimmed at the ends

10 fingerling potatoes, sliced in half the long way and sliced again if you want the smaller

1-2 tablespoon olive oil

salt and pepper, to taste

For the fish:

1 large fillet of salmon (about 1/4 pound)

1/2 tablespoon mustard

1 1/2 tablespoons olive oil

1/2 tablespoon red wine vinegar (or lemon juice)

a pinch of each salt and pepper

Preheat the oven to 400 degrees. Line a baking sheet with parchment paper.

Spread the potatoes on one half of the baking sheet, and the asparagus on the other half of the baking sheet in a single layer (if you can’t make a single layer, use 2 baking sheets). Drizzle the olive oil over the vegetables, tossing to coat. Sprinkle with a dash of salt and pepper (you can always use more later).

Roast the vegetables, checking after 10 minutes. The asparagus will be done before the potatoes. After 10-15 minutes, the asparagus will probably be done. Transfer the asparagus to a serving plate, re-distribute and spread the potatoes out on the baking sheet, and return the potatoes to the oven. They will cook for about 20 to 30 minutes more or until slightly golden and soft.

———-

Meanwhile, pat the salmon dry. Line your baking sheet (or pie pan!) with a rectangle of parchment paper. Place the salmon onto the parchment, skin side down.

Whisk together the mustard, olive oil, vinegar or lemon juice, and salt and pepper. Spoon it over the salmon (you may not need all of it, save the rest for a vinaigrette…just don’t double dip your spoon). Roast the fish in the oven for about 10-20 minutes, checking oven so as not to overcook the salmon.

Sardine Pastas!

21 Jun

Processed with VSCOcam with f2 preset

 Brother/Sister Pasta with Sardines

I’m new to the whole “fish in tins” thing. Fresh fish is great, but I am picky about where it comes from, etc., etc., so I don’t buy it often. And even though I love my vegetarian-friendly chia seeds and ground flaxseeds, I always feel like I should be eating more fish.

(Re: the recent news about the updated recommendations for pregnant women and children to eat more fish…not that I am pregnant, or a child, but nonetheless, a little fish in the diet is good for the brain, the heart, the body)

I took a big step (for me) last year and started to eat canned tuna fish. Not bad. Not great. But I do it for my health, right? It’s good to change up the diet, add some variety to the mix. And you can keep it in the pantry to have on-hand.

This year, I am taking the “fish in tins” challenge. Bring it on sardines and anchovies. These smaller fish are supposed to be more sustainable, plus, anchovies can add a nice salty flavor to dishes and sauces, and sardines are a hot “super food” bursting with healthy omega-3 fat. A few months ago, I tried sardines from the tin for my first time. Last month, I bought anchovy paste and made my own version of fish sauce to go into a curry. I was definitely scared, but I persisted and came out strong in the end.

I can now say that I enjoy a nice pasta with sardines sprinkled throughout. I buy the boneless skinless sardines packed in olive oil. (I know, I’m not a true sardine fan until I can enjoy them skin, bones, and all, but this is a process…I’ll get there soon).

This was my first run at sardine pasta, adapted from Ellie Krieger’s Weeknight Wonders cookbook:

Processed with VSCOcam with f2 preset Pasta with Sardines Broccoli Rabe

Whole wheat fusilli pasta with broccoli rabe, pine nuts, golden raisins, and sardines. I added Parmesan on top. And it was SO good!

The sardines got added at the last minute before serving. The worst part about fish is the fishy smell, so I was pleased that the sardines had a very mild fishy smell only if they got too hot, but a smell so delicate that I was not offended.

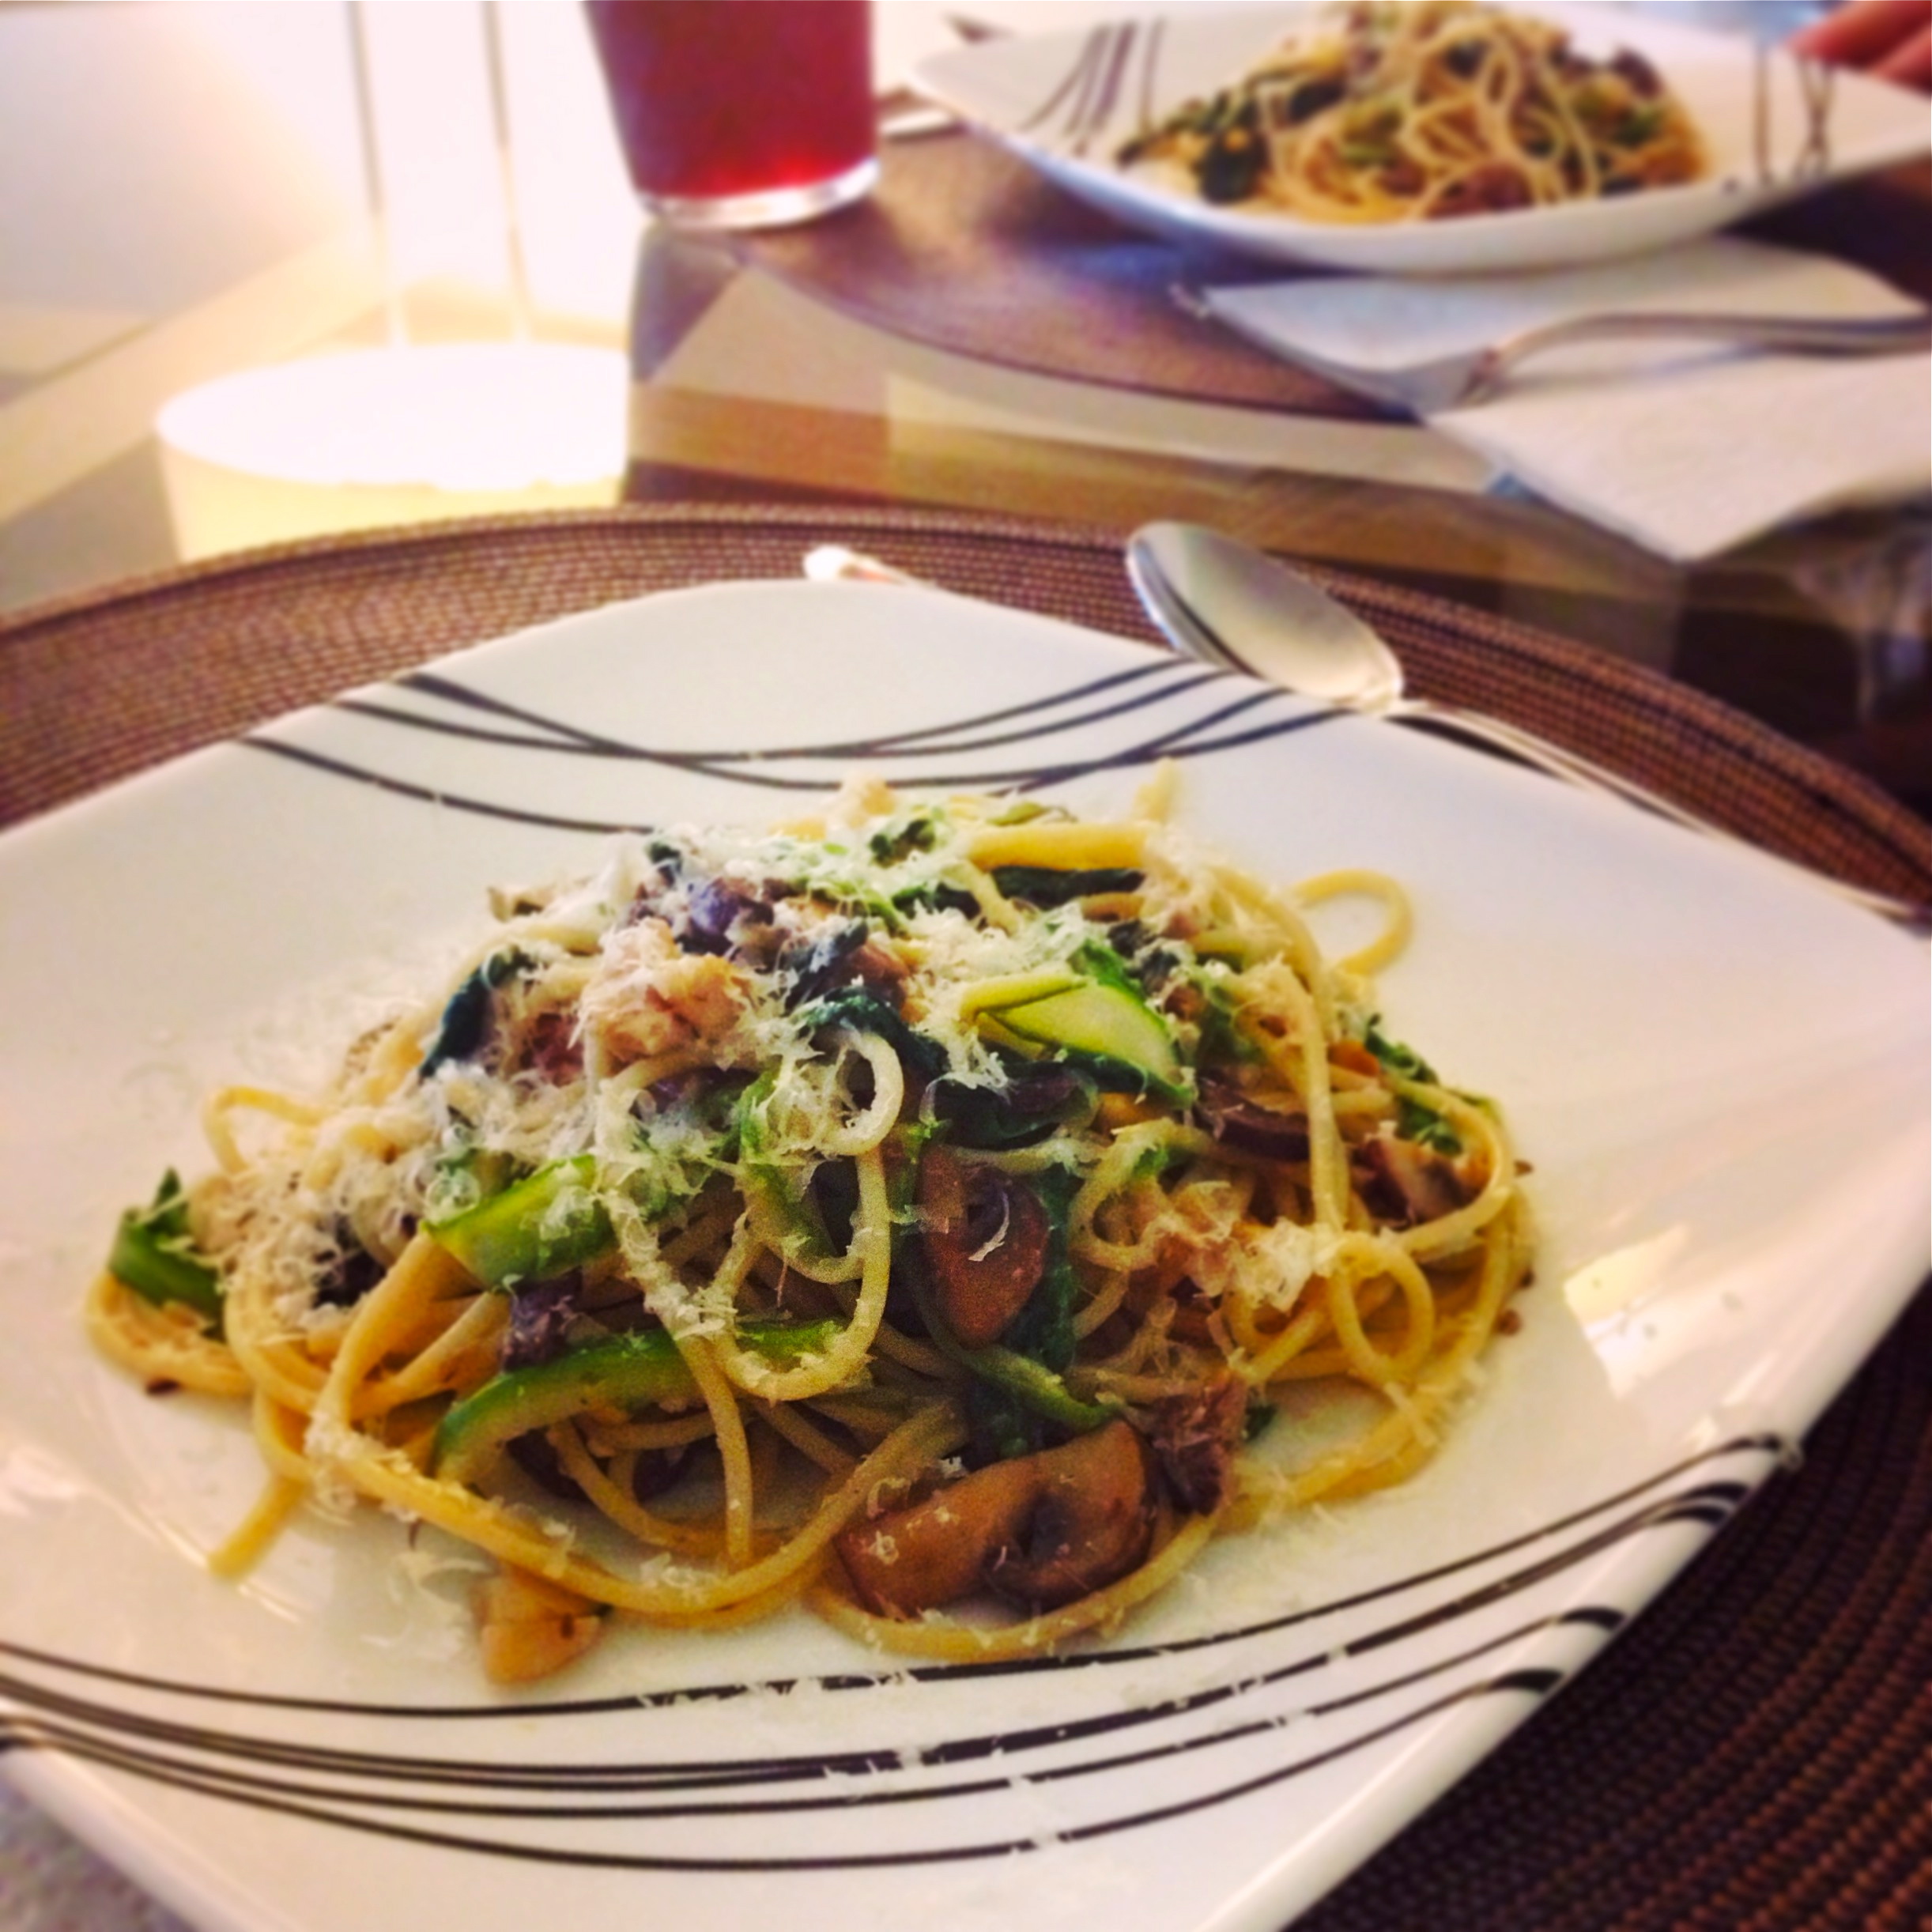
I recently made a version of Ellie’s Pasta with Sardines with my brother. The pasta was a combination of Ellie’s recipe and my Throw Together Late Spring/Early Summer Pasta.

Instead of broccoli rabe, my brother and I used asparagus ribbons, fresh spring garlic, swiss chard, and cremini mushroom slices. We used toasted pine nuts, but no raisins this time.

Processed with VSCOcam with f2 preset

Brother/Sister Pasta with Sardines

Once you have the basic method down, you can always substitute your favorite vegetables and nuts/seeds. You can omit the raisins or keep them. Parmesan is optional, but I love the salty tufts on top of my pasta.

Don’t forget to always save your pasta water!

Pasta with Sardines and Vegetables

Adapted from Ellie Krieger

Makes about 4 servings

3 small tablespoons pine nuts (or whatever nut you like)

1 small bunch (3/4 lb. or so) of broccoli rabe (or a combination of whatever seasonal vegetables you have)

4 cloves garlic (in the spring, look for fresh garlic!)

1 can olive-oil packed sardines (Ellie uses 2, I just used 1…up to you; I like the boneless/skinless kind)

12 ounces whole-wheat or regular fusilli or spaghetti

3 tablespoons olive oil

1/4 cup raisins (optional)

salt and pepper and red pepper flakes, to taste

grated Parmesan, for serving

Bring a large pot of water to a boil. While the water is heating, toast the pine nuts in dry skillet over medium-high heat until fragrant, about 4 minutes. Transfer to a plate to cool.

Trim the tough ends from the broccoli rabe, then chop the rest, including the leaves, into 1/2-inch pieces (or, prepare/chop your other vegetables how you like). Roughly chop the garlic and drain the sardines.

Cook the pasta for 1 minute less than it says on the package directions; drain, reserving 1 cup of the cooking water *If using asparagus or zucchini ribbons, drop them into the pasta water 1-2 minutes before you drain the pasta. While the pasta is cooking, heat the oil in a large skillet (you can use the same one you toasted the pine nuts in) over medium-high heat. Add the broccoli rabe, raise the heat to high, and cook, stirring, until it is crisp-tender, 2 to 3 minutes. Add the garlic and cook for 1 minute more.

Add the drained pasta to the vegetable skillet. Add the sardines, the raisins, the pasta cooking water, toasted pine nuts, and the salt/pepper/red pepper flakes. Turn the heat to medium-high and toss to warm through, 1 to 2 minutes. The sardines will break up as you toss. Serve each bowl with a little grated Parmesan on top.

Processed with VSCOcam with f2 preset

Pasta with Sardines Broccoli Rabe