Dietetic Internship Ramblings + Ramen Noodles with Collards and Peanut Sauce

5 Oct

For the next year, I will be rotating around New York City, interning with registered dietitians (RDs) at various organizations, businesses, and clinics. I must complete this internship year and pass an exam in order to obtain my license as an RD.

As a dietetic intern, I have to complete a certain number of hours in a community nutrition setting, a clinical nutrition setting, and a food service nutrition setting. From September through December, I intern at three different community nutrition sites for five weeks at a time. In the spring, I do a 15-week clinical rotation, and next summer, I do a food service rotation.

I am currently four weeks into my first community nutrition rotation, and I love it! I work with clients who have HIV/AIDS. Some of the tasks performed at this five-week rotation include: Continue reading

Finding the Right Ratio: Basic Chia-Yogurt Mix

1 Oct

Processed with VSCOcam with f2 preset

I publicly announced my dabbling with chia pudding over the summer. Even though I adore chia seeds sprinkled in smoothies and oatmeal and baked goods, for a long time, I could not bring myself to adore chia pudding. Finally, after gleaning through what seemed like a zillion different variations on chia pudding and nixing the few not-so-great combos I tested at home, I found my go-to ratio that I truly do adore:

2 tablespoons chia seeds to 2/3 cup yogurt-water mix (a heaping 1/3 cup plain Greek yogurt + a scant 1/3 cup water)

I think the yogurt is really key. The thickness of the Greek yogurt provides a nice consistency, and the water loosens things ever so slightly. Mix everything in a jar the night before. The next morning, spoon the mixture into a bowl (or keep in the jar for an on-the-go breakfast) and add toppings! Coconut chips, granola, fruit, and nut butter are my go-to’s.

The berries in the picture above were frozen and I heated them in the microwave for 20-30 seconds. Sometimes I toss the berries in when they are still frozen. Different strokes.

Last month, I attended an acai bowl class at Sweetgreen taught by Ksenia of Breakfast Criminals. Her class inspired me to start “decorating” my breakfast, and I definitely feel more excited about eating when my bowl/plate looks colorful and pretty.

Processed with VSCOcam with f2 preset

I have been eating variations of my Basic Chia-Yogurt mix for the last month, at least two or three times a week, so I can now say that this ratio has been well-tested and given my seal of approval.

Sometimes I use a mix of chia, buckwheat, and hemp seeds instead of plain chia seeds. Change it up. Use the Basic Chia-Yogurt Mix as your starting ratio, then add in whatever looks good.

Basic Chia-Yogurt Mix

serves 1

The night before, mix together in a jar:

2 tablespoons chia seeds

heaping 1/3 cup plain Greek yogurt 

scant (aka slightly less than) 1/3 cup water

Stir, let it sit for 5 minutes, then stir again and place in the refrigerator overnight.

The next morning, either keep the chia-yogurt mix in the jar, or pour it out into a bowl. Sprinkle in your favorite fruity/crunchy/creamy toppings. I like a sprinkle of each of the following:

granola // coconut chips // fruit (fresh, frozen, or dried) // nut butter 

Homemade Miso Ramen

29 Sep

Processed with VSCOcam with f2 preset

After spatchcocking a chicken the other night (recipe here), I saved the backbone to make a chicken stock.

To make a light chicken stock: Place the backbone and a few other chicken bones/discards into a pot with a chopped carrot, onion, and celery stalk and cover with water. Let it come to a boil and then reduce the heat and simmer for about an hour, partially covered. Drain the solids out and you get a beautiful homemade chicken stock. Salt to taste. Skim some fat off during simmering or after refrigeration.

I was contemplating a recipe to make that would let the homemade chicken stock shine, and my boyfriend suggested/challenged me to make ramen. Genius! Sometimes I need a little outside input to get my creative juices going again.

And guess what? Making ramen at home was not as scary as I thought it would be.

Granted, I made a somewhat simplified version compared to what one might find at a Japanese ramen shop, but I appreciate my less salty, vegetable-topped ramen for it’s purpose as an amped-up dinner at home. Having the chicken stock already prepared from the day before saved me a lot of time, too.

IMG_3672

I cooked all of the components of the ramen dish separately, but I was multitasking the whole time and only used 2 pots in the process. As the miso broth was simmering, I made 7-minute eggs* and set them in an ice bath while I steamed some broccoli and boiled my ramen noodles (eggs, broccoli, and noodles were all cooked in the same pot at different times). I kept everything separate until serving.

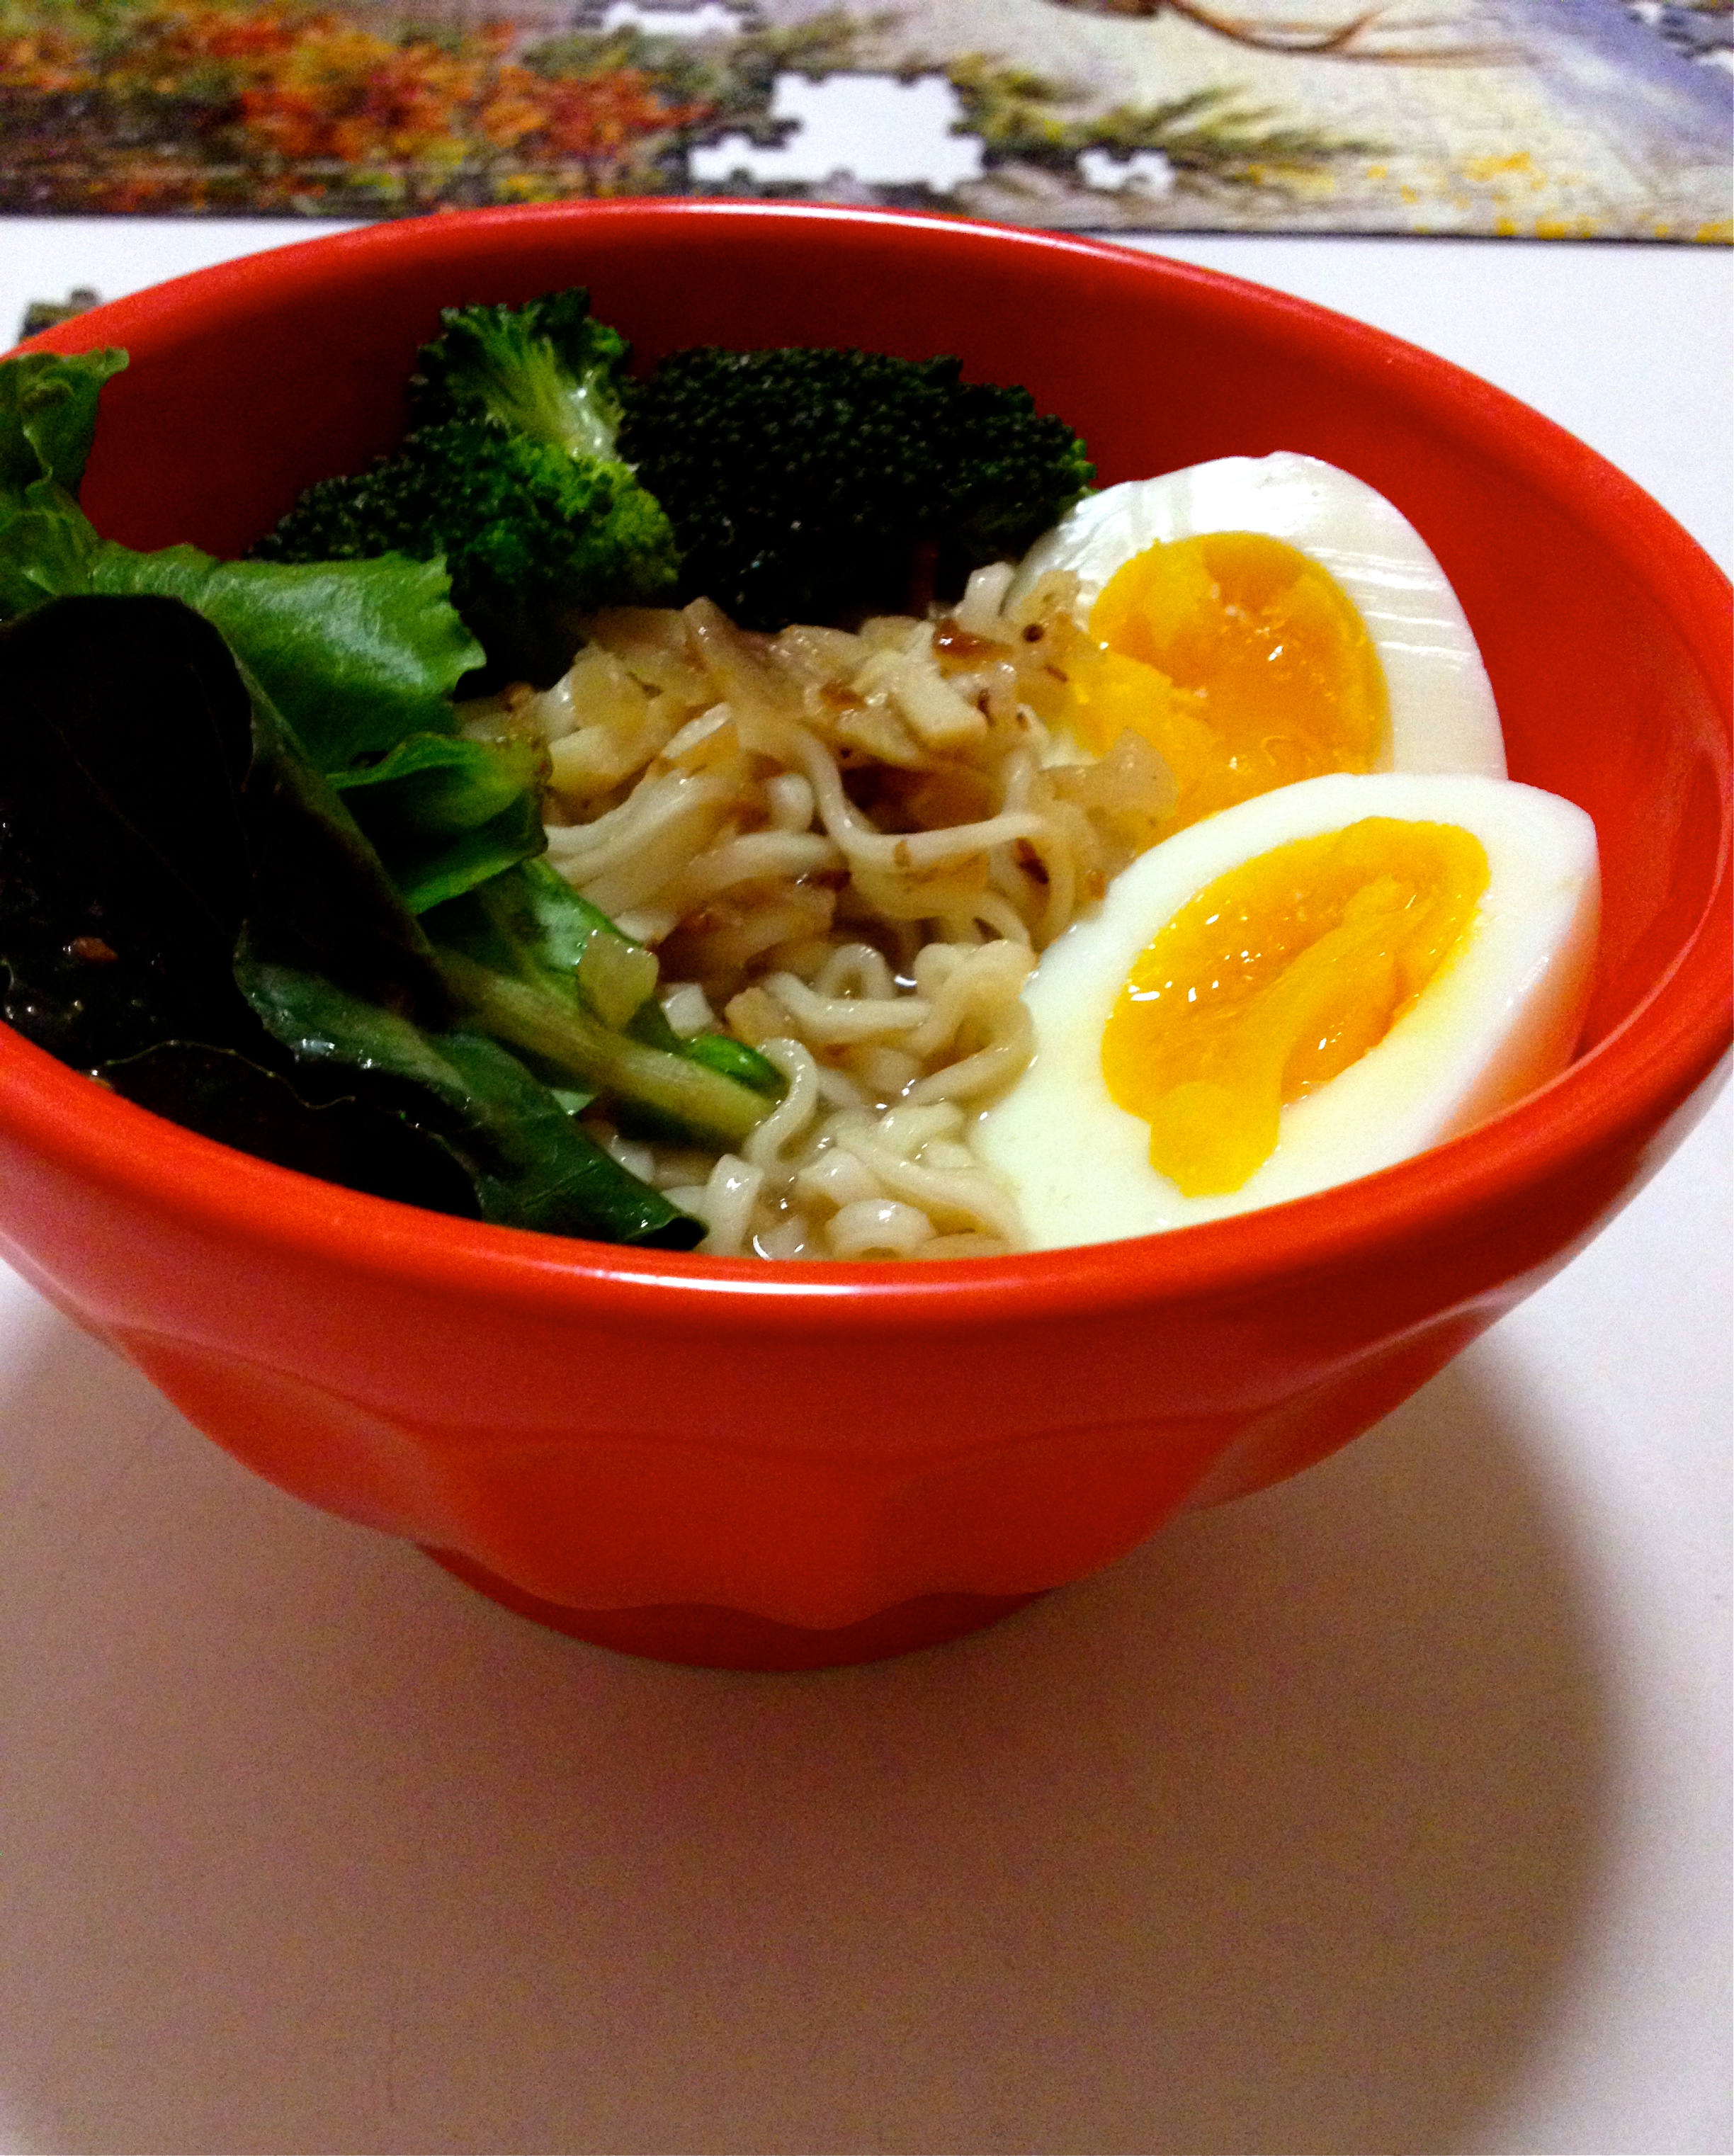
To serve the ramen, I placed cooked noodles in the bottom of a serving bowl. Then I ladled in hot broth and placed egg halves and vegetables on top.

*This was also my first time making a medium or 7-minute egg. It was so good, I need to do this more often.

IMG_3669

I had broccoli and greens on-hand at home. Use whatever seasonal vegetables you want. Also, you could add some ground pork or chicken to this recipe after sautéing the shallot/garlic/ginger. Cook until no longer pink and then add the miso/bean/sesame and follow the rest of the recipe.

Homemade Miso Ramen

adapted from Just One Cookbook

makes 2-3 servings

For the broth:

1 shallot or a small onion

2 garlic cloves

1 1-inch piece of fresh ginger

1 tablespoon sesame oil

3 tablespoons white miso paste

1 teaspoon fermented black bean paste (not super spicy) or chili bean paste/La Doubanjiang (spicy)

1 tablespoons crushed sesame seeds

4 cups chicken stock, homemade if you have it (or vegetarian stock or water)

Noodles:

2 servings of packaged ramen noodles (do not use any of the powders or sauces that come with)

Toppings:

7-minute boiled eggs

steamed broccoli

fresh greens

more “authentic” might be: pickled red ginger, nori (seaweed), bean sprouts, corn, scallion, Japanese chili oil, pork or chicken

Directions: 

Finely chop the shallot and garlic. Mince the ginger with a microplane.

Heat the sesame oil in a pot. Add the garlic, shallot, and ginger and cook for about 2-3 minutes. Add the miso, bean paste, and crushed sesame seeds and stir. Add a little of the chicken stock to deglaze the pan and smooth out the miso paste, then add the rest of the chicken stock and stir. Simmer this while you prepare the remaining ingredients.

-Make your eggs. Bring a small pot of water to a boil. Set two eggs on a large spoon and gently set them into the boiling water. Set the timer for 6 minutes, then spoon the eggs out of the boiling water and into an ice bath.

-Next, set a steamer over the same water you used to boil the eggs. Steam the broccoli, covered, for about 4 minutes. Set aside.

-Using the same pot you boiled the eggs and steamed the broccoli in, bring water to a boil and cook the ramen noodles for about 3 minutes.

To serve:

Spoon cooked ramen noodles into serving bowls. Ladle the miso broth on top of the noodles. Place your toppings–eggs, steamed broccoli, fresh greens–over the broth and noodles. Enjoy!

Cauliflower “Rice” Sauté: Food For the Summer-Fall Transition

25 Sep

Processed with VSCOcam with f2 preset

Making Cauliflower Pesto a few weeks ago turned me on to a whole world of cauliflower possibilities.

My post-pesto experiment? Rice! Or couscous, or whatever you want to call the small, fluffy tufts of pulsed, grated cauliflower.

The below links provided me with some background and technique on making grain-like cauliflower salads:

The Kitchn provides an easy how-to tutorial on cauliflower couscous

Food52 makes an easy spiced couscous with cumin, za’atar, and lemon

Joy the Baker turns colorful cauliflower  into a rice burrito bowl

The First Mess knows how to make a mean “rice and peas” with all of the best crunchy elements

Clearly, I wanted to be among those in the use-cauliflower-like-a-grain club. So, I picked out the biggest head of cauliflower at the farmer’s market and set to work.

An efficient person would likely use a food processor or blender to pulse the cauliflower into tiny pieces. I, on the other hand, used my box grater, justifying the mess I made all over the counter and the floor as a yearning for the old-fashioned and an excuse to exercise my arm and core muscles. To make less of a mess when grating my hand, try setting the box grater in a large bowl to catch fly-away cauliflower bits.

The cauliflower “rice” can be eaten raw, but I prefer it lightly sautéed.

Use the “rice” plain as a bed for a curry, or stir the “rice” into some seasonal vegetables and add-ins to create a full meal.

I cooked up some onion with zucchini, corn, and tomato, and mixed in the cauliflower “rice” with some chili powder, paprika, and my friend Amy’s uncle’s special Maryland spice blend (you can use something like Old Bay). Shave some Parmesan on top if you want. I took this for lunch every day this week, sometimes adding a little avocado or hummus on top to make things interesting.

Cauliflower is hot, hot, hot right now, as it should be. Jump on board.

Cauliflower “Rice” Sauté: Food For the Summer-Fall Transition

1/2 very large or 1 regular size head of cauliflower

1 tablespoon oil, olive or canola

1 small onion, chopped

1 small zucchini, chopped small

1/2 cup small tomatoes, sliced in half or quartered

1 ear corn, sliced off the cob

1 teaspoon each: chili powder, paprika, Old Bay

salt and pepper, to taste

optional: fresh grated Parmesan cheese and/or hot sauce

Wash the cauliflower and take off the stalk and leaves. Cut or tear the cauliflower into large florets. In batches, pulse the cauliflower florets until finely chopped and they look approximately the size of rice or couscous. **You can also use a box grater to grate the florets by hand. You should get about 4 cups, more or less. Set the “rice” aside.

In a large skillet, heat the oil over medium-high heat. Add the onion and sauté for 2-3 minutes. Add the zucchini, corn, and tomatoes and sauté for another 5 minutes.

Slowly toss the cauliflower “rice” into the skillet with the spices. Continue cooking everything for another few minutes. Taste and add salt and pepper as needed. Finish with Parmesan and/or hot sauce.

Slow Food NYC Benefit Dinner at Kings County Distillery

22 Sep

On Wednesday, September 10, I attended Parker Red’s Farm to Fork Dinner benefiting Slow Food NYC at Kings County Distillery in the Brooklyn Navy Yard.

The dinner was supporting Slow Food NYC’s Producer Summit, an event bringing together local farmers, chefs, and distributors to discuss challenges and celebrate successes of the current local food system. The Producer Summit will be held at Hawthorne Valley Farm in early November, and the hope is to create “an actionable strategy to strengthen and expand the supply chain of organic and sustainably-grown food to New York City restaurants.”

FTF Whiskey Dinner Invite - Final

The evening began with live music, radishes with butter and salt, boiled peanuts, charcuterie, and a tasting—moonshine, bourbon, and chocolate whiskey—made from corn and barley grown onsite at the distillery in the Brooklyn Navy Yard. Continue reading