Archive | custard RSS feed for this section

Honey Lavender Ice Cream

15 Aug

Processed with VSCOcam with f2 preset

I just made a batch of Smitten Kitchen’s Maple Cluster Granola. She uses an egg white in her recipe as a protein “glue” that creates wonderful clusters. Genius. Since I have a “nothing to waste” attitude, I saved the yolk and immediately made room in the freezer for my Cuisinart ice cream bowl.

As I was putting the container of fresh-baked granola away in the pantry, I re-discovered my bag of Culinary English Lavender (grown in Long Island). With lavender, a little goes a long way, so I always have what feels like an endless supply of purple buds.

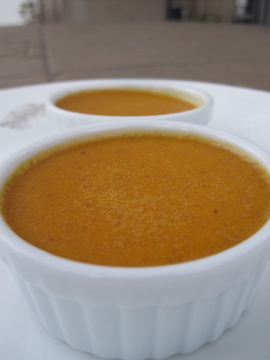
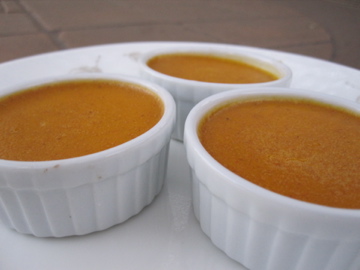
And so, Honey Lavender Ice Cream.

IMG_1145

I just got back from a trip to visit California’s Bay Area and Sierra Mountains. Lavender seems to grow wild there, and in many other places, so if you have fresh lavender accessible, skip the purchased bag and go pick some!

This ice cream smells and tastes like a delicate flower, in a good way. I am almost tempted to lather a cold honey-lavender-ice-cream-mask all over my face, but the temptation to just eat the ice cream is much greater.

(psst…since we are on the subject, have you ever tried Dr. Bronner’s Lavender soap? It’s my favorite!)

IMG_1143

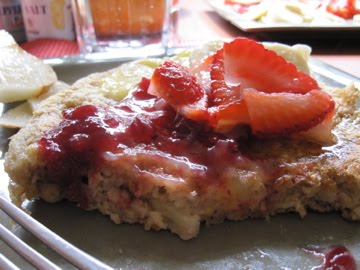
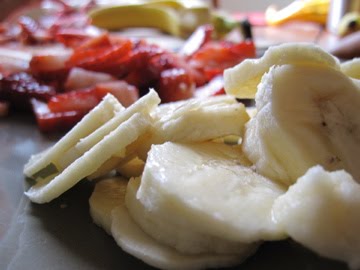
Pair the ice cream with fresh strawberries or white peaches. Or serve it over your favorite summer fruit crumble, cake, or pie.

IMG_1149

Find more Figs in my Belly ice cream recipes and flavors in the Recipe Index.

Honey Lavender Ice Cream

adapted from Bakeology by Lisa, using David Lebovitz technique

I used 1% milk and one fewer yolk than the original recipe because it was convenient for me and a touch healthier, without compromising on taste or texture

  • 1 cup milk (I used 1% milk, but you could use whole if you want)
  • pinch of Kosher salt
  • 1/2 cup honey
  • 2 tablespoons culinary lavender
  • 2 cups heavy cream
  • 4 egg yolks (large or extra large work fine)

Place the bowl of an ice cream maker in the freezer for at least 24 hours.

Place the milk, salt, honey and lavender in a small pot and heat, stirring with a rubber spatula, until just scalding. Turn off the heat, cover, and let the mixture infuse for one hour.

Meanwhile, place the heavy cream in a bowl and place a mesh strainer over the top. Set the bowl of heavy cream into a larger bowl. Surround the larger outside bowl with ice water.

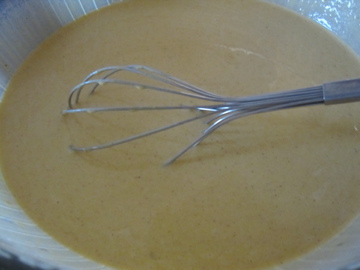
After an hour, re-warm the milk/salt/honey/lavender mixture. Mix the egg yolks in a small bowl. Very slowly and stirring constantly with either  a whisk or a rubber spatula, pour some of the milk mixture (about 1/2 cup) into the yolks.  Pour this mixture back into the pot with the remaining milk mixture. Continue to cook the custard over low heat, stirring constantly, until it thickens enough to coat the back of a spoon.

Once thickened, pour the custard through the mesh strainer into the bowl of cream sitting in the ice water bath. Stir everything together and let it sit in the ice water bath until the ice cream base is chilled. Once chilled, refrigerate the mixture for a few hours. Churn it in the ice cream maker according to the manufacturer’s instructions.

Advertisement

A Cast-Iron Cutie: Cherry Clafoutis, Round 2

22 May

Cherry season. Is upon us.

I’m bringing this beautiful cross between a custard and a pancake to an afternoon party in Napa Valley today.

Check the perfectly browned edges, please. With the lightest, airiest, subtly sweet-and- studded-with-cherry fruit-center. Now this is a pancake that’ll get you up in the morning.

While the clafoutis was in the oven, I whipped up some pasta.

Rigatoni with sauteed onions, cauliflower, and pattypan squash. Fresh pesto made in my mortar and pestle. Almonds. Cheese. I ate too much. It was worth it.

A cherry clafoutis was one of the first recipes I ever posted to my blog. 2 years ago. Dang.

Well here I go again. Cherry clafoutis, round 2.

Cherry Clafoutis

serves 8

adapted from 2 recipes: Saveur magazine and Joy of Baking/figsinmybelly

Once again, I keep the pits in the cherries for two reasons:

#1 It is easier and…
#2 The pits give the clafoutis a subtle almond flavor when baked.

Ingredients

1 tbsp. butter

2-3 cups cherries, washed and stemmed (no need to pit them)

1 tbsp. sugar

1 tbsp. vanilla extract (or 1 tsp. almond extract)

6 eggs

5 tbsp. sugar (I used brown sugar because I ran out of granulated)

1 1/4 cups milk

2 tbsp. kirsch (optional: I omitted it because I did not have any on hand)

Pinch salt

3/4 cup flour

Confectioners sugar (optional)

Preparation

1. Preheat oven to 425 degrees F.

2. In a blender or whisking by hand, combine your vanilla (or almond) extract, 6 eggs, 5 tbsp. sugar, milk, kirsch, and salt and whiz for a few seconds until blended. Then add the flour and blend for one more minute until smooth. Let the batter rest while you prepare the cherries.

3. Melt the butter in your cast iron skillet (or any oven proof skillet or pan), making sure to coat the pan and the sides very well. Once the butter starts bubbling, add your cherries, coating them and cooking for about 2 minutes. Sprinkle with 1 tablespoon of sugar and continue cooking for one more minute.

3. Pour the batter over the cherry mixture. Bake in the oven for 30 minutes. Do not open the oven midway through baking. Pull the pan out after 30 minutes, you should have a nice puffed, browned clafoutis. Let it cool for a few minutes then dust with confectioners sugar. Slice and serve.

>Pumpkin Custards

30 Nov

>
Ok. Here’s the thing. Whenever I come home (aka to the parents’ house), the first thing I do is look in the fridge. Then I go to the pantry.

I have a meal sitting down at the table and immediately after I have a second meal standing up, hovering over all of the exciting goodies and treats, snacking, sticking my fingers into this and that, taking a nibble here and there, munching, crunching, and pigging out. I’m telling you, my manners have flown the coop.

I eat a bowl of cereal and lick it clean, getting dribbles of milk and soggy flakes all over my chin. And yep, you betcha, I LOOOOOVE soggy cereal. No matter what kind, the soggier the better.

Chocolate covered peanut butter filled pretzels. Need I say more?

5 different flavors of ice cream …of course I must taste every single one.

One of my favorite drawers in the house is the “gum drawer,” and gum is not the only star of this drawer: we’re talking gum, lollipops, little candies, good quality dark chocolate, even birthday candles and chalk (yah, the kind you write on a chalk board with).

Then comes part 2, the stomach ache. Ouch. I ate waaaaay too much. But it was just sooo good.

Indeed when I come home, my family looks forward to my “gourmet” home cooking. I have to impress, and I always do (well, I try).

This time, I whipped up these cute little pumpkin custards.


Baked in ramekins both tiny and a bit larger than tiny, these little custards are just so darn good. Good for dessert, but in my opinion, even better for breakfast, spread on toast or waffles (really yummy with leftover Thanksgiving cranberry sauce), as a filling for Ebelskiver pancakes, and yes, I throughout the day, I will stick my finger into the custard dish a few times just to get a little taste. Mmmm.

These custards are like the filling of pumpkin pie, but better. I had the intention to make little ginger snaps to go with but never quite got around to it this time.

Just mix all of the ingredients together, strain them, and then bake the custard in a water bath until set.

Cinnamon, Ginger, Salt…


I am still unsure whether to serve these custards warm, chilled, or room temperature. I guess it is up to you…

When we make these custards at the restaurant I work at, we use fresh pumpkin (duh, only the best). At home, I was lazy and bought the can. But hey, it was fresh at some point in its pumpkin life…?

Pumpkin Custards
Adapted from Oakland’s Pizzaiolo Restaurant

Fills 6 two-inch ramekins plus 4 baby ramekins…

Ingredients

6 eggs
2 oz. sugar (about ¼ cup)
3 oz. dark brown sugar (a little more than ¼ cup?)
½ teaspoon cinnamon
½ teaspoon ginger
¼ teaspoon salt
2 c. cream (aka 1 pint)
2 c. pureed pumpkin (aka one 15 oz. can)

Directions

1. Whisk all of the ingredients together.
2. Strain (this is simply for a smooth, even texture and aesthetic reasons).
3. Fill ramekins with custard.
4. Bake in a 275 degree oven in a water bath until set (about an hour, less for the baby ramekins). Rotate at least once during baking.
5. Serve warm, chilled, or room temperature with whipped cream, ginger snaps, or whatever tickles your fancy.

Luscious Lemon Curd

22 Oct

Lemon curd is my new favorite breakfast/dessert condiment.

A fruit curd is similar to a fruit custard, except it is made without milk or cream. Lemon curd is a classic spread for toast, muffins, scones or pancakes. I like to spoon it over plain yogurt, too.

For a more dessert-like treat, pour homemade curd into a tart or pie shell and bake it in the oven until set. Curd can also be used as a filling for cookies, cakes or pastries, or swirl it into freshly churned ice cream or whipped cream!


I can eat it this stuff by the spoonful. It is just *~so.darn.good.~* I love the sweet and sour combination of lemons and sugar mixed with the creaminess of good ol’ butter.


I wanted to make lemon curd since the beginning of summer, and finally got around to it last Friday. It was so easy and delicious that I made it again on Sunday.

The process is like a science experiment. Sugar, lemon zest, eggs, and lemon juice get heated in a bowl over a pot of simmering water. The eggs cook slowly, thickening the mixture into a custard. Once thick, the custard gets strained through a fine sieve. Add a little butter for extra silky smoothness.

To go with the curd, my friends and I made pancakes. Really hearty and oaty ‘cakes, and topped with a triple threat of spreads—maple syrup (duh!), lingonberry jam (similar to a cranberry), and homemade lemon curd!!!!!! With walnuts and bananas mixed into the batter…YUM-O!


Four great friends and a lovely Sunday morning noon breakfast. Kelly made the pancakes. Sara cut up the fruit and made the mimosas. I threw together some lemon curd. Sara’s brother Sam got to eat with us in exchange for helping Sara with her physics homework and fixing the toilet 🙂

Sunday breakfast. Let’s do it again. And again. And again.

Luscious Lemon Curd

Adapted from Kiri, head pastry chef at Pizzaiolo Restaurant

This recipe is almost too easy! I memorized it immediately after the first time I made it! You do not have to be super exact with all of the measuring. Just go with the flow.

Makes about 1 ½ to 2 cups

Ingredients

½ cup sugar
lemon zest
2 eggs
¼ cup of fresh lemon juice (about 2-4 lemons)

4 Tablespoons of butter
Directions:

1. Place the sugar and the lemon zest in a heatproof metal bowl (the zest will infuse the sugar with lemony goodness!).

2. Crack your eggs in a separate bowl.

3. Measure out the lemon juice and set aside.

4. Place your bowl of sugar over a small pot of simmering water. Add the eggs and the lemon juice.

5. Whisk the mixture over the simmering water until it thickens, about 10-12 minutes.

6. When thickened, take the bowl away from the heat and add the butter, stirring until melted.

7. Strain your lemon curd through a fine mesh strainer (or chinois if you’re fancy).

8. Let it cool slightly and enjoy!

Store leftovers in the refrigerator.