Cornbread fit for 60!

11 Sep


Where’s the peeler? You mean I have to soak the beans overnight? How much liquid do I use for the rice? These questions cross my mind every week as I prepare to cook dinner for sixty hungry college students living in my co-op.

As head cook, I start preparing dinner with one other person in the afternoon to have the meal ready by 7 p.m. I want to cater to everyone’s likes, dislikes, and needs—to vegetarians, vegans, meat-lovers, gluten-free eaters, and picky eaters. Seasonal produce, bread, meat, and dairy products regularly get delivered to the house, and the kitchen is already stocked with the basics—spices, grains, dry beans, oils and vinegars…

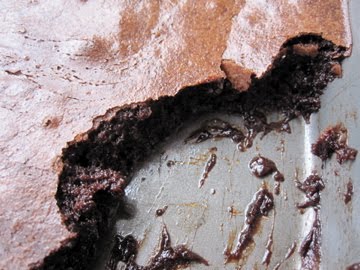
Cornbread. Always a crowd-pleaser. So moist and comforting—I feel guilty with glee, it is like eating cake with dinner!


Golden yellow in the center and perfectly browned on the edges, this cornbread really is the best ever! And you know why it is the best ever? Because it calls for the butter to be browned! Yes, browning the butter is the secret! It was also the secret in these blueberry muffins!


The key to browning your butter is to melt it on the stove over medium heat and to turn it off as soon as it stops “singing” (aka sizzling/cracking/popping/making noise…you get the picture). You can see the butter go from yellow to a nice brown color, and the smell is so sinfully delicious and nutty!


This is just a basic recipe for cornbread. If you are feelin’ a little cra’ cra’ (aka crazy!!) you can add in some cheese, fresh corn kernels, jalapeños, chives…


This recipe is so moist and all the flavors come together so nicely that I found no need to add any extra butter, honey, sour cream… on top. But if you feel so inclined, please go right ahead!

Best Cornbread Ever
Adapted from herbivoracious.com
Serves 60! (divide recipe by 6 and use an 8×8 in. pan to get the original proportions)

* 6 sticks unsalted butter
* 12 eggs
* 6 cups buttermilk (I used 3 cups nonfat milk + 3 cups 2% milk and 6 T. white vinegar)
* 6 cups cornmeal
* 6 cups all-purpose flour
* 2 cups sugar
* 6 teaspoons salt (aka 2 Tablespoons)
* 3 teaspoons baking soda

1. Preheat the oven to 375 °F and butter two large rectangular pans.
2. Melt the butter in a saucepan over medium heat. Continue cooking about 10 minutes or more until it is turning a light brown and has a delicious, nutty aroma. Do not skim, keep all those browned milk solids (that is where most of the flavor is concentrated!).
3. Whisk together the eggs and buttermilk. Drizzle in the butter, whisking constantly to avoid cooking the eggs.
4. Whisk together the dry ingredients in a separate bowl.
5. Combine the wet and dry ingredients and stir just enough to form a batter. It is ok if there are a few lumps. Avoid over-beating as this could make the cornbread tough (tough cornbread=yuck).
6. Pour into the pan and bake about 25 minutes until golden brown and a toothpick inserted in the center comes out dry.
7. Serve while still hot. Get it while you can because in a house full of hungry 20-something year olds, it will all be gone in a matter of minutes!

>Brownie Pudding Amazingness!

5 Sep

>
“Close your eyes the next time you eat a piece of chocolate cake; did it really taste like chocolate or did the fudgey-looking icing just trick you into thinking it would taste like chocolate? The best chocolate desserts have a depth of flavor that hits you in a few ways—both sweet and bitter, with a winey complexity—and it’s my goal to bring out that complexity to reveal the true essence of chocolate…”

–Ina Garten

Not quite a brownie, not quite a pudding, not quite a soufflé—just a beautifully rich and decadent chocolate filled dessert!

The top of this treat is thin and crisp, but once you stick your fork in, oozing molten chocolate amazingness seeps out!


Check out the lovely mound of sifted cocoa powder/flour!


Everything that I have made from Ina Garten’s Back To Basics cookbook has turned out exquisite. She really focuses on cooking with ingredients that bring out the essence of the natural flavor in food. It is all about taking ordinary, on-hand ingredients and cooking or pairing them in a way that really brings out the taste! She is very aware of weaving her menus together and adding that extra “umph” to her dishes by finishing them off with a sprinkle of course sea salt, a splash of lemon juice, or a gorgeous herb…!

I made this brownie pudding dessert as a gift for my friend Natasha’s going away party. She is leaving to study in Scotland for the YEAR! Natasha is the QUEEN of chocolate/dessert/sweets, so I saw this as a prime opportunity to make a rich dessert to send her off! I just hope the Scots will be able to accommodate her sweet tooth!

Ina bakes her brownie pudding in an oval shaped dish, however the co-op where I live only had a rectangular shape pan. Despite the change from circular to square, this baby came out just perfect!


This dessert is baked in a water bath. A water bath is typically used when baking delicate foods—especially dairy and egg-based custards, soufflés and cheesecakes—as they can curdle and overcook very easily. A water bath acts as a way to insulate whatever you are cooking to maintain a smooth and even texture. This way, the oven will cook the center of the cake/custard/etc. without overcooking the sides. Genius!

Warning: Do not leave me alone with a big pan of chocolate dessert, or I might just eat it all and you will have to retrieve me from the doctor for having an overdose of goodness! But seriously, I have very little self-control these days…


Brownie Pudding
Amazingness
Adapted from Ina Garten’s Back to Basics

Ingredients

½ lb. (2 sticks) unsalted butter

4 extra-large eggs, at room temperature

2 cups sugar

¾ cup good cocoa powder

½ cup all-purpose flour

seeds scraped from 1 vanilla bean

Optional: 1 Tablespoon of framboise liqueur (or any liqueur of your choice; espresso would be great, too!)

1. Preheat oven to 325°F. Lightly butter a 2-quart (9x12x2 inch) oval baking dish (I used a 9x13x2 inch rectangular and it came out great!)
2. Melt the butter and set aside to cool.
3. Beat the eggs and sugar until very thick and light yellow (Ina uses an electric mixer with paddle attachment and beats for 5-10 minutes, but I utilized my super arm strength and used a hand whisk instead!).
4. Sift the cocoa powder and flour together and set aside.
5. When the egg/sugar mixture is ready, add in the vanilla bean seeds, the liqueur (if using), and the cocoa powder/flour mixture. Mix until just combined.
6. Slowly pour in the cooled butter and mix again just until combined.
7. Pour the brownie mixture into the prepared dish and place it in a larger baking pan. Add enough of the hottest tap water to the pan to come halfway up the sides of the dish.
8. Bake for exactly 1 hour. A cake tester inserted 2 inches from the side will come out ¾ clean. The center will appear very under-baked.
9. Allow to cool and serve with sifted powdered sugar, vanilla ice cream, whipped cream, raspberries, or on its own. Mmmmmmmmmmmm!

>Dorm Food Gets Schooled

3 Sep

>Um…Amazing! Just read this!

Italian Fig Newtons–Cucidati

2 Sep


Ahh the foods of childhood…

Wagon wheel shaped pasta, Dunkaroos and those cookie koala’s with the chocolate inside, Fred Flintstone popsicles, shark gummy snacks, rock candy, that rainbow stripe gum, FIG NEWTONS!

Fig newtons… In the 1980s, Nabisco produced a popular advertising slogan: “A cookie is just a cookie, but a Newton is fruit and cake.”

Stand up comedian Brian Regan comments on Fig Newtons: “I was reading a Fig Newtons label — I’ve always liked them, and I was trying to see if it was OK to eat them. Everything looked pretty good, the fat content and everything. So, I’m thinking I could eat these. I looked at the serving size: two cookies. Who the hell eats two cookies? I eat Fig Newtons by the sleeve. Two sleeves is a serving size.”

While on a little family vacay a few weeks ago, my dad told my mom, “why don’t you buy some Fig Newtons? I miss those…”

This got me thinking about homemade Fig Newtons. I got slightly sidetracked in my search for homemade Fig Newtons when I came across theBrownEyedBaker’s Italian cucidati fig cookies!

These cucidati are similar to fig newtons, but less cake-like; they have this pie feel to them…more like shortbread than mushy.


The filling is AWESOME! Better than your typical Fig Newton. It almost reminded me of a Passover “Charoset” sans apples and wine. The texture was on the ball—crunchiness comes from walnuts and the fig seeds, and a smooth sweetness from dates, prunes, honey, and jam. Next time I would roll the dough out thinner to maximize the filling-to-cookie ratio! Mmm!


These cucidati are pretty labor intensive. You first make the dough, then you knead the dough, then you refrigerate, roll it out, cut it out into little rectangles, fill it, fold, and bake. On top of that, you have the option to frost and decorate. I nixed the frosting so as to enjoy the cookies as more of a snack than a dessert.

You could always halve the recipe to save time and energy because this recipe makes A LOT of cookies!

Nevertheless, my family went bonkers over the cookies and they were gone in an instant.

Enjoy!


Cucidati (Italian Fig Cookies)

Adapted from theBrownEyedBaker

Makes about 4 dozen

Dough
4 cups all-purpose flour
1½ tablespoons baking powder
¼ teaspoon salt
½ cup sugar
1 cup butter (can also use vegetable shortening)
1 egg
1 tablespoon vanilla extract (I used my own homemade extract!)
½ cup milk (I used nonfat)
**Note: my dough came out a little bit tough, so more liquid may be needed to smooth it out! Just eyeball it and add more milk as needed!

Filling
1 cup dried figs
1 cup dates, pitted (I substituted some of the dates with a few prunes!)
¾ cup raisins
½ cup walnuts, chopped or ground in food processor
½ teaspoon ground cinnamon
¼ cup honey
¼ cup apricot preserves (or marmalade or a jam of your choice!)

1. Sift flour, baking powder, and salt in a large mixing bowl. Whisk in the sugar and combine well.

2. Cut in the butter and work the mixture until it looks like cornmeal. (I used my fingers and rubbed the butter into the mix, but feel free to use a fork or pastry blender!)

3. In a separate bowl whisk together the egg, vanilla, and milk.

4. Add the egg mixture to the flour mixture and mix. The dough should be soft. Remove the dough from the bowl and knead by hand for 5 minutes.

5. Divide the dough into 4 equal pieces, wrap each with plastic wrap, and refrigerate for at least 45 minutes.

6. To make the filling, grind figs, dates, and raisins in a food processor until coarse. Place fig, date, and raisin mixture in a bowl. Add the remaining ingredients and mix well. Mixture will be thick. Set aside.

7. Preheat oven to 375°F and line cookie sheets with parchment paper.

8. Work with one piece of dough at a time, leaving the remaining pieces in the refrigerator until needed. On a floured surface roll the dough into a thin layer. Cut dough into 2×3-inch rectangles. Spoon filling into the middle of each rectangle. Carefully fold the short edges over to meet in the center and pinch to seal. Seal the sides as well.

9. Place each cookie, seam-side down, on a baking sheet, leaving 1-2 inches between each cookie. (Optional: As an alternative to icing, you can sprinkle some raw turbinado sugar on the tops of the cookies before baking!)

10. Bake for 12 to 15 minutes, or until the cookies are golden in color. Remove from oven and let these babies cool!

11. If you plan to put icing on the cookies, make sure they are completely cool. You can decorate with sprinkles, too!

>Slow Food Done Kinda Fast: Oakland’s "Eat Real" Food Festival

30 Aug

>“You don’t have to cook fancy or complicated masterpieces—just good food from fresh ingredients”

–Julia Child

Today I ate some of the best cheese I have ever tasted! Mozzarella curd, pulled to order, drizzled with Arbequina (a type of olive) olive oil, good quality salt, and torn basil leaves. I ate my little puddle of cheese alongside some fat slices of heirloom tomatoes!


I purchased this simple cheese puddle at Jon’s Street Eats, one of the many vendors set up at Oakland’s “Eat Real” festival. Jon was boiling the cheese in some sort of magical way (well it was probably very simple but it tasted magical!). Mozzarella tends to be a mild, almost bland cheese, but when paired with the right accoutrements, mmmm!

In addition to the freshly pulled mozzarella, my friend, Michelle, and I shared a grilled eggplant sandwich—grilled eggplant, ratatouille, shaved Parmesan in a grilled split top bun! Everything tasted heavenly—the bun was just the right amount of buttery and salty, the grilled eggplant slices complemented the ratatouille so well!


The Eat Real Festival is loaded with crowds of people cruising along the boardwalk, tasting street food from various vendors highlighting fresh summer fruits and veggies, multicultural snacks, handcrafted local beers, and ice cream sold from the back of a bicycle! In connection with the Slow Food Movement, Eat Real aims to put eaters in contact with the real people — the farmers, chefs, and producers — who make our food.

For dessert, Michelle and I shared a fruit salad—watermelon, cantaloupe, cactus fruit, mango, pineapple, cucumber, and jicama. We ate it the authentic way with chili powder, salt, and lemon juice! YUM. Perfectly refreshing on a nice summer day!


Check out these homemade s’mores!

The line for this paella was a heap of tomfoolery! Look at those HUMONGOUS stoves!

A truck devoted to chowder. Gotta love the Bay Area…