Archive | tarts/pies RSS feed for this section

Throw-Together Late Spring/Early Summer Pasta

8 Jun

Processed with VSCOcam with f2 preset

I’m back in New York after visiting California for 10 days, five in the Bay Area with friends and five in Los Angeles with family. All of the summer produce was in full swing: stone fruit, cherries, berries,  summer squashes, tomatoes…

New York greenmarkets literally just started selling strawberries, and rhubarb and asparagus are still hanging on, even into the month of June (this is rare according to my greenmarket vendor).

While I had a giant list of restaurants to eat at, I found myself cooking and baking quite often during my California visit.

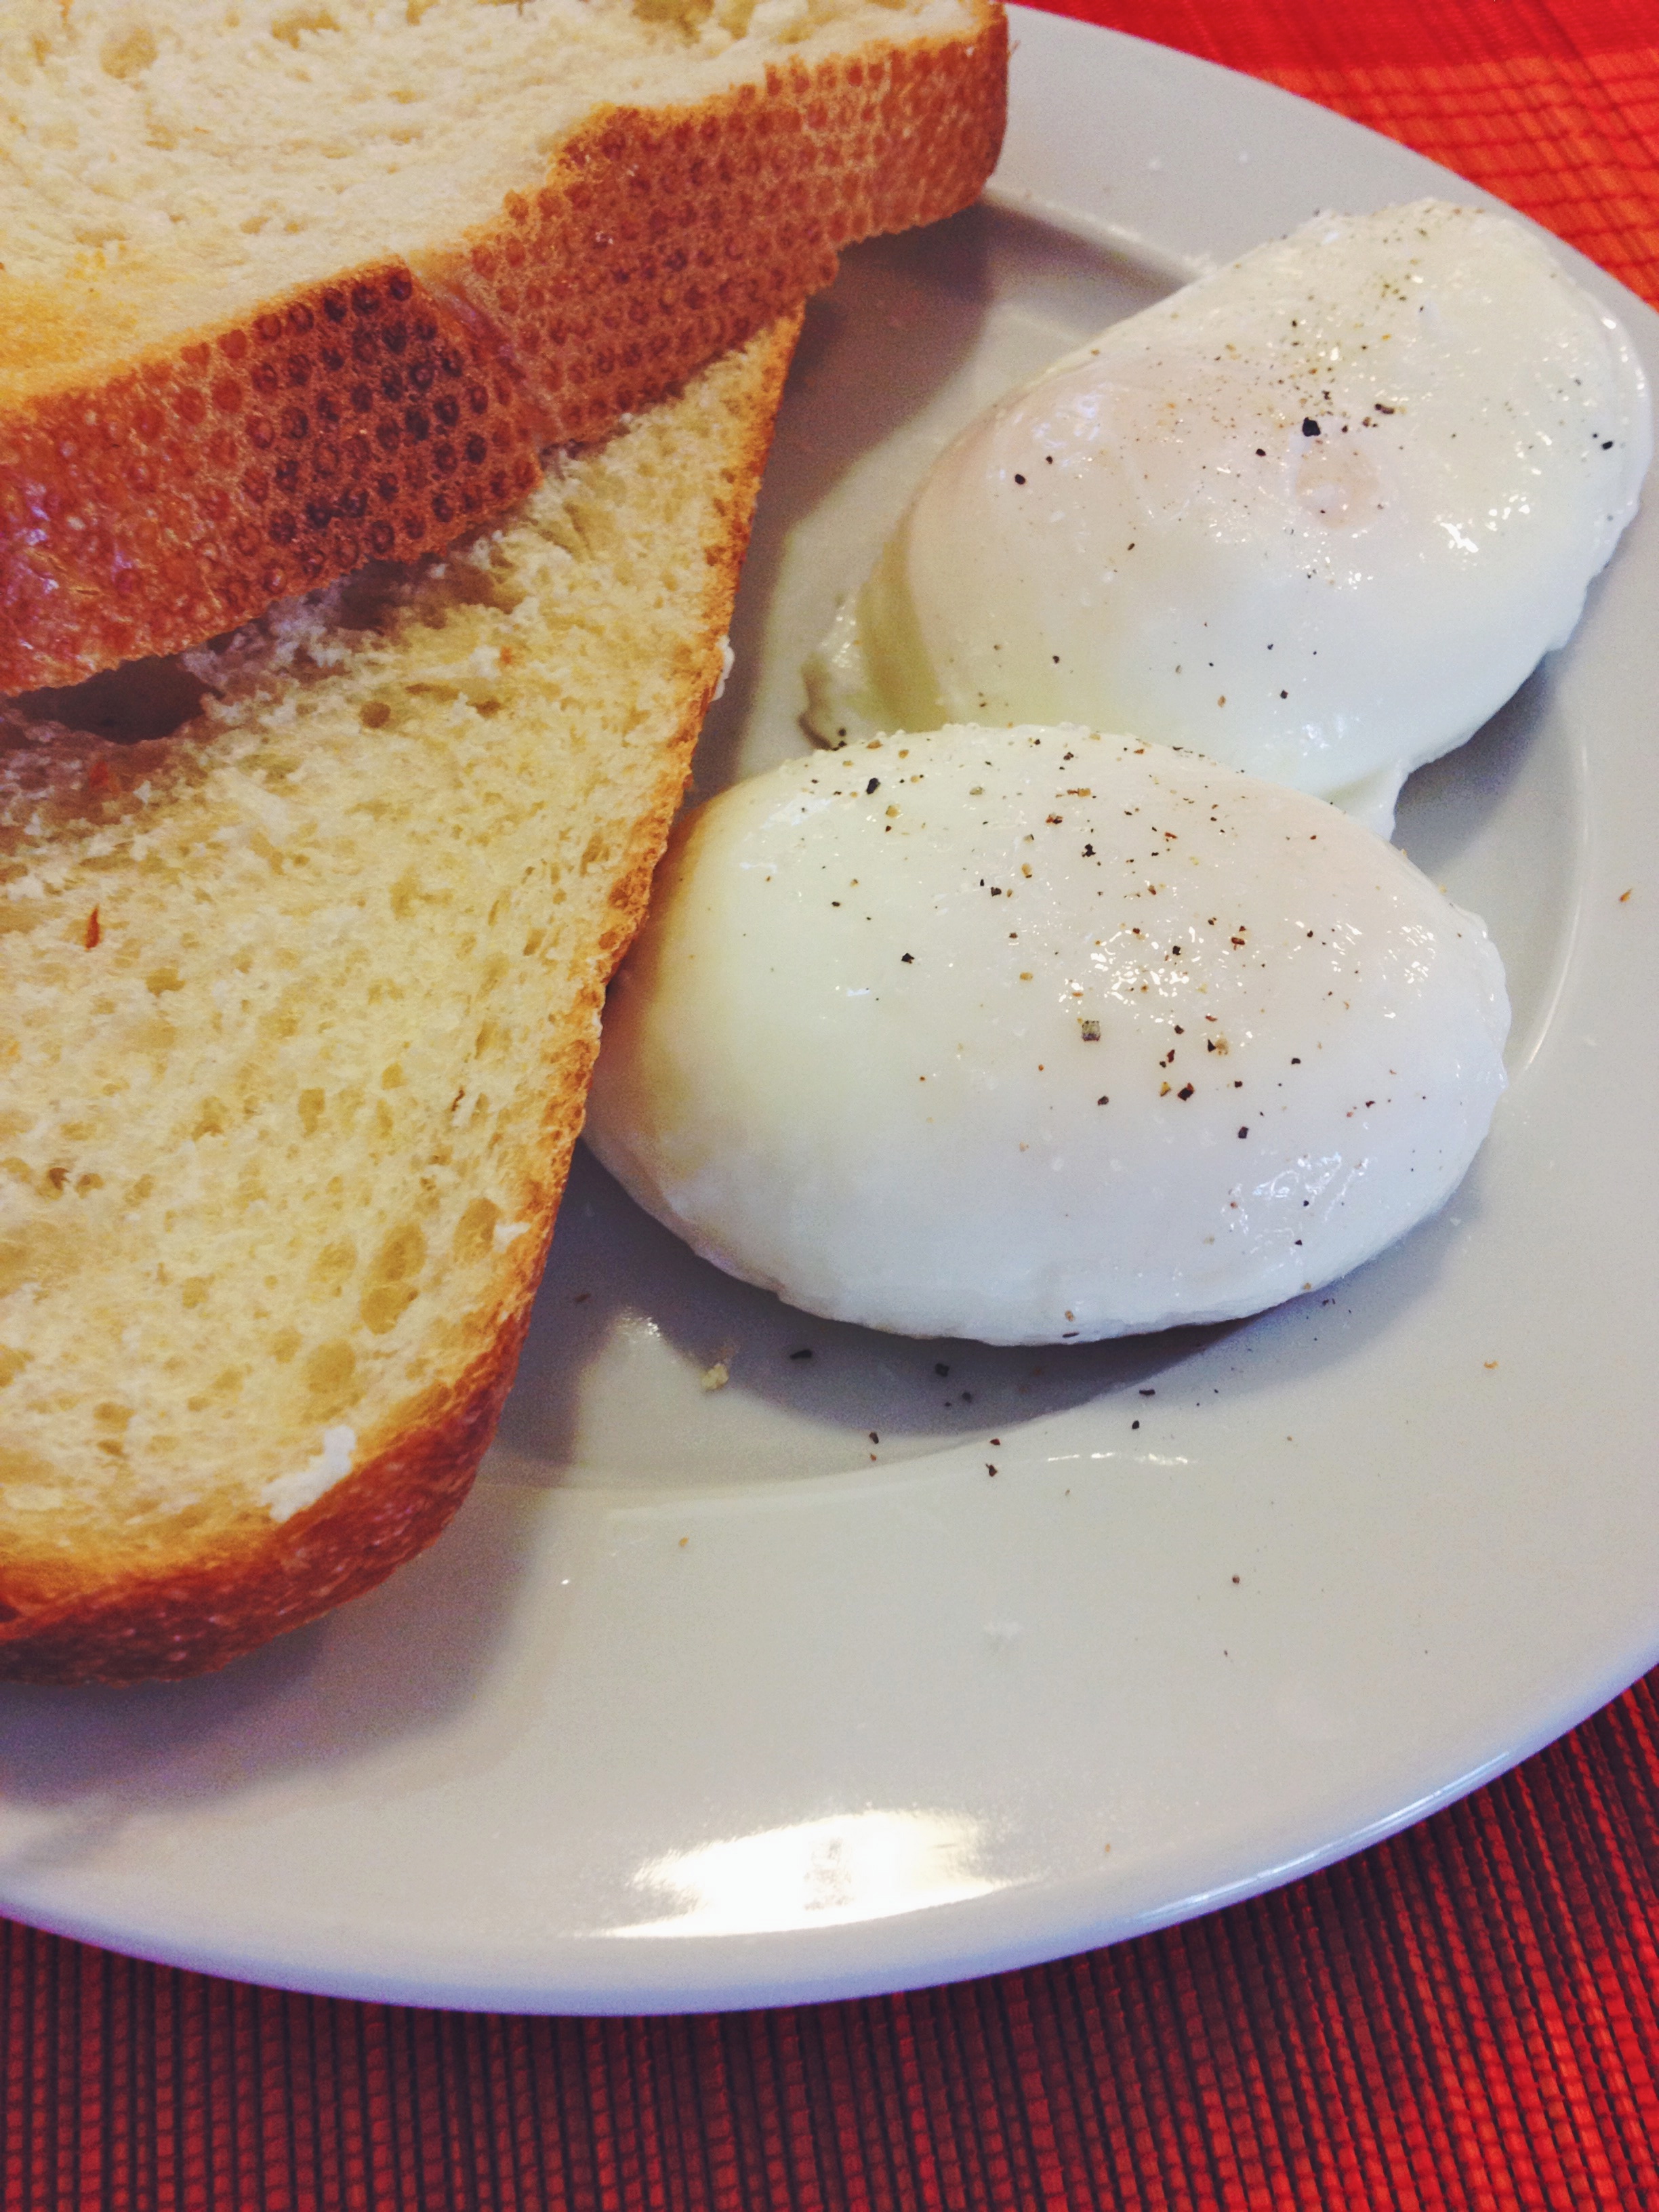
I made a plum galette using this recipe as a guide (I didn’t use almonds to keep things simple). I made Smitten Kitchen’s brown butter salted rice crispy treats. I made the Silver Palate’s  zucchini bread. I made lots of smoothies. I made poached eggs and veggie egg scrambles. Simple things, but so nourishing.

Processed with VSCOcam with f2 preset

Processed with VSCOcam with f2 preset

I found myself making this throw-together pasta twice, once in the Bay Area and once in Los Angeles. The trick: save about 1/2-3/4 cup of the water that you use to cook the pasta in. Adding back the hot starchy water keeps the veggie-filled pasta creamy and coated.

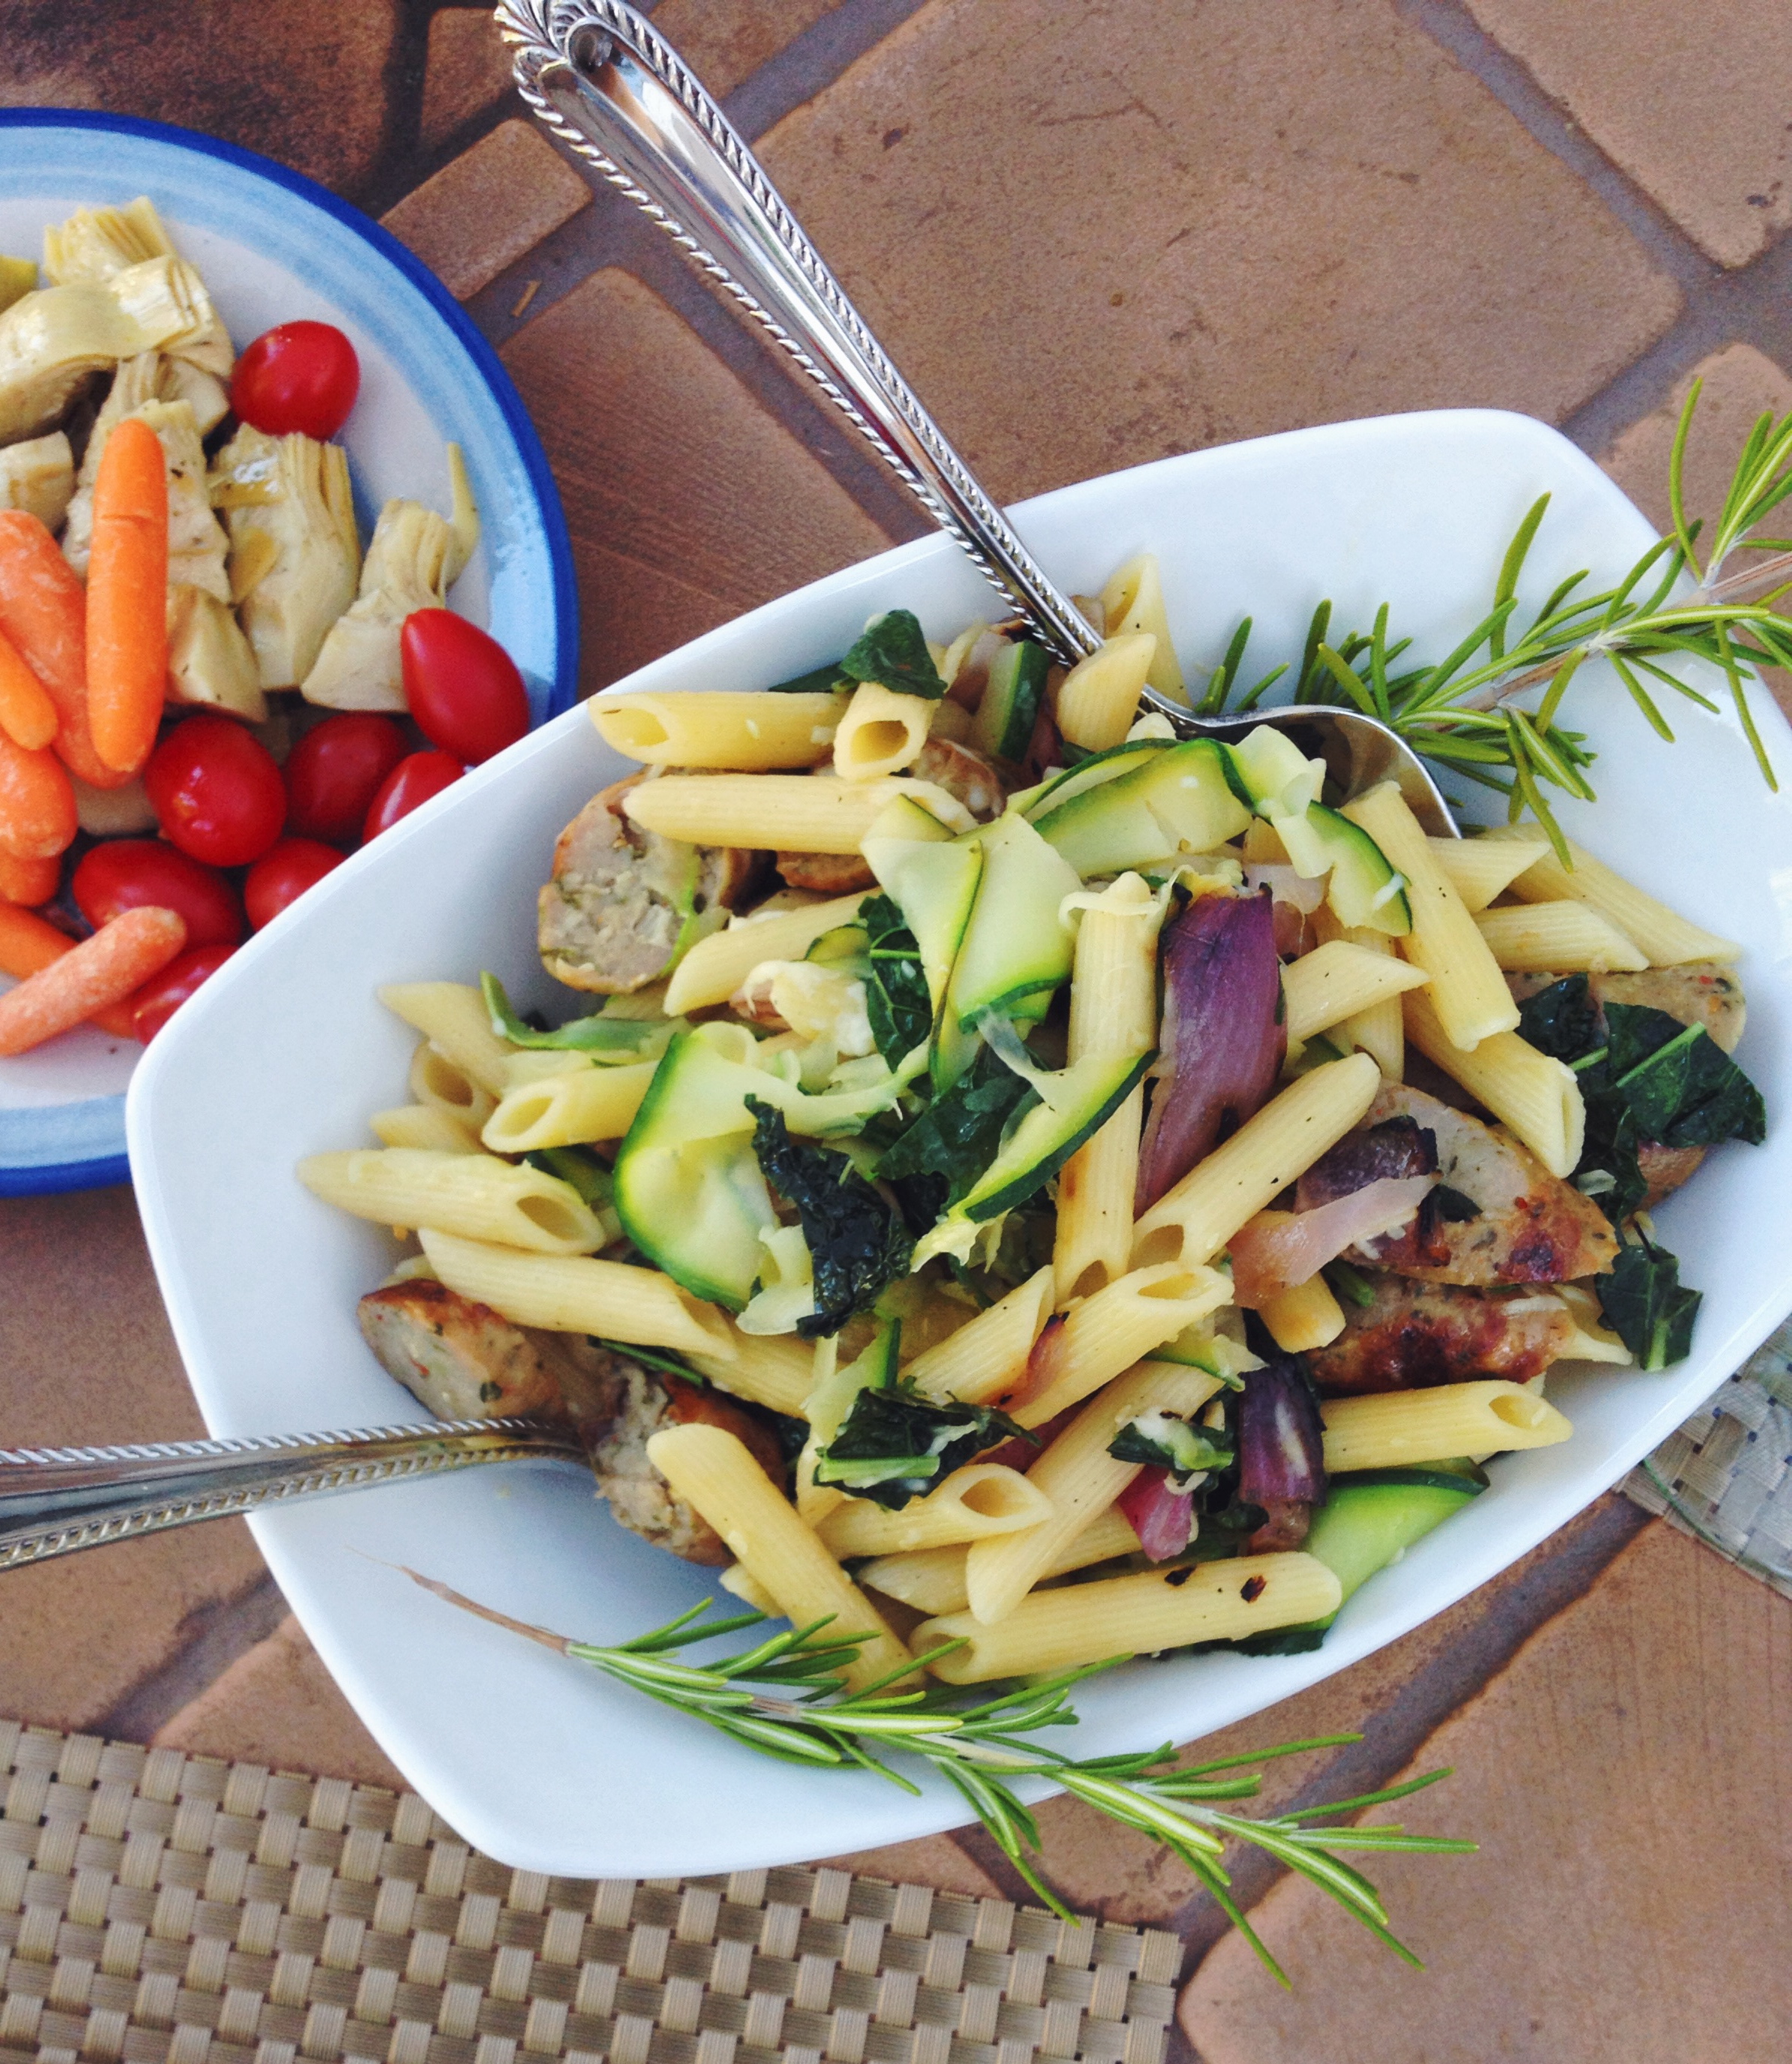
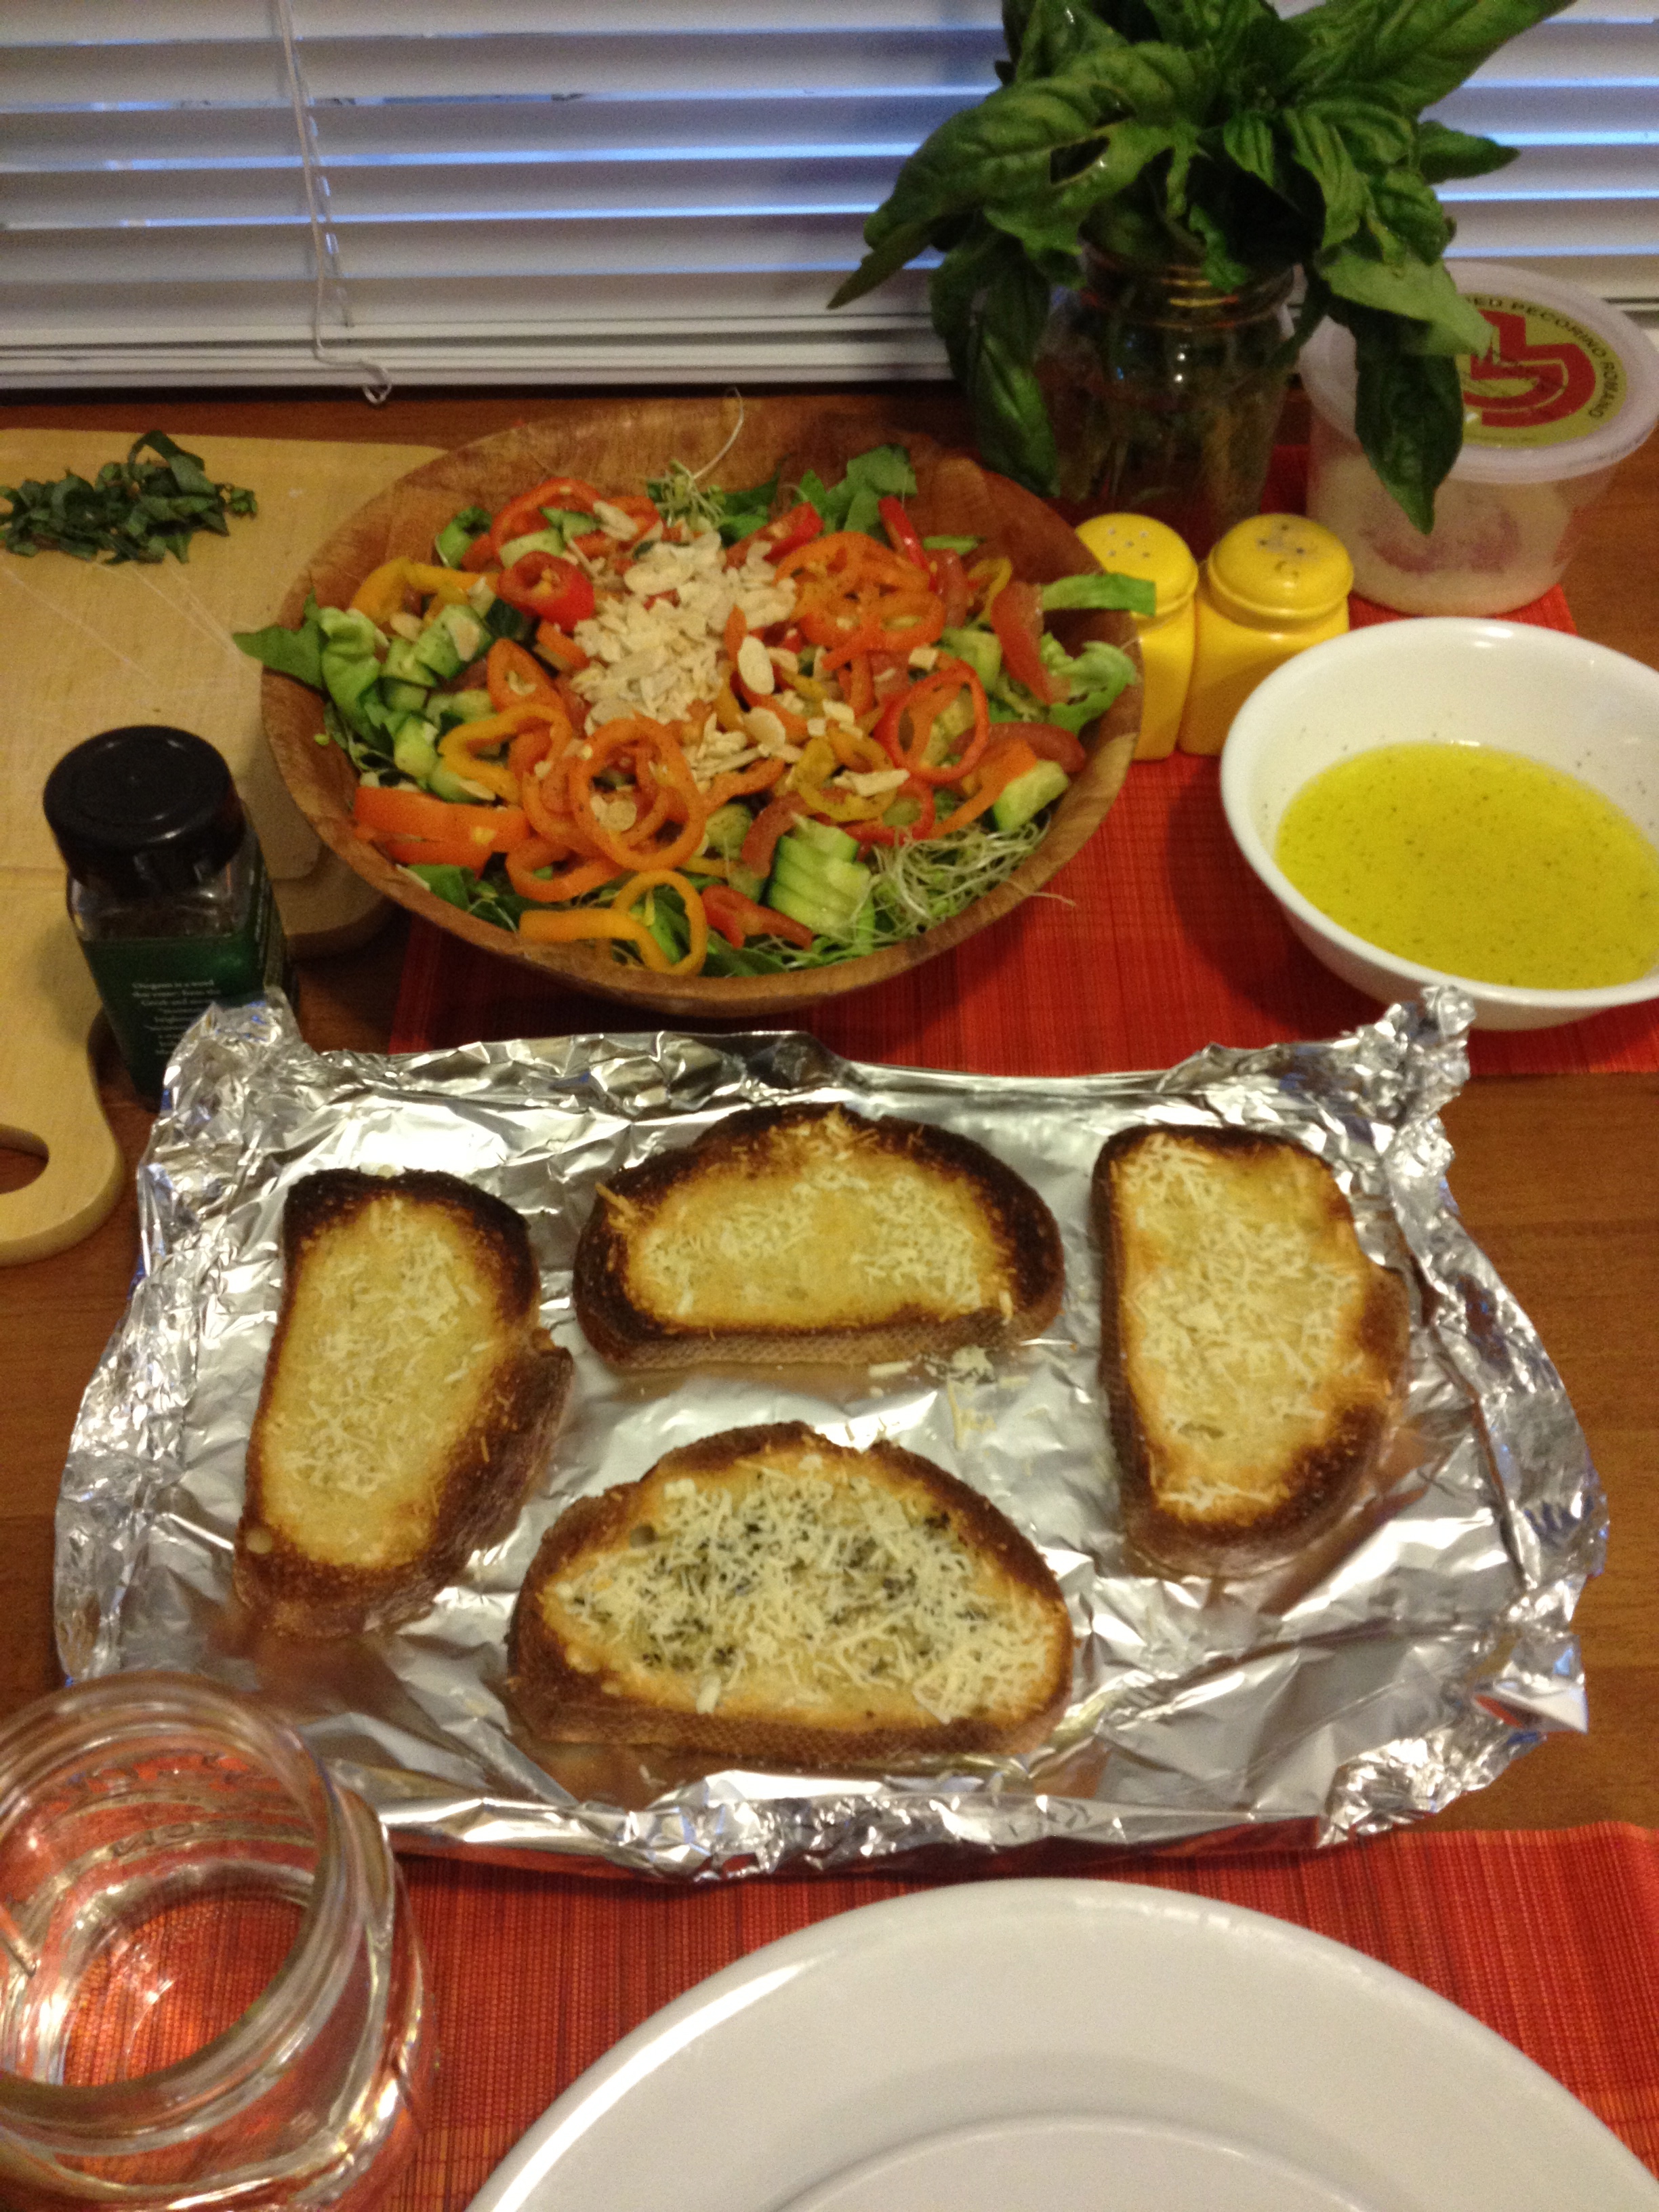
I made this pasta the first time in Berkeley, with my friends Sara and Nir. We used a mix of chard and kale, onion, ribboned asparagus, basil, and lemon zest. Pasta water, Parmesan, a splash of red wine vinegar, and salt and pepper were added as finishing touches. A great vegetarian meal. To go with the pasta, Sara made us a colorful salad with lemon dressing, and Nir made his cheesy garlic olive oiled bread.

IMG_2698

Sara, Nir, and I loved the pasta so much, so I made it again for my parents on my last night in L.A. My mom grilled some sausages and we added them into the pasta at the end. I used zucchini ribbons instead of asparagus. No basil, but some rosemary on the side. And lemon zest and juice this time instead of a splash of vinegar.

Remember: save your cooking water. It makes all the difference.

New York, I’m waiting very patiently for the rest of the summer produce to arrive. Until then, I’m eating as much rhubarb, strawberry, young greens, and asparagus as I can.

Processed with VSCOcam with f2 preset

Throw Together Late Spring/Early Summer Pasta

makes about 3-4 servings

1/2 pound pasta (if you can find it, use mini penne)

1-2 tablespoons olive oil

2 medium zucchini or 1/2 bunch of asparagus

1/2 onion, red or white

1-2 cloves garlic

1 small bunch kale or chard

zest and juice from 1 small lemon

Salt and pepper, to taste

Parmesan cheese, to taste

Grilled sausage (I used a chicken cilantro sausage), optional

Using a vegetable peeler and holding one end of the vegetable, shave the zucchini (or asparagus) into long ribbons. Chop the onion, mince the garlic, and chop the kale and/or chard (you can use the chard stems but not the kale stems).

Bring a large pot of water to a boil. Once boiling, add a hefty amount of salt and the pasta. Cook according to the package directions or until al dente. In the last minute of cooking, drop the zucchini or asparagus ribbons into the boiling water. When the pasta is cooked, drain the pasta/vegetable ribbon mixture. *SAVE 1/2-3/4 cup of the water and set aside.*

Heat the grill and grill some sausages. Once grilled, cut them up into bite-size pieces. (alternatively, you could cut the sausages up and saute them in the skillet with the kale, or omit altogether to keep things vegetarian).

Heat the olive oil in a large skillet. Add the onion and saute for about 5 minutes. Add the garlic and saute for another minute. Add the kale and cook until just wilted. Turn off the heat.

Mix the cooked pasta/ribbons in with the sauteed onions and greens mixture. Pour in the reserved pasta water and toss. Toss in the lemon zest and juice. Mix in the grilled sausages. Add salt and pepper and Parmesan to taste.

You’ll want seconds. Trust me. 

Tomato Blue Cheese Tarte Tatin

24 Aug

I’ve been busy enjoying life on a beautiful island in the Pacific Northwest, in a petite rustic cabin with no running water and no electricity. For 4 days, I was peeing in the woods and not taking showers. I wore a headlamp and lit candles to see at night. The days were filled with hiking and bushwhacking up mountains and through meadows, and the evenings with melting marshmallows by a fire on the beach. It was totally dreamy to be out in nature, to be one with the biting bugs and scurrying animals and calm waves of the ocean’s tide coming in and out.

It’s amazing what one can miss with just a week absence of internet. The moment I had access to my computer again, I started plowing through, trying to catch up on all the blogs I read.

Heidi’s tomato tarte tatin immediately caught my eye, especially since I had a pie crust in my freezer just waiting to be used.

I made a big trip to the farmer’s market today, where I found heaps of gorgeous tomatoes, onions, green and yellow beans, cucumbers, melon, and white peaches. I even bought my lunch at the farmer’s market–whole wheat focaccia with eggplant, spinach, and goat cheese.

This tarte tatin is basically an upside down pie. Filling on the bottom, crust on top. I sautéed onions and combined them with fresh tomatoes, balsamic vinegar, and salt. Into a pie plate and sprinkled with blue cheese. I think blue cheese and honey are a swoon-worthy combination, so I squeezed a bit of honey over everything for good measure. Pie crust on top. Egg wash. Salt. Oven.

The blue cheese melts right into the tomatoes, the juices so rich they give off hints of a beefy French onion soup.

Real talk: I used the cap of my canola oil to cut out the circles in the center of the pie crust.

Also, I like to place the pie plate onto a baking sheet. It just makes it easier to take in and out of the oven.

Tomato Blue Cheese Tarte Tatin

adapted from Heidi, of 101 cookbooks

serves 6-8

**NOTE: Use whatever pie crust you like. I think Heidi’s rye crust sounds great. I used David Lebovitz’s recipe (see below) that can go into a savory or sweet pie. 

1 extra large (or 2 medium) onion(s), chopped

1-2 tablespoons canola oil

1 1/2 pounds (24 oz.) small tomatoes

scant 1/2 teaspoon salt

2 teaspoons balsamic vinegar

1-2 tablespoons flour

2-3 tablespoons blue cheese

1 teaspoon honey, for drizzling

1 pie crust

1 egg (for egg wash), whisked

flaky salt, for sprinkling on top

Preheat the oven to 400F / 205C.

While the oven is warming, heat the oil in a large skillet over medium and saute the onions. Cook, stirring regularly, until the onions are deeply golden and caramelized, 10-15 minutes. Remove from heat.

While the onions are cooking, cut any larger tomatoes in half. You can leave the small cherry tomatoes whole. Add the tomatoes to the caramelized onions along with the sea salt and balsamic vinegar. Transfer to a deep pie dish. If you get the sense that your tomatoes are quite juicy, and might release a lot of liquid, you can toss the mixture with a tablespoon or two of flour at this point. Sprinkle mixture with crumbled blue cheese and drizzle with a touch of honey.

Roll out your pie dough, cut out 3 circles around the center, and cover the tomato mixture – tucking in the sides a bit. Brush the crust with the beaten egg wash and bake in the top third of the oven until the crust is deeply golden and the tomatoes are bubbling a bit at the sides, 25 – 30 minutes. Let it rest for a few minutes, then serve.

Prep time: 10 min – Cook time: 45 min

Pie Crust

from David Lebovtiz’s Ready for Dessert

makes 2 rounds

**NOTE: You only need 1 round for the Tomato Blue Cheese Tarte Tatin. You can keep the other round in the freezer.

2 1/2 cups (350 g) all-purpose flour

1 tablespoon sugar

1/2 teaspoon salt

1 cup (8 ounces/225 g) unsalted butter, cut into 1-inch (3-cm) cubes and chilled

6-8 tablespoons ice water

In a large bowl using a pastry blender, in a stand mixer fitted with the paddle attachment, or in a food processor fitted with the metal blade, mix together the flour, sugar, and salt. Add the chilled butter cubes and mix just until the butter is broken up into rough 1/4-inch pieces.

Add 6 tablespoons of the ice water all at once and continue mixing just until the dough begins to hold together. If necessary, mix in the additional 2 tablespoons ice water.

Turn the dough out onto a work surface. Divide the dough in half and form each half into a disk about 1 inch thick. Wrap the disks in plastic wrap and refrigerate until chilled and firm, at least 1 hour.

STORAGE: The disks of dough can be refrigerated for up to 2 days or frozen for up to 2 months.

Rhubarb Recipe Roundup

16 Apr

Because spring is here.

Because the weather in New York City is so. freaking. beautiful.

Because I just signed myself away to 13 weeks of online medical biochemistry.

Because I am going to attempt to make spanakopita tonight, delving into the abyss that is filo dough.

Because summer dresses are cute, and I’m always on the hunt for more.

Because I have been washing my hands with used coffee grounds to rid my skin of dryness. A caffeinated exfoliant!

Because I swoon over fresh peas, favas, and spring garlic…because rhubarb gets me going.

Rhubarb is around the corner, or might even be available in some areas already. Get into it and make a crumbly coffeecake, a strawberry rhubarb pie, or, what I am craving most today, some creamy cold rhubarb ice cream.

Big Crumb Coffee Cake With Rhubarb-enjoy with a tall glass of coffee for breakfast, snack time, or dessert

Strawberry Rhubarb Pie-strawberries and rhubarb were meant to come together in a pie

Rhubarb Ice Cream– creamy dreamy ice cream with chunks of rhubarb dispersed throughout; just the way I like it

Broccoli Quiche

26 Mar

Life as a pastry cook really hit me hard last week. One of our key pastry chefs was on vacation. I was working longer hours, many of them by myself. On Wednesday night, we had 45 people with reservations, on paper. Easy. I prepped for that amount give or take a few, and I felt solid and set up for the night. When more than double the amount of reservations showed up, things got a bit crazy.

I was running out of my set-up. Ice creams were melting. Bowls were not yet cold enough (we keep bowls in the freezer so that our frozen desserts stay cold by the time they arrive at the guest’s table). I had to whip more cream “on the fly” (as in ‘right now’!). I had to torch multiple creme brulee orders. I had to bake off more caramelized apples. I had to supreme more blood oranges. I had to pipe more “whipped chocolate flan” into bowls. I ran out of ramekins filled with honey and ricotta to go with the chocolate bread. There were birthdays that needed “Happy Birthday” written in chocolate on a plate. And of course, the machine that spits out ticket orders ran out of paper.

My hands were shaking, the sweat was dripping down my back. My legs were shot. My mouth was dry.

I did it. I plated all of the desserts. I shuffled and I shook until I got it all done. I re-stocked my mis-en-place. Everyone ate and was satisfied. I left work that night at 11:45pm. I had the biggest adrenaline rush. The next morning, my whole body ached and as I stretched out of bed, I prepared to do it all over again that night.

Even on my days off, I can’t seem to get myself out of the kitchen. I guess I’m a little obsessed. It is, however, a totally different kind of kitchen to be at home versus in a big restaurant kitchen.

This weekend I made a broccoli quiche inspired by Joy the Baker’s beautiful asparagus quiche. And you should totally watch this video with Joy frolicking in the garden and cooking in the test kitchen at the French Laundry in Napa, CA. I’m completely jealous and inspired, and the video just makes me miss California living even more.

I happened to have extra pie dough leftover in my freezer from (eek) Thanksgiving. Sure, I probably should not have kept it in the freezer that long, but it was there, I used it, and it tasted superb. I stuck it it the fridge to defrost overnight and Bam! I had everything I needed to make a comforting quiche for a cozy Saturday morning  afternoon meal. I’m totally into the studs of broccoli and the browned cheesy bits. And you simply cannot go wrong with buttery crust and black coffee.

Broccoli Quiche

filling adapted from JoytheBaker’s website and the JoytheBaker cookbook

pie dough for a single crust 9-inch pie, I used the pate brisee from Sherry Yard’s book

Dough: *You can use any dough you want, you could even use puff pastry for a quick fix

4 oz (1 stick) unsalted butter, cubed and placed in the freezer for about 15 minutes

1 1/4 c. all-purpose flour

1 tablespoon sugar

1/2 teaspoon salt

about 1/4 cup ice water

1/4 teaspoon white wine vinegar (or cider vinegar) *see note below

Filling:

1/2 tablespoon unsalted butter

1 head of broccoli, chopped

1 bunch of scallions, sliced into thin rounds

6 large eggs

1 cup milk (I used 1%)

1/2 cup heavy cream

pinch of salt and fresh ground pepper

1/2 cup grated white cheddar or Gruyere cheese

1/2 cup grated Parmesan cheese

To make the dough:

Mix together the dry ingredients in a large bowl. Add the partially frozen butter cubes and, with your fingers, rub and press the butter and flour between your thumbs and first two fingers to create flattened broken walnut sized pieces. Combine the ice water and vinegar and add the liquid all at once; mix lightly with a fork until the dough just comes together.

Wrap the dough in plastic and refrigerate for at least 1 hour before rolling it out (the well-wrapped dough can be kept in the refrigerator for up to 3 days or frozen for up to 2 weeks). I had my dough already made and frozen. I transferred it from the freezer to the refrigerator 2 days before I wanted to make the quiche so that I could just pull the dough out on Saturday morning and get going.

*Note: the amount of water can be variable. It is better to have a slightly wet/tacky dough than one that is too dry; add a little water if your dough seems dry.

When you are ready to roll out the crust, on a well-floured work surface, gently roll out the pie crust into about an 11-inch circle.  Press together any spots that might tear.  Carefully lift down and place into the 9-inch pie plate.  Use a pairing knife to trim the edges of pie dough, leaving about 1/2 inch extra dough overhang.  Fold the excess dough under and crimp with fingers.

Place your rolled out crust in the fridge or freezer to chill while you prepare the filling.

To make the filling:

Preheat the oven to 375 degrees F.

In a medium saucepan over medium heat, melt the butter. Add the broccoli and scallions and saute for about 4 minutes, until bright green and slightly tender. Remove from heat. Sprinkle with salt and pepper.

In a large bowl, whisk together eggs, milk, cream, and salt and pepper. Whisk until blended.

Add the cooked vegetables to the unbaked pie crust. Sprinkle with half of the cheeses (1/4 cup each of cheddar and Parm.). Pour the egg mixture over everything. Top with remaining cheese.

Place a baking sheet in the oven. Carefully place the pie plate of quiche on top of the baking sheet in the oven and bake for about 45-55 minutes, until quiche puffs up and is set.

Remove from the oven and let it cool for 30 minutes to an hour before cutting it.

Wild Rice and Mushroom Casserole

30 Jan

Gruyere cheese and mushrooms were made to go together. With onions and garlic and a small dash of whole grain mustard, your nose would have flipped out last night as I was making this casserole. You’ve got your grain, protein, and vegetable all in one with this dish.

Browsing through Heidi’s book, I saw a photo of this casserole and my mouth immediately started watering. Her photo is to die for and the chopped fresh tarragon makes all the difference. I was too cheap to go buy tarragon, one day I will have a giant herb garden and I can just tear off a tiny sprig to garnish my dishes. Until then, I’m ok neglecting the herb.

Also, my casserole turned purple from the wild rice. No big deal, it still tasted fantastic. I have not had that much experience cooking wild rice, and I can’t wait to experiment more.

Two of us ate half of the casserole in one sitting, it was that good. Tonight’s dinner will be leftovers with some oven roasted broccoli. Cheers to healthy comfort foods!

Wild Rice and Mushroom Casserole

adapted from Heidi Swanson’s Super Natural Everyday 

Heidi says that you can prepare the casserole a day or two ahead and bake off when needed…

2 large eggs

1 cup/ 8oz/ 225g cottage cheese (I used 1%)

1/2 cup/ 4oz/ 115g sour cream (I used regular)

1 teaspoon Dijon-style or whole grain mustard

Kosher salt or sea salt

1 tablespoon extra virgin olive oil (or unsalted butter)

8 ounces/ 225g cremini mushrooms, chopped

1 large yellow onion, finely chopped

3 cloves garlic, finely chopped

3 cups cooked wild and/or brown rice, at room temperature **see note

1/3 cup/ .5 oz/ 15g freshly grated Gruyere cheese

optional: 1 teaspoon chopped fresh tarragon or thyme

**NOTE: First, make sure that you have your rice cooked and ready before starting on the casserole. I used a combo of brown and wild rice, as Heidi recommends, to get “the creaminess of the brown rice playing off the individual wild rice grains.” Out of laziness efficiency, I threw 1/2 cup dry brown rice and 1/2 cup wild rice with roughly 2 1/2 cups water into my rice cooker. After an hour, both rices were ready. Granted my brown rice turned purple because of the wild rice bleeding its color, but it all got cooked and I was ready to begin the casserole. Make sure to take the top off of your rice cooker so that the rice has time to come to room temperature. Also, just for reference, brown rice is typically 1 part dry rice to just shy of 2 parts water. Wild rice is typically 1 part dry rice to 3 parts water. 

1. Preheat oven to 350 degrees F. Rub a medium-large baking dish with a bit of butter or olive oil. I used a 9-inch pie pan and it worked great.

2. In a large bowl, whisk together the eggs, cottage cheese, sour cream, mustard, and a scant 1/2 teaspoon of salt. Set aside.

3. In a large skillet over high heat, combine the olive oil with a couple pinches of salt. Stir in the mushrooms. After the initial stirring, leave the mushrooms alone until they release their water and the water evaporates, about 5 minutes. Continue to cook and stir every couple minutes until the mushrooms are browned. Add the onion and cook until the onion is translucent, another 2 or 3 minutes. Stir in the garlic, cook for another minute, and remove from the heat. Add the rice to the skillet and stir until combined.

4. Add the rice mixture to the cottage cheese mixture, stir until well combined, and turn into the prepared baking dish. Sprinkle with two-thirds of the grated cheese and cover with aluminum foil, or in my case if you do not have aluminum foil, just place a baking sheet on top of your casserole dish.

5. Bake for 30 minutes. Remove the foil/baking sheet and bake for another 20-30 minutes, until the casserole takes on a lot of color. The finished casserole should be hot throughout and golden along the edges. Let it stand for a few minutes and then serve sprinkled with the chopped tarragon (if using) and the remaining grated cheese.