Archive | fruit RSS feed for this section

>Pumpkin Custards

30 Nov

>
Ok. Here’s the thing. Whenever I come home (aka to the parents’ house), the first thing I do is look in the fridge. Then I go to the pantry.

I have a meal sitting down at the table and immediately after I have a second meal standing up, hovering over all of the exciting goodies and treats, snacking, sticking my fingers into this and that, taking a nibble here and there, munching, crunching, and pigging out. I’m telling you, my manners have flown the coop.

I eat a bowl of cereal and lick it clean, getting dribbles of milk and soggy flakes all over my chin. And yep, you betcha, I LOOOOOVE soggy cereal. No matter what kind, the soggier the better.

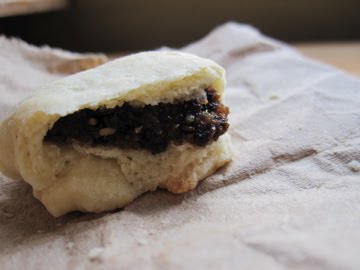
Chocolate covered peanut butter filled pretzels. Need I say more?

5 different flavors of ice cream …of course I must taste every single one.

One of my favorite drawers in the house is the “gum drawer,” and gum is not the only star of this drawer: we’re talking gum, lollipops, little candies, good quality dark chocolate, even birthday candles and chalk (yah, the kind you write on a chalk board with).

Then comes part 2, the stomach ache. Ouch. I ate waaaaay too much. But it was just sooo good.

Indeed when I come home, my family looks forward to my “gourmet” home cooking. I have to impress, and I always do (well, I try).

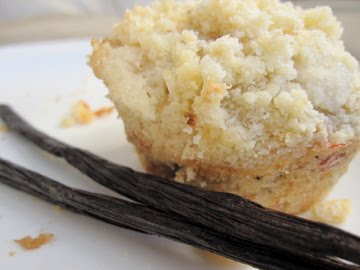
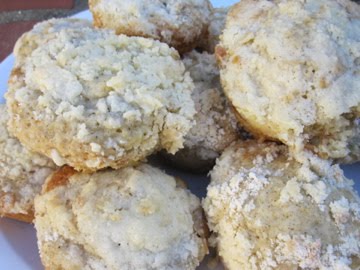
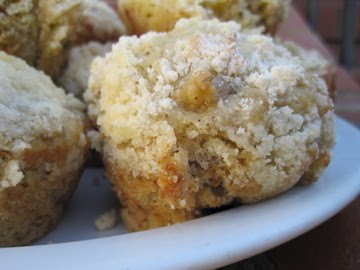
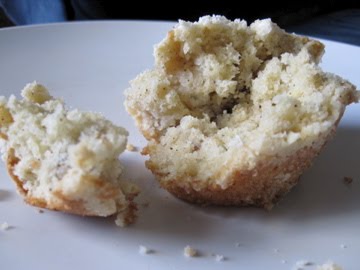
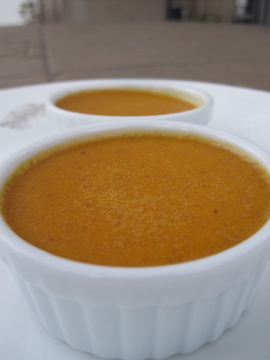
This time, I whipped up these cute little pumpkin custards.


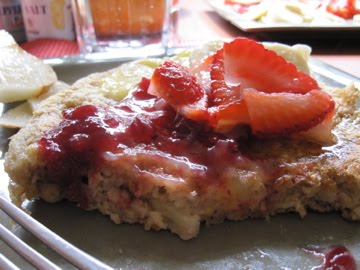
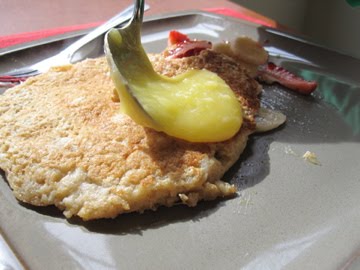
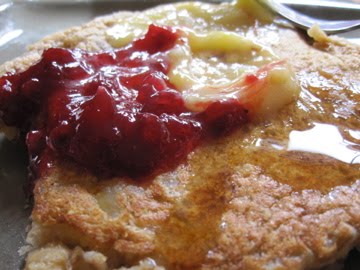
Baked in ramekins both tiny and a bit larger than tiny, these little custards are just so darn good. Good for dessert, but in my opinion, even better for breakfast, spread on toast or waffles (really yummy with leftover Thanksgiving cranberry sauce), as a filling for Ebelskiver pancakes, and yes, I throughout the day, I will stick my finger into the custard dish a few times just to get a little taste. Mmmm.

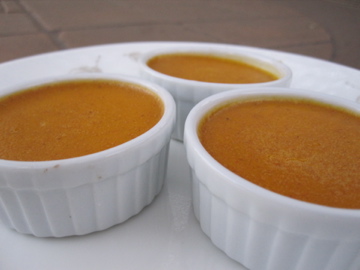
These custards are like the filling of pumpkin pie, but better. I had the intention to make little ginger snaps to go with but never quite got around to it this time.

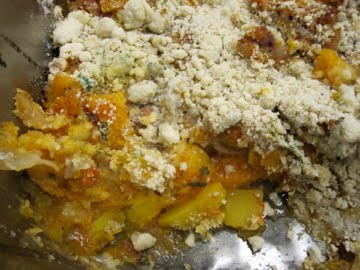
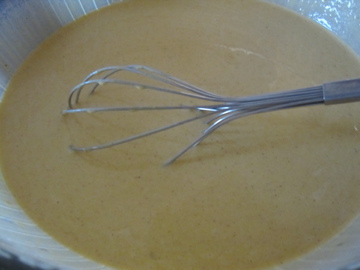
Just mix all of the ingredients together, strain them, and then bake the custard in a water bath until set.

Cinnamon, Ginger, Salt…


I am still unsure whether to serve these custards warm, chilled, or room temperature. I guess it is up to you…

When we make these custards at the restaurant I work at, we use fresh pumpkin (duh, only the best). At home, I was lazy and bought the can. But hey, it was fresh at some point in its pumpkin life…?

Pumpkin Custards
Adapted from Oakland’s Pizzaiolo Restaurant

Fills 6 two-inch ramekins plus 4 baby ramekins…

Ingredients

6 eggs
2 oz. sugar (about ¼ cup)
3 oz. dark brown sugar (a little more than ¼ cup?)
½ teaspoon cinnamon
½ teaspoon ginger
¼ teaspoon salt
2 c. cream (aka 1 pint)
2 c. pureed pumpkin (aka one 15 oz. can)

Directions

1. Whisk all of the ingredients together.
2. Strain (this is simply for a smooth, even texture and aesthetic reasons).
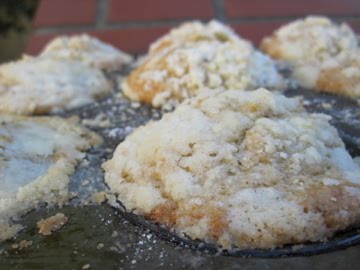
3. Fill ramekins with custard.
4. Bake in a 275 degree oven in a water bath until set (about an hour, less for the baby ramekins). Rotate at least once during baking.
5. Serve warm, chilled, or room temperature with whipped cream, ginger snaps, or whatever tickles your fancy.

Savory Butternut Squash Crumble

23 Nov

“I’m wary of health faddists. When they’re done talking, you can’t eat anything. We need a nutritionist who loves good food.”  -Julia Child

Julia, I completely agree. I believe that a lot of what people produce inside of their heads deters them from tasting new foods. After making this savory squash crumble, a fellow housemate of mine exclaimed, “Wait, there is squash in this? Wow, I don’t even like squash and this is good!”

Lately I have been reading Irena Chalmers’ Food Jobs, a book about the variety of professions available for culinary students, career changers, and FOOD lovers. She is helping me translate my “zest for flavor into a satisfying profession.” Everyday I scour the Internet as well as my library of cookbooks and circle of food-loving friends for new and exciting places to eat, concoctions to create, and finger-licking food finds. Working in the food industry is an ever-changing and on-going process that keeps us all on our toes and constantly having to play and finesse, and finesse, and finesse…

Butternut squash is a beautiful vegetable, with that bright orange color and that bulbous yet elongated shape. Roasted, butternut squash turns soft and caramel-like. Today I took a different approach: I stewed the squash with tomatoes, onions, and spices and then topped it with a crumb topping.

Just a word of advice for all you food photographers out there: I have a slight problem…I tend to make something and either immediately want to eat it or someone else immediately wants to eat it. Understandable. As a result, I present to you some scraps of photos that definitely could have been better—better lighting, better styling, better everything. I’m working on my problem. For now, if you want to see the real deal, check out La Tartine Gourmande’s photos. Yes, she rocks.

Ok, it’s time to get stewing and crumbling!

*NOTE: I made this vegan, but you could add Parmesan cheese and use butter instead of oil in the topping.

**NOTE #2: Feel free to experiment with different herbs (thyme, oregano…), squash varieties (acorn, kabocha…), and cheeses (gruyere, sharp cheddar…).

Savory Butternut Squash Crumble
Recipe adapted from LaTartineGourmande
Serves 6-8

TOPPING

1 cup flour
½ cup walnuts, chopped coarsely
1 tablespoon chopped parsley
1/2 cup grated Parmesan (I omitted the cheese this time to make it vegan)
Pepper, to taste
6 tablespoons butter, diced and at room temperature (I used oil to make it vegan)
optional: 1-2 tablespoons of brown sugar

1.In a bowl, combine the flour, walnuts, parsley, Parmesan, brown sugar, and a generous sprinkle of pepper.

2. Add the butter (or oil) and work with your fingertips until the mixture forms coarse crumbs. Cover and refrigerate while you prepare the filling.

SQUASH

Butter or oil (for the dish)
2 tablespoons olive oil and 1 tablespoon butter (or 3 tablespoons oil)
1 red onion, coarsely chopped
1 teaspoon ground coriander
1 bay leaf
½ cup canned tomatoes
1 peeled butternut squash, cut into 1-inch dice
5 fresh sage leaves, chopped
optional: 1-2 tablespoons of brown sugar
Salt and pepper, to taste
1 tablespoon chopped fresh parsley
optional: 1/2 cup grated Parmesan

1. Generously butter a 10-inch baking dish.

2. In a large skillet over medium heat, heat the olive oil and butter (or just oil) and when the butter melts, and the onion, coriander, and bay leaf and cook, stirring occasionally, for 3 minutes or until softened.

3. Add the tomatoes and cook for 3 more minutes. Add the butternut squash, sage, brown sugar, salt, and pepper. Turn down the heat. Cover and cook for 30 minutes or until the vegetables soften.

4. Set the oven at 350.

5. Discard the bay leaf from the squash mixture. Sprinkle with parsley and Parmesan; stir gently. Transfer the vegetables to the baking dish. Spoon the crumble mixture on top.

6. Bake for 30 to 35 minutes or until the top is golden (My top did not get super golden due to my using oil instead of butter. Oh well, it was still mighty good!).

Browned Butter Banana Nut Muffins

1 Nov

Browned Butter. You are my hero. You are the apple of my eye, the sunshine in my sky, the secret to my magic!

Yes, magic, I create magic. Magic in the kitchen. Seriously. You know when you walk into a café or a bakery and see a gorgeous display of pastries and you think, “Wow, whoever makes these is a genius, literally a holy person?” Well, that person is now officially me.


Every week I look forward to waking up at 6 am (on Friday and Saturday mornings, mind you) to spend my day amongst my good friends Butter, Flour, and Sugar to create pastries and desserts just for you! The smile on your face when you ask for a nibble of that cookie or a taste of that little donut hole, glazed and sprinkled, just makes my day! Really, you should see yourself—when you take that first bite your eyes light up like you were a kid again! It’s great. Really, really great.


Anyway, back to browned butter. And muffins. And Sunday morning breakfast. And sunshine, on November 1st!


I made these muffins a few months ago with fresh summer blueberries and boy oh boy were they addicting! I ate 3 in just one day! Muffin overdose (but totally worth it, mmm).

This morning I needed to make muffins. It was just one of those days—a muffin day. Since fresh blueberries were not around today, I decided to use chopped bananas and toasted walnuts instead.

So now after making both a blueberry and banana nut version, tons of add-in ideas are flying around inside my head, etching to get out:

  • Lemon rosemary muffins (inspired by a lemon rosemary pound cake; any herb/flavor of choice will do…lavender, lemon verbena, fresh ginger, basil?)
  • Fresh and dried cranberry combo (Dried cherries sound yummers, too! Maybe some slivered almonds and white chocolate chips?)
  • Persimmon pulp muffins
  • Roasty butternut squash muffins
  • Chunks of avocado…and…raspberry? (I don’t even know if this would really work but it sounds so good in my head…)

Ok Stephanie, enough. Focus. Browned Butter. Bananas. Toasted Walnuts. Fresh vanilla beans. Crumb topping. Enough said. Go make these muffins.


Browned Butter Banana Nut Muffins (Infinitely adaptable)

Makes 12 muffins

Ingredients:
7 Tablespoons unsalted butter

1/3 cup milk (I used 2 % this time)

1 large egg

1 large egg yolk

1 teaspoon vanilla extract (I used the seeds of half a vanilla bean…I love those bean flecks!)

1 1/2 cups all-purpose flour

3/4 cup sugar

1 1/2 teaspoons baking powder

3/4 teaspoon salt

2 cups chopped bananas (I used 3 large bananas)

about a cup of toasted walnuts

For the Topping:
3 Tablespoons cold, unsalted butter, cut into little cubes

1/2 cup all-purpose flour

3 1/2 tablespoons sugar

Directions:
1. Preheat oven to 375° F. Grease a muffin tin or line it with paper or foil liners.

2. Melt butter in a small saucepan over medium heat. Keep an eye on the butter. Melt and cook down the butter until little brown bits appear in the pan. Once the butter stops crackling or “singing,” it will begin to brown fairly quickly. Keep a close eye. Remove from heat.

3. Toast the walnuts.

4. Whisk milk, egg, yolk, and vanilla bean seeds until combined. Slowly add the brown butter and stir to combine (careful not to cook the eggs).

5. Whisk together flour, sugar, baking powder, and salt in a medium bowl. Add milk and butter mixture all at one and stir gently to combine.

6. Gently but thoroughly fold in the bananas and walnuts and the batter among muffin cups and spread evenly. (You can use an ice cream scoop to plop the batter in the muffin cups!)

7. To make the topping: combine all of the ingredients in a bowl and rub together with your fingertips until crumbly. Sprinkle evenly over the batter in the cups.

8. Bake until golden and crisp and a wooden pick inserted into the center of a muffin comes out clean, about 20 minutes.


Oh yah, and here is a picture of browned butter. It is a really ugly picture but trust me, this stuff is GOLDEN! Those little brown bits are where all the flavor is at!

Luscious Lemon Curd

22 Oct

Lemon curd is my new favorite breakfast/dessert condiment.

A fruit curd is similar to a fruit custard, except it is made without milk or cream. Lemon curd is a classic spread for toast, muffins, scones or pancakes. I like to spoon it over plain yogurt, too.

For a more dessert-like treat, pour homemade curd into a tart or pie shell and bake it in the oven until set. Curd can also be used as a filling for cookies, cakes or pastries, or swirl it into freshly churned ice cream or whipped cream!


I can eat it this stuff by the spoonful. It is just *~so.darn.good.~* I love the sweet and sour combination of lemons and sugar mixed with the creaminess of good ol’ butter.


I wanted to make lemon curd since the beginning of summer, and finally got around to it last Friday. It was so easy and delicious that I made it again on Sunday.

The process is like a science experiment. Sugar, lemon zest, eggs, and lemon juice get heated in a bowl over a pot of simmering water. The eggs cook slowly, thickening the mixture into a custard. Once thick, the custard gets strained through a fine sieve. Add a little butter for extra silky smoothness.

To go with the curd, my friends and I made pancakes. Really hearty and oaty ‘cakes, and topped with a triple threat of spreads—maple syrup (duh!), lingonberry jam (similar to a cranberry), and homemade lemon curd!!!!!! With walnuts and bananas mixed into the batter…YUM-O!


Four great friends and a lovely Sunday morning noon breakfast. Kelly made the pancakes. Sara cut up the fruit and made the mimosas. I threw together some lemon curd. Sara’s brother Sam got to eat with us in exchange for helping Sara with her physics homework and fixing the toilet 🙂

Sunday breakfast. Let’s do it again. And again. And again.

Luscious Lemon Curd

Adapted from Kiri, head pastry chef at Pizzaiolo Restaurant

This recipe is almost too easy! I memorized it immediately after the first time I made it! You do not have to be super exact with all of the measuring. Just go with the flow.

Makes about 1 ½ to 2 cups

Ingredients

½ cup sugar
lemon zest
2 eggs
¼ cup of fresh lemon juice (about 2-4 lemons)

4 Tablespoons of butter
Directions:

1. Place the sugar and the lemon zest in a heatproof metal bowl (the zest will infuse the sugar with lemony goodness!).

2. Crack your eggs in a separate bowl.

3. Measure out the lemon juice and set aside.

4. Place your bowl of sugar over a small pot of simmering water. Add the eggs and the lemon juice.

5. Whisk the mixture over the simmering water until it thickens, about 10-12 minutes.

6. When thickened, take the bowl away from the heat and add the butter, stirring until melted.

7. Strain your lemon curd through a fine mesh strainer (or chinois if you’re fancy).

8. Let it cool slightly and enjoy!

Store leftovers in the refrigerator.

Italian Fig Newtons–Cucidati

2 Sep


Ahh the foods of childhood…

Wagon wheel shaped pasta, Dunkaroos and those cookie koala’s with the chocolate inside, Fred Flintstone popsicles, shark gummy snacks, rock candy, that rainbow stripe gum, FIG NEWTONS!

Fig newtons… In the 1980s, Nabisco produced a popular advertising slogan: “A cookie is just a cookie, but a Newton is fruit and cake.”

Stand up comedian Brian Regan comments on Fig Newtons: “I was reading a Fig Newtons label — I’ve always liked them, and I was trying to see if it was OK to eat them. Everything looked pretty good, the fat content and everything. So, I’m thinking I could eat these. I looked at the serving size: two cookies. Who the hell eats two cookies? I eat Fig Newtons by the sleeve. Two sleeves is a serving size.”

While on a little family vacay a few weeks ago, my dad told my mom, “why don’t you buy some Fig Newtons? I miss those…”

This got me thinking about homemade Fig Newtons. I got slightly sidetracked in my search for homemade Fig Newtons when I came across theBrownEyedBaker’s Italian cucidati fig cookies!

These cucidati are similar to fig newtons, but less cake-like; they have this pie feel to them…more like shortbread than mushy.


The filling is AWESOME! Better than your typical Fig Newton. It almost reminded me of a Passover “Charoset” sans apples and wine. The texture was on the ball—crunchiness comes from walnuts and the fig seeds, and a smooth sweetness from dates, prunes, honey, and jam. Next time I would roll the dough out thinner to maximize the filling-to-cookie ratio! Mmm!


These cucidati are pretty labor intensive. You first make the dough, then you knead the dough, then you refrigerate, roll it out, cut it out into little rectangles, fill it, fold, and bake. On top of that, you have the option to frost and decorate. I nixed the frosting so as to enjoy the cookies as more of a snack than a dessert.

You could always halve the recipe to save time and energy because this recipe makes A LOT of cookies!

Nevertheless, my family went bonkers over the cookies and they were gone in an instant.

Enjoy!


Cucidati (Italian Fig Cookies)

Adapted from theBrownEyedBaker

Makes about 4 dozen

Dough
4 cups all-purpose flour
1½ tablespoons baking powder
¼ teaspoon salt
½ cup sugar
1 cup butter (can also use vegetable shortening)
1 egg
1 tablespoon vanilla extract (I used my own homemade extract!)
½ cup milk (I used nonfat)
**Note: my dough came out a little bit tough, so more liquid may be needed to smooth it out! Just eyeball it and add more milk as needed!

Filling
1 cup dried figs
1 cup dates, pitted (I substituted some of the dates with a few prunes!)
¾ cup raisins
½ cup walnuts, chopped or ground in food processor
½ teaspoon ground cinnamon
¼ cup honey
¼ cup apricot preserves (or marmalade or a jam of your choice!)

1. Sift flour, baking powder, and salt in a large mixing bowl. Whisk in the sugar and combine well.

2. Cut in the butter and work the mixture until it looks like cornmeal. (I used my fingers and rubbed the butter into the mix, but feel free to use a fork or pastry blender!)

3. In a separate bowl whisk together the egg, vanilla, and milk.

4. Add the egg mixture to the flour mixture and mix. The dough should be soft. Remove the dough from the bowl and knead by hand for 5 minutes.

5. Divide the dough into 4 equal pieces, wrap each with plastic wrap, and refrigerate for at least 45 minutes.

6. To make the filling, grind figs, dates, and raisins in a food processor until coarse. Place fig, date, and raisin mixture in a bowl. Add the remaining ingredients and mix well. Mixture will be thick. Set aside.

7. Preheat oven to 375°F and line cookie sheets with parchment paper.

8. Work with one piece of dough at a time, leaving the remaining pieces in the refrigerator until needed. On a floured surface roll the dough into a thin layer. Cut dough into 2×3-inch rectangles. Spoon filling into the middle of each rectangle. Carefully fold the short edges over to meet in the center and pinch to seal. Seal the sides as well.

9. Place each cookie, seam-side down, on a baking sheet, leaving 1-2 inches between each cookie. (Optional: As an alternative to icing, you can sprinkle some raw turbinado sugar on the tops of the cookies before baking!)

10. Bake for 12 to 15 minutes, or until the cookies are golden in color. Remove from oven and let these babies cool!

11. If you plan to put icing on the cookies, make sure they are completely cool. You can decorate with sprinkles, too!