Archive | November, 2009

Ebelskivers: Pancake Balls Filled with Heaven

30 Nov


Last year, I was browsing through a Williams Sonoma catalog and I flipped to a page with a picture of one of the most amazing-looking pancake nibbles that my eyes ever saw.

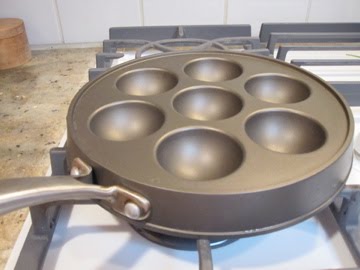
Everything in the Williams Sonoma catalog is drool-worthy, but this pan, I had to buy this pan and make those stuffed flapjacks. I had to.

So I did.

Wow.


This investment definitely hits the top of my list.

Now I can’t stop making ebelskivers. I make them for the fam., I brought my pan to a friend’s house (she’s got hungry brothers, and her hungry brothers have hungry friends…so we whipped up these ebelskivers for a snack and then later in the evening for dessert…we went through an entire box and a half of pancake mix and a menagerie of fillings), I brought my pan up to school with me, and I just brought my pan back home for Thanksgiving break.

Basically, you mix up some your favorite pancake batter, decide on your filling of choice, and well, there you have it—ebelskivers! Brush the hole with a bit of butter, fill with about a tablespoon of batter, dollop about a teaspoon of filling, and top with another tablespoon of batter. Wait until it bubbles, and flip. I like to use two wooden skewers to flip my pancake balls, but you can also use two spoons if you like.


Your filling can be anything from grand to bare-bones simple. You do not even need filling if you just want your pancake in the shape of a mini tennis ball.

Check out the Williams Sonoma website for some great filling ideas, or invent your own:

-berries
-jam
-pecan pumpkin
-cinnamon bun
-cheese
-chocolate
-banana and peanut butter
-lemon mascarpone
-lemon curd
-custard
-spiced apple

One of my favorite fillings is goat cheese (or feta cheese) mixed with jam. The cheese gets all melty and the jam/cheese combination is so satisfying!

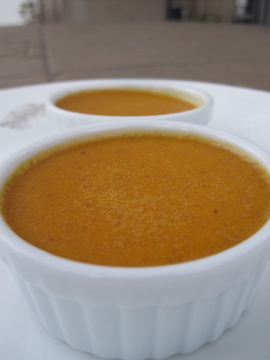
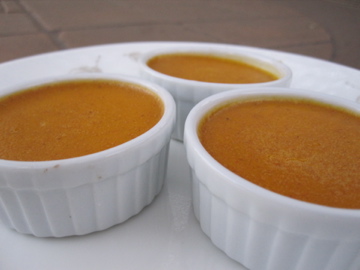
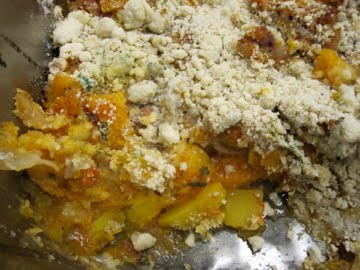
This week I filled my ebelskivers with leftover pumpkin custard and cranberry sauce. I’m salivating right now. I’m sorry, I just can’t help it…


Go splurge and buy this pan. They are anywhere from 25-40 dollars (Bed, Bath, and Beyond or Williams Sonoma or Sur la Table will definitely carry them).

Oooo, and check out this video of Rachael Ray making ebelskivers! Here is a second video in case you want another tutorial on how to use the pan.

Ebelskiver Pancake Balls Stuffed with Heaven
Adapted from Williams Sonoma and Rachael Ray

Ingredients:

Pancake batter of your choice
Filling of your choice
Melted butter, for brushing the pan

Directions:

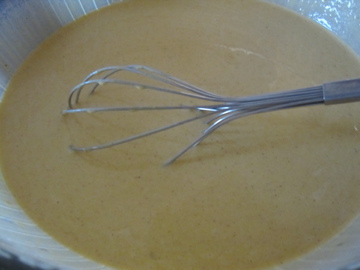
1. In a medium-size mixing bowl, prepare your pancake batter. Have your filling in a small dish next to your batter as you’ll need it quickly once you start cooking the ebelskivers.

2. Place an ebelskiver pan over medium heat. Melt your butter in a separate dish and brush your pan with a bit of butter.

3. Using a spoon, fill each dip in the pan about halfway with the batter (about 1 tablespoon of batter). Using another spoon, place a small dollop of your filling into the center of each indent on the pan, leaving a ring of batter all around it to enclose it in the pancake. Top each indent off with another small dollop of batter.

4. Allow the pancakes to cook for about 1 ½ minutes, until light golden brown on the outside (you can check them by lifting them up with a skewer, teaspoon or the tip of a knife).

5. Using two skewers, teaspoons, or paring knives, flip each pancake over in its indent to cook the other side. Allow the pancakes to cook for another 2 minutes, then remove them to a plate until you’re ready to serve them.

6. Continue the above process until you’ve used up all of the batter. Serve up the ebelskivers as soon as they’re finished cooking with a dusting of powdered sugar, if you like.

>Pumpkin Custards

30 Nov

>
Ok. Here’s the thing. Whenever I come home (aka to the parents’ house), the first thing I do is look in the fridge. Then I go to the pantry.

I have a meal sitting down at the table and immediately after I have a second meal standing up, hovering over all of the exciting goodies and treats, snacking, sticking my fingers into this and that, taking a nibble here and there, munching, crunching, and pigging out. I’m telling you, my manners have flown the coop.

I eat a bowl of cereal and lick it clean, getting dribbles of milk and soggy flakes all over my chin. And yep, you betcha, I LOOOOOVE soggy cereal. No matter what kind, the soggier the better.

Chocolate covered peanut butter filled pretzels. Need I say more?

5 different flavors of ice cream …of course I must taste every single one.

One of my favorite drawers in the house is the “gum drawer,” and gum is not the only star of this drawer: we’re talking gum, lollipops, little candies, good quality dark chocolate, even birthday candles and chalk (yah, the kind you write on a chalk board with).

Then comes part 2, the stomach ache. Ouch. I ate waaaaay too much. But it was just sooo good.

Indeed when I come home, my family looks forward to my “gourmet” home cooking. I have to impress, and I always do (well, I try).

This time, I whipped up these cute little pumpkin custards.


Baked in ramekins both tiny and a bit larger than tiny, these little custards are just so darn good. Good for dessert, but in my opinion, even better for breakfast, spread on toast or waffles (really yummy with leftover Thanksgiving cranberry sauce), as a filling for Ebelskiver pancakes, and yes, I throughout the day, I will stick my finger into the custard dish a few times just to get a little taste. Mmmm.

These custards are like the filling of pumpkin pie, but better. I had the intention to make little ginger snaps to go with but never quite got around to it this time.

Just mix all of the ingredients together, strain them, and then bake the custard in a water bath until set.

Cinnamon, Ginger, Salt…


I am still unsure whether to serve these custards warm, chilled, or room temperature. I guess it is up to you…

When we make these custards at the restaurant I work at, we use fresh pumpkin (duh, only the best). At home, I was lazy and bought the can. But hey, it was fresh at some point in its pumpkin life…?

Pumpkin Custards
Adapted from Oakland’s Pizzaiolo Restaurant

Fills 6 two-inch ramekins plus 4 baby ramekins…

Ingredients

6 eggs
2 oz. sugar (about ¼ cup)
3 oz. dark brown sugar (a little more than ¼ cup?)
½ teaspoon cinnamon
½ teaspoon ginger
¼ teaspoon salt
2 c. cream (aka 1 pint)
2 c. pureed pumpkin (aka one 15 oz. can)

Directions

1. Whisk all of the ingredients together.
2. Strain (this is simply for a smooth, even texture and aesthetic reasons).
3. Fill ramekins with custard.
4. Bake in a 275 degree oven in a water bath until set (about an hour, less for the baby ramekins). Rotate at least once during baking.
5. Serve warm, chilled, or room temperature with whipped cream, ginger snaps, or whatever tickles your fancy.

Homemade Oreos

23 Nov

It was a lazy Friday afternoon. I was up at 6 am to go to work. I came home with the intention of going to class but due to the crumby weather and my lack of sleep from the night before, I chose to snuggle up with my temperpedic bed instead. Oh so comfy!

A few hours later, I awoke with a hankering to make oreos. Yes, oreos.


Oreos have been on my mind lately. My boss made them a few times at work, she even made an orange colored filling for Halloween. Too cute!

Warning, I shoved two big oreos in my mouth on my way out to ballet rehearsal. Do not do this. Tummy ache + having to jump and turn and look pretty and graceful= bad combo.

There are many ways to approach the dough. I used a food processor, but using a kitchen aid would be nice if you own one, and making the dough by hand is also easy.


Deb from smittenkitchen told me to drop the dough by teaspoonful onto a cookie sheet and then gently press down to flatten. A small melon-baller/ice cream scoop works well. I decided to roll out my dough and cut it into small circular shapes (due to lack of a cookie cutter, I used a shot glass instead). My boss told me that sometimes she will roll the dough into a log, refrigerate it, and then just slice and bake. The world is your oyster people so just experiment and find your method of choice.

Oh, yes, and to pipe the frosting between the cookies, I used a ziplock baggie and cut off a tiny piece from one end, scooped my filling in, and squeezed it out. You can use a pastry bag if you own one, or just a knife or a spoon, or your fingers…

Have fun!


Homemade Oreos

Adapted from SmittenKitchen

Makes 25 to 30 sandwich cookies

For the chocolate wafers:
1 1/4 cups all-purpose flour
1/2 cup unsweetened Dutch process cocoa
1 teaspoon baking soda
1/4 teaspoon baking powder
1/4 teaspoon salt
1 to 1 1/2 cups sugar [or less if you like your cookie less sweet]
1/2 cup plus 2 tablespoons (1 1/4 sticks) room-temperature, unsalted butter
1 large egg

For the filling:
1/4 cup (1/2 stick) room-temperature, unsalted butter
1/4 cup vegetable shortening
2 cups (sifted) confectioners’ sugar
2 teaspoons vanilla extract
a few drops of water

  1. Preheat to 375°F.
  2. In a food processor, or bowl of an electric mixer, or by hand, thoroughly mix the flour, cocoa, baking soda and powder, salt, and sugar. While pulsing, or on low speed, add the butter, and then the egg. Continue processing or mixing until dough comes together in a mass.
  3. Take rounded teaspoons of batter and place on a parchment paper-lined baking sheet approximately two inches apart. With moistened hands, slightly flatten the dough. OR: Roll out your dough and use a small cookie cutter to cut into circular shapes. OR: Use the log method. Bake for 9 minutes, rotating once for even baking. Set baking sheets on a rack to cool.
  4. To make the cream, place butter and shortening in a mixing bowl, and at low speed, gradually beat in the sugar and vanilla. Turn the mixer on high and beat for 2 to 3 minutes until filling is light and fluffy.
  5. To assemble the cookies, in a pastry bag with a 1/2 inch, round tip, pipe teaspoon-size blobs of cream into the center of one cookie. Place another cookie, equal in size to the first, on top of the cream. Lightly press, to work the filling evenly to the outsides of the cookie (OR: use the ziplock baggie method or just spread the cream around with a knife). Continue this process until all the cookies have been sandwiched with cream.
  6. Dunk generously in a large glass of milk. I also like to split my oreo in half and lick out the filling! Mmm.

Savory Butternut Squash Crumble

23 Nov

“I’m wary of health faddists. When they’re done talking, you can’t eat anything. We need a nutritionist who loves good food.”  -Julia Child

Julia, I completely agree. I believe that a lot of what people produce inside of their heads deters them from tasting new foods. After making this savory squash crumble, a fellow housemate of mine exclaimed, “Wait, there is squash in this? Wow, I don’t even like squash and this is good!”

Lately I have been reading Irena Chalmers’ Food Jobs, a book about the variety of professions available for culinary students, career changers, and FOOD lovers. She is helping me translate my “zest for flavor into a satisfying profession.” Everyday I scour the Internet as well as my library of cookbooks and circle of food-loving friends for new and exciting places to eat, concoctions to create, and finger-licking food finds. Working in the food industry is an ever-changing and on-going process that keeps us all on our toes and constantly having to play and finesse, and finesse, and finesse…

Butternut squash is a beautiful vegetable, with that bright orange color and that bulbous yet elongated shape. Roasted, butternut squash turns soft and caramel-like. Today I took a different approach: I stewed the squash with tomatoes, onions, and spices and then topped it with a crumb topping.

Just a word of advice for all you food photographers out there: I have a slight problem…I tend to make something and either immediately want to eat it or someone else immediately wants to eat it. Understandable. As a result, I present to you some scraps of photos that definitely could have been better—better lighting, better styling, better everything. I’m working on my problem. For now, if you want to see the real deal, check out La Tartine Gourmande’s photos. Yes, she rocks.

Ok, it’s time to get stewing and crumbling!

*NOTE: I made this vegan, but you could add Parmesan cheese and use butter instead of oil in the topping.

**NOTE #2: Feel free to experiment with different herbs (thyme, oregano…), squash varieties (acorn, kabocha…), and cheeses (gruyere, sharp cheddar…).

Savory Butternut Squash Crumble
Recipe adapted from LaTartineGourmande
Serves 6-8

TOPPING

1 cup flour
½ cup walnuts, chopped coarsely
1 tablespoon chopped parsley
1/2 cup grated Parmesan (I omitted the cheese this time to make it vegan)
Pepper, to taste
6 tablespoons butter, diced and at room temperature (I used oil to make it vegan)
optional: 1-2 tablespoons of brown sugar

1.In a bowl, combine the flour, walnuts, parsley, Parmesan, brown sugar, and a generous sprinkle of pepper.

2. Add the butter (or oil) and work with your fingertips until the mixture forms coarse crumbs. Cover and refrigerate while you prepare the filling.

SQUASH

Butter or oil (for the dish)
2 tablespoons olive oil and 1 tablespoon butter (or 3 tablespoons oil)
1 red onion, coarsely chopped
1 teaspoon ground coriander
1 bay leaf
½ cup canned tomatoes
1 peeled butternut squash, cut into 1-inch dice
5 fresh sage leaves, chopped
optional: 1-2 tablespoons of brown sugar
Salt and pepper, to taste
1 tablespoon chopped fresh parsley
optional: 1/2 cup grated Parmesan

1. Generously butter a 10-inch baking dish.

2. In a large skillet over medium heat, heat the olive oil and butter (or just oil) and when the butter melts, and the onion, coriander, and bay leaf and cook, stirring occasionally, for 3 minutes or until softened.

3. Add the tomatoes and cook for 3 more minutes. Add the butternut squash, sage, brown sugar, salt, and pepper. Turn down the heat. Cover and cook for 30 minutes or until the vegetables soften.

4. Set the oven at 350.

5. Discard the bay leaf from the squash mixture. Sprinkle with parsley and Parmesan; stir gently. Transfer the vegetables to the baking dish. Spoon the crumble mixture on top.

6. Bake for 30 to 35 minutes or until the top is golden (My top did not get super golden due to my using oil instead of butter. Oh well, it was still mighty good!).

How to Poach an Egg

20 Nov


“When food is poached, it cooks delicately over the gentlest heat; not a bubble breaks the surface of the liquid in the pan”

–Alice Waters, The Art of Simple Food

The first time I ever ate a poached egg was two years ago at Café Fanny, one of my favorite breakfast spots in Berkeley.

In lieu of attempting to emulate Café Fanny’s picture perfect poached eggs, I purchased an egg poacher. I found, however, that simply pouring an egg into a low-sided sauté pan works best.

Now be warned. The whole egg poaching thing takes a bit of practice to master. I am still in the process of tweaking and refining my technique.

Ok here we go.

Poached Eggs a la Alice Waters and Julia Child
[Oeufs pochés]

Ingredients:
Egg (or eggs)
Water
Vinegar
Salt and Pepper

Step one. Crack an egg into an individual cup or bowl. Be careful not to break the yolk.


Step two. Fill a pan with water about 2 to 3 inches deep; add a large splash of vinegar. Let it come to just below a simmer: very hot, but without any bubbles breaking the surface (as you can see some of my bubbles broke the surface—c’est la vie).


Step three. Hold the cup right at the level of the water and carefully slide the egg in. This gentle entry into the water will help the egg keep its shape. Immediately and gently push the white over the yolk with a wooden spoon for 2-3 seconds (I omitted this part…just decided to have my yolk exposed this time around). After a minute you can gently stir the water to discourage the egg from sticking to the bottom of the pan. Lower the heat if the water starts to simmer.


Step four: The egg will take about 3-5 minutes to cook, depending on your egg. The white will be set but the yolk still soft. Test for doneness by gently lifting the egg with a slotted spoon and pressing it gently with your finger to feel how set the white and the yolk are.

Step five: Carefully remove the cooked egg with a slotted spoon. Sprinkle with salt and pepper.

*I chose to drizzle with balsamic vinegar and place my egg over a nice green salad for a quaint lunch. A delicately poached egg atop a hearty slice of lightly buttered toast is also a favorite of mine! Yum!

**You can poach a few eggs at a time. The same recipe applies. When cooking for a crowd, freshly poached eggs can be kept for a few minutes in a bowl of cool water while another batch is being cooked.