Lauren’s Vegan Coffee Crumb Cake

23 Dec


My cousin Lauren has been a vegan for years. The two of us were discussing how being vegan definitely does NOT mean that she does not like good food. Lauren is ALL about good food, as she should be.

She is famous for her vegan chocolate chip cookies. Honestly, I don’t know how she does it. I have tried to make her cookies (“veganized” as well as with butter and eggs) and mine just do not come out as well as hers. She has the magic touch.

Last night around midnight, Lauren was busy baking her heart out in the kitchen. This morning I woke up and there it was—a decadent, crumb-topped coffee cake! Voila! Vegan with a vengeance indeed.


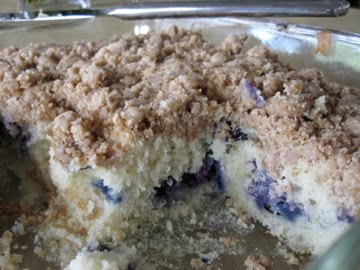
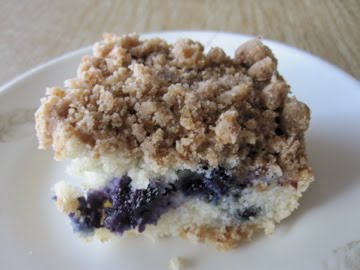
This coffee cake was light and airy, not dense, and I loved her addition of fresh blueberries in the middle. Surely, you could experiment with other fun add-ins like chocolate chips, nuts, jam, citrus zest, or another kind of berry or fruit.

Lauren borrowed her recipe from Isa Chandra Moskowitz’s Vegan Brunch. The gingerbread waffles in this cookbook look divine as well (they use fresh ginger in the recipe, mmm!!). Moskowitz is also known for her fabulous cookbook, Vegan Cupcakes Take Over the World, which I adapted my vegan maple walnut muffins from.

What I like about this recipe is that all of the ingredients are on-hand. No funky egg replacer concoctions or “natural” sugar substitutes. Plus, I’m not gonna lie, Lauren’s cake looks prettier than the picture in the cookbook. Way to go!

Lauren’s Vegan Coffee Crumb Cake
Adapted from Isa Chandra Moskowitz’s Vegan Brunch

Serves 8

For the topping:
1 cup all-purpose flour
1/3 cup brown sugar
1 teaspoon ground cinnamon
¼ teaspoon ground nutmeg
¼ cup canola oil, plus up to 2 tablespoons more if needed

For the cake:
¾ cup soy milk (or any nondairy milk)
1 teaspoon apple cider vinegar
1/3 cup sugar
½ cup canola oil
1 teaspoon pure vanilla extract
1 ¼ cups all-purpose flour
2 teaspoons baking powder
½ teaspoon salt

Add-in:
1 cup fresh blueberries

Directions:

1. Preheat oven to 375°F. Lightly grease an 8-inch round springform pan or an 8-inch square pan. Measure out the mlike for the cake and mix in the teaspoon of vinegar; set aside to curdle.

2. Make the topping: In a small mixing bowl, mix together the flour, sugar, cinnamon, and nutmeg. Drizzle in the canola oil by the tablespoonful (you can just eyeball this, no reason to whip out a tablespoon). Use your fingers to swish around the mixture until crumbs form. Alternate swishing and adding canola oil until all of the oil is used and large crumbs have formed. Some of the topping is still going to be sandy and that is fine, just so long as you have mostly nice big crumbs.

3. Make the cake: In a large mixing bowl, mix together the milk mixture, sugar, canola oil, and vanilla. Sift in the flour, baking powder, and salt and mix until smooth.

Pour the half of the cake batter into the prepared pan. Spread the blueberries over the batter, and top with the other half of the batter. Evenly sprinkle on the topping and pat it down just a bit. Bake for 35-40 minutes, or until a knife inserted though the center comes out clean. Let cool for at least an hour before slicing and serving, if you can wait that long!

Chocolate Crackle Cookies

23 Dec

I am now the proud owner of a Candy Apple Red 90th Anniversary Kitchen Aid Standing Mixer with a glass bowl.


Beautiful. This is my baby.


I had to make SOMETHING immediately after I brought my baby home. First, I made tart dough. Then I stuck that in the freezer to use later in the week.

Then I made these chocolate crackle cookies from Alice Waters’ The Art of Simple Food.


Ok, so at first, I was not happy with the outcome of these cookies; they were super cute but I felt like they were lacking something in taste, and I could not pinpoint what it was. At first, I thought maybe they were too rich?…or maybe the ground almonds, which my cousin mistook for coconut, gave these cookies a funky texture?

I mean, these cute little guys are made with only good things—dark chocolate, cognac (a variety of brandy), ground almonds…and they only have 3 tablespoons of butter! But, sadly, I was not that impressed. They are not necessarily bad, but I thought they were nothing worth swooning over.

So it has been a few days now and I figured I would give these cookies another shot. Well, actually I brought my friends a few samples to snack on and I was very afraid of what they would say, but to my surprise, yes, they were swooning: “Oh my, Stephanie! These taste like little petit fours, like chocolate truffles, like little baby cake bites!”

Really guys? Ok fine, I’ll give them another taste. As I bit into a 4-day-old chocolate crackle cookie, yes, holy heck, these were sooooo yummy! My friends were right, these DO taste like a little truffle cake bite! A few days ago, I thought they were too rich. Now, I think they could be even richer!


I guess these cookies/petit fours/truffle bites taste better as they age. Make them, taste them, let them sit a few days, taste them again. Really, you will taste a difference!

I think next time I make these, I will futz with the recipe a bit…I definitely think that a few pinches of salt and some vanilla extract will benefit, as well as a bit of good quality cocoa powder. Adding in some coffee or experimenting with another kind of extract (mint…?) might be fun, too! Also, maybe next time I might nix the ground almonds and just use more flour? This is the beauty (or for some people, the stressor) about cooking and baking–nothing is ever constant!

Chocolate Crackle Cookies
From The Art of Simple Food

Makes about 3 dozen cookies

Pulverize in a food processor:
1 cup almonds, toasted
2 Tablespoons sugar

Put them in a bowl, and combine with:
½ cup flour
½ teaspoon baking powder

Melt in a heat-proof bowl over simmering water:
8 oz. bittersweet chocolate, coarsely chopped (I used Ghirardelli)
3 Tablespoons butter

Stir in:
1 ½ Tablespoons brandy (I used cognac, and had a few sips for myself but boy, is that stuff STRONG!!)

Set the mixture aside off the heat. Whisk together:
2 eggs, at room temperature
¼ cup sugar

Continue whisking until the mixture forms a ribbon, about 5-7 minutes. Stir in the melted chocolate and the almond and flour mixture. Chill the dough in the refrigerator for 1 to 2 hours or until firm (I just chilled mine overnight).

Before baking, preheat the oven to 325°F. Fill a small bowl with:
Granulated sugar

Fill another small bowl with:
Sifted powdered sugar

Roll the cookie dough into 1-inch balls. Roll a few at a time in the granulated sugar to coat them, then roll them in the powdered sugar.

Set them on parchment-lined baking sheets 1 inch apart. Bake for 12-15 minutes. Midway through baking, rotate the baking sheets for even baking. When the cookies are done they will have cracks in their white shells and they will be firm on the edges, but still soft in the center. Do not overbake.

Review: The Buttermilk Truck

22 Dec


Ever since I saw TheKitchyKitchen’s post about the Buttermilk Truck, I could not wait to come back to LA to taste the sought-after breakfast wonders served from a truck.

Gosh, it has been weeks and every day I have ogled over the bite size treats on the Buttermilk website.

The owner/founder, Gigi Pascual, graduated LMU with a BA in Business Administration and shortly after went to culinary school in NYC at The French Culinary Institute for Pastry Arts. After working in a few restaurants, she decided to open up this truck.

Food trucks are just everywhere these days. You can feast on your tacos from truck A, scarf down your cupcake from truck B, and indulge in your midnight burger from truck C. My brother raves about this organic ice cream truck in NYC, and my friend Natasha won’t shut her trap about the crème brûlée cart in San Francisco’s Mission district! I just found the Grilled Cheese Truck online, and wowza does that sound cheesy and comforting!

The Buttermilk truck twittered about coming to the San Fernando Valley on Tuesday December 22, so this was the day I planned to go get my buttermilk breakfast fix.

My brother and I drove 20 minutes to get to this truck. The weather was windy, very very windy. The darn wind was not so conducive to us waiting in line for 30 minutes and then having no place to sit but the parking lot curb to eat all the while having the wind blowing my hair, my sweater, my food, and my napkins all over the place.

Due to the extreme windy conditions, I was almost too overwhelmed to take nice pictures of all the food. I managed to snap a few, but if you really want to see some nice photos, check out the KitchyKitchen or the Buttermilk website.

I ordered the breakfast sandwich—a fried egg with chicken apple sausage sandwiched between two buttermilk biscuits. It was supposed to come with a cute little hashbrown pancake, but they ran out just before we ordered. Bummer.


This little b-fast sandwich looked pretty darn delish, but honestly, it needed to be salted and peppered, and even though the yolk was nice and runny, the sandwich altogether was pretty dang DRY.

My bro ordered French toast on Hawaiian bread—it came dusted with powdered sugar and garnished with a slice of strawberry. Pretty good. Nice and crunchy on the outside. Very sweet and very fried.

Then we shared the cake donut bites. These were definitely the winners of the morning. Could have been slightly more aesthetically pleasing, but I’m kind of a food snob, so sue me.

The sandwich, French toast, and cake donuts cost $8.50. Not too bad?

Well, it took 20 minutes to drive there, 30 minutes to wait in line, 10 minutes to eat, and 20 minutes to drive back home. Plus, we were kind of in the middle of nowhere, well, we were in the middle of a bunch of warehouses. That’s a lot of minutes for windy, mediocre breakfast from a truck.


Here is my suggestion: if the Buttermilk truck happens to be in your area, yah, hit that up. Otherwise, eh, just come over to my house and I can make you the breakfast of your dreams (my brother can vouch for that).

Brown Sugar Buttermilk Waffles

17 Dec

These are some sexy waffles.

They can be drizzled with maple syrup, slabbed with butter, dolloped with ice cream, smothered with yogurt, dusted with powdered sugar, spread with jam (or lemon curd) and peanut butter, dipped in coffee…

Sometimes when I’m feelin’ a little devilish, I will even add walnuts, dates, and bananas to my batter! Jeepin’ Jilipers that’s good!

I want to eat my waffles groove by groove.

You can smell these waffles from down the street.

These waffles kick Eggo Waffles booty!

These waffles contain buttermilk and brown sugar. Now is that sexy or what?

They only take 10 minutes to prepare and about 2 minutes to cook, and my belly is satisfied for hours!

Go make these waffles, top and fill with the condiment of your choosing, start the day off right.

Brown Sugar Buttermilk Waffles
Recipe from JoyTheBaker

Ingredients

3 cups all purpose flour

1 Tablespoon baking powder

1 teaspoon baking soda

1 teaspoon salt

¼ cup brown sugar

¾ teaspoon cinnamon

¼ teaspoon freshly grated nutmeg

4 eggs

2 ½ cups buttermilk

2/3 cup oil

2 teaspoons vanilla

Directions

Set up your waffle iron on a level, clean surface and turn on to preheat.

In a large bowl combine flour, baking powder, baking soda, salt, brown sugar, cinnamon, and nutmeg. Whisk to blend. In a medium bowl, whisk together eggs, oil, buttermilk and vanilla extract. Add the wet ingredients to the dry ingredients and fold. (If you choose, once almost fully incorporated, add walnuts, bananas, or dates to your batter; chocolate chips are fun, too!). Stir. Try not to over mix the batter or the waffles will become tough. It’s ok if a few lumps remain in the batter.

Cook according to your waffle machine

Homemade Croissants, Part II: Rolling, Baking, Eating

15 Dec

Ok folks, so now that you have gone through part I of the adventure in homemade croissants, you’ve got your laminated dough ready to be rolled and shaped and eaten!

This was the scary part for me. How can I possibly roll these little guys out to look the way they do in a real French bakery (well, I’ve still never been to France but I have a very distinct image in my head)?

How big should I make my triangles? Should they be equilateral, isosceles…? Do I pinch my ends together or leave them open?

Stephanie. Calm down. Breathe. You can do this. Lets take it step-by-step, shall we?

To begin, you should have ready a baking sheet lined with parchment paper and a rolling pin and pizza cutter nearby.

Step 1: Take you laminated dough out of the refrigerator. It should look like this:

Step 2: On a lightly floured surface, roll your dough out into a large rectangle about ½ an inch thick and maybe 2 feet wide. Using a pizza cutter, I cut my rectangle in half the long way, so that I had two rectangles, each about 2 feet wide and 6 inches tall.

Step 3: Using your pizza cutter, cut your dough into long isosceles triangles. At the restaurant, we way out each triangle to roughly 3 ¾ oz., but I just eyeball it when I make them at home. Your triangles should look similar to this:

Step 4: Cut a tiny slit at the base of each triangle. Also, I like to stick any extra leftover end pieces of dough inside some of the triangles. Nothing goes to waste!

Step 5: With the base closest to you, begin to roll your croissant outward, your right hand rolling to the right, your left hand rolling to the left. Then, turn your triangle so the tip faces you and simultaneously stretch the dough with your right hand and roll it toward you with your left hand. Tuck the end of the tip underneath and pinch your sides together.

Optional: You can fill your croissants with prosciutto and cheese, with chocolate, with anything you like! Plain are a good place to start, though.

Step 6: Place your croissants on a baking sheet lined with parchment. Either wrap in saran wrap and stick them in the fridge overnight, or let your croissants sit at room temperature until they are nice and springy when you touch them.
**If you stick your croissants in the fridge, just pull them out about 40 minutes before you want to bake them so that they can come to room temperature and proof.

Step 7: When you are ready to bake, preheat your oven to about 400-425°F. Crack an egg and beat it with a touch of cream. Brush your croissants with the egg wash. Bake for about 20-25 minutes until golden everywhere.

OMG eat them eat them eat them…yum yum yum, they are so beauuuuttttiiiiifffffullll and delicious and flaky and warm! Gah!!!!

**NOTE: Rolling these out takes a bit of practice. The first time I made these all on my own, I did not pinch my ends together nor did I make sure the tip of my triangle was tucked underneath. Alas, here is what my first batch came out looking like:


Not too shabby, but I like the pinched ends look better!