Archive | dinner RSS feed for this section

French Lentil Soup

7 Apr

IMG_0689

When it comes to legumes, I almost always think of beans, too often forgetting about lentils (shame on me). Lentils are so easy to make and provide a great source of plant-based protein, fiber, iron, and magnesium.

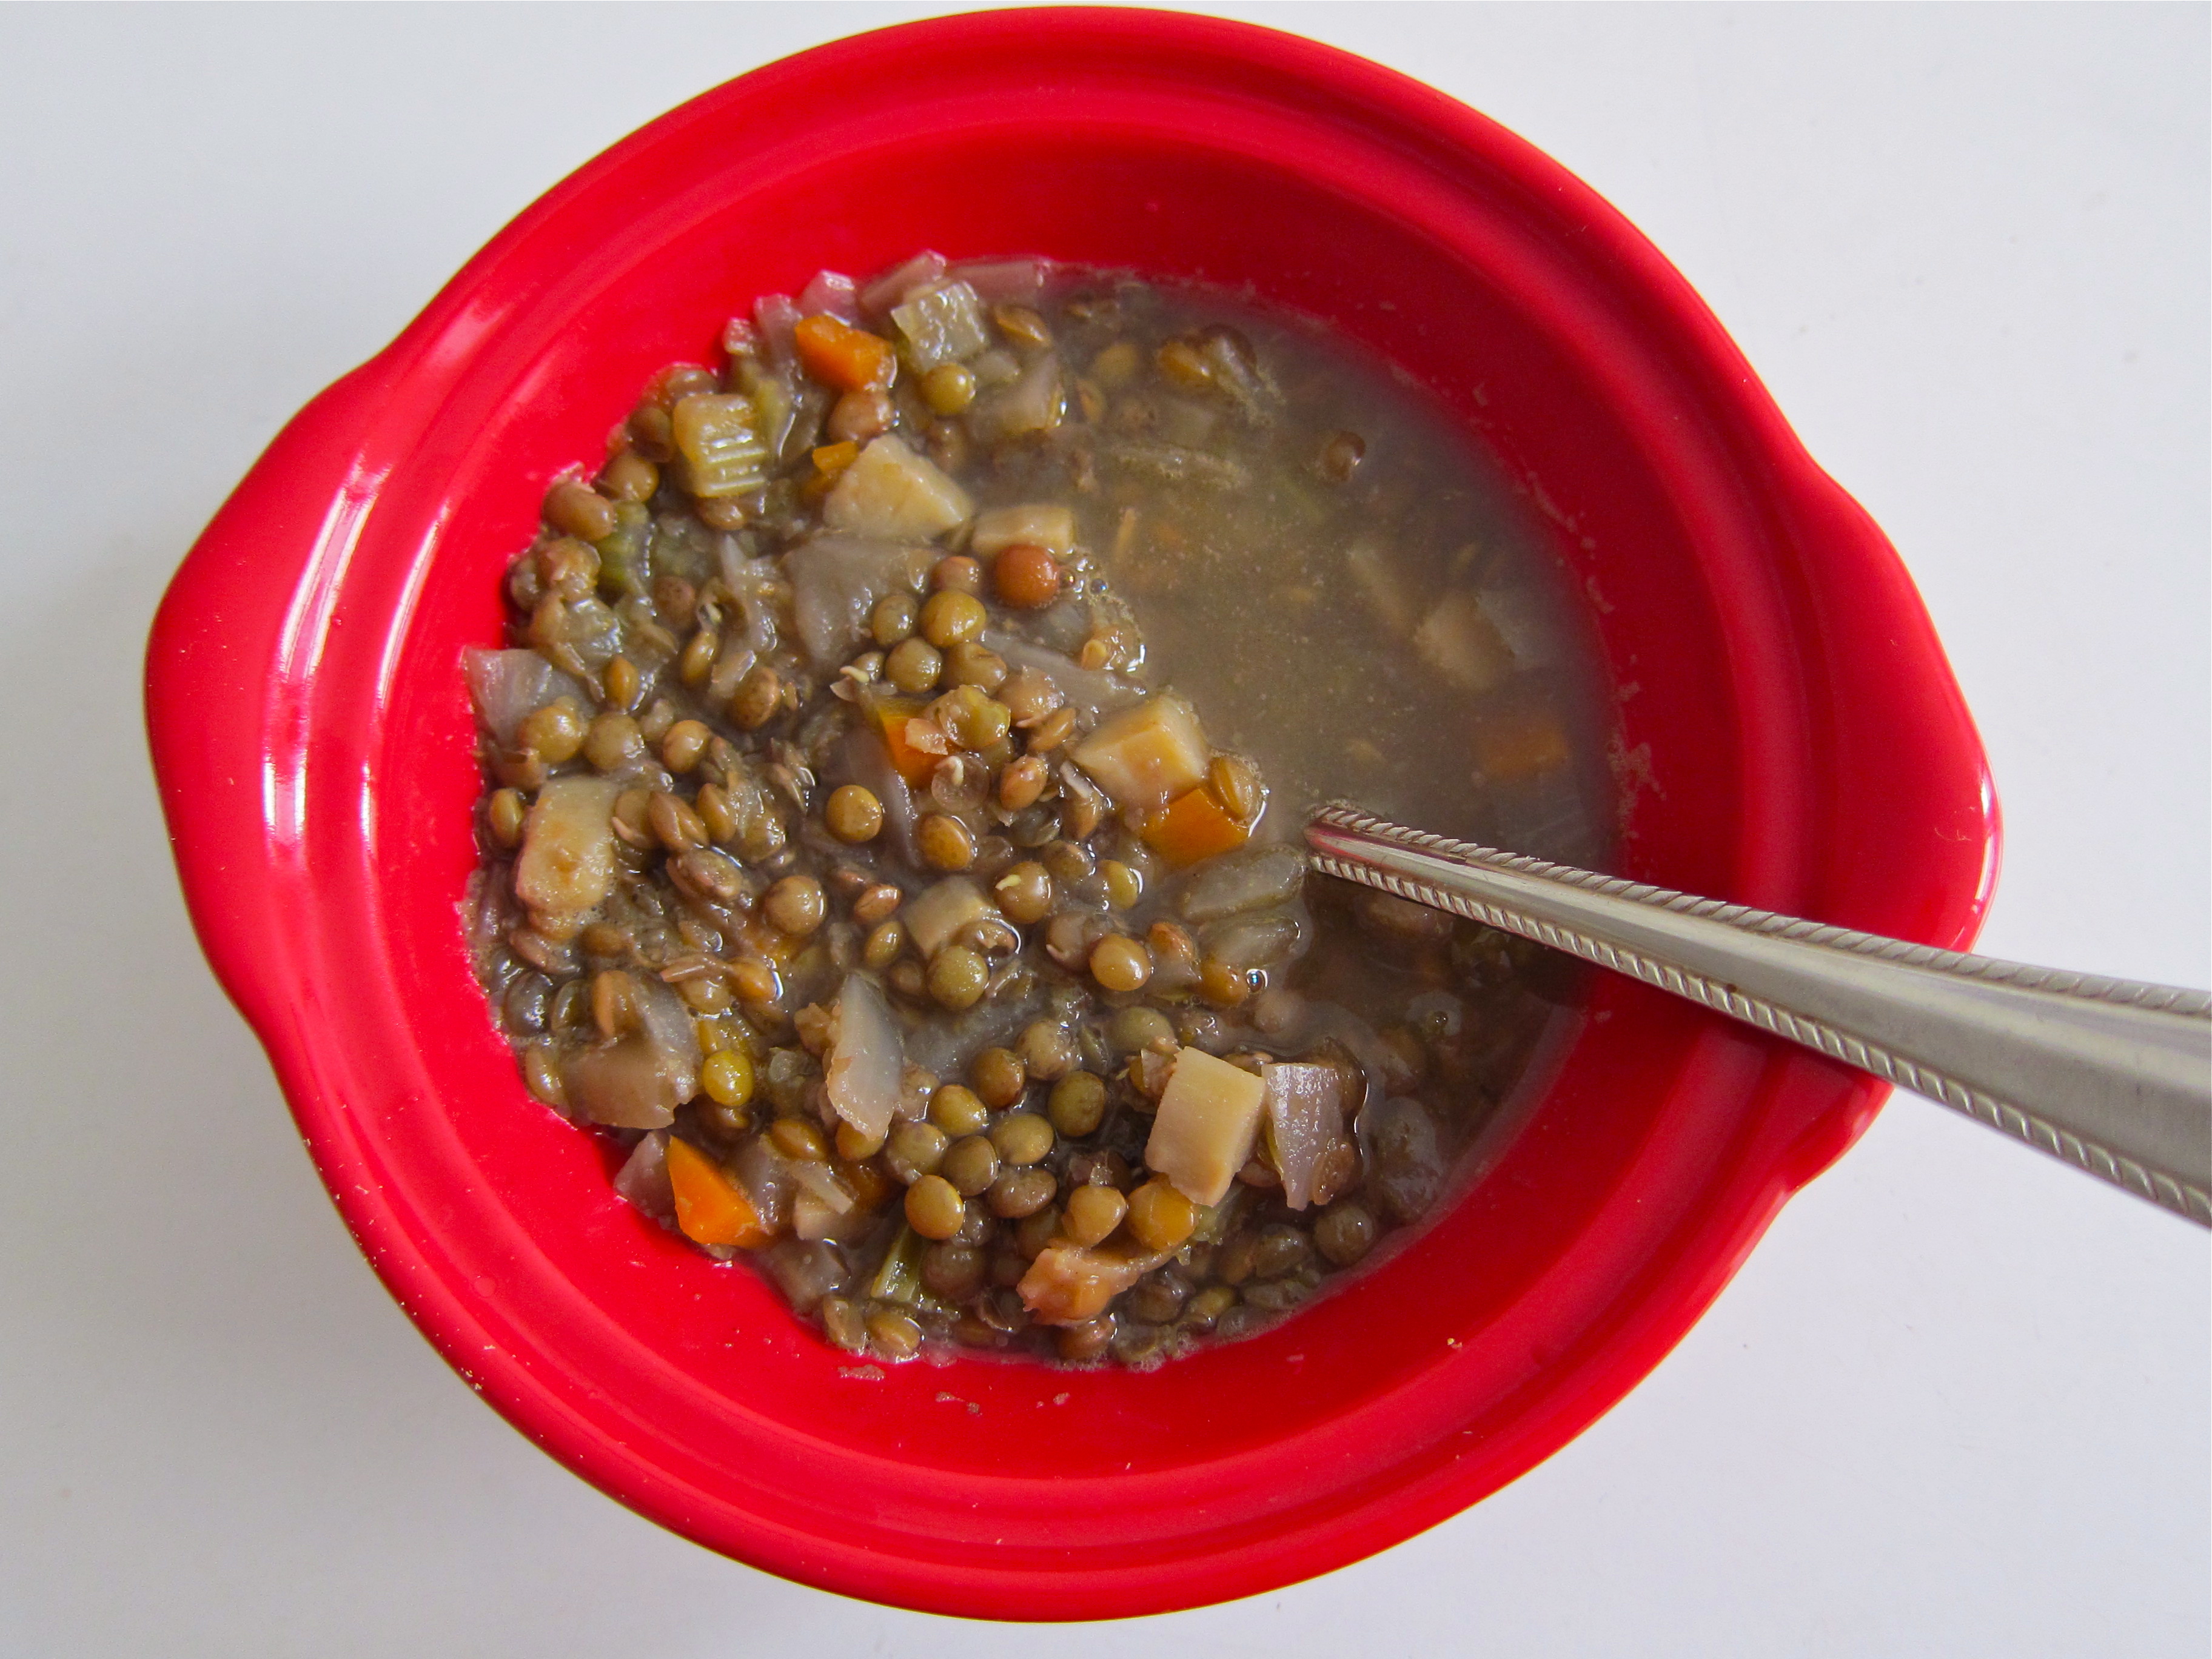
This soup is great for a light lunch or dinner, or even a mid-day snack. After a quick chopping session, everything gets thrown into a pot and simmers for an hour. This provides time for you to get other things done, allowing the soup to be left alone except for a little stir here and there.

Flipping throughAlice’s In the Green KitchenI was reminded of her “green kitchen manifesto:”

green kitchen manifesto

I understand that sometimes these tips are easier said than done, and that location and income are huge factors that affect the desire and ability to keep a green kitchen. Try focusing on 1 or 2 of these components, and see where that takes you…

IMG_0683

I purchased my French lentils in the bulk section of my local health food store. Aren’t they beauties? These girls are hold their shape nicely when cooked, and pack such a comforting flavor.

The soup is great on it’s own with some toast or pita. You can also serve it with fluffy brown rice or quinoa. A few dabs of yogurt or a drizzle of aged balsamic vinegar add some oomph. Or even a poached egg right on top, the yolk dripping right into the broth…

French Lentil Soup

4-6 servings

adapted from Alice Waters’ In the Green Kitchen

1 tablespoons olive oil

2 carrots, peeled and diced (I used 1 carrot and 1 parsnip)

1/2 onion, peeled and diced

2 celery stalks, diced

2 1/2 teaspoons kosher salt

3 garlic cloves, peeled and crushed

1 cup French green lentils, rinsed

7 cups of water or vegetable stock

Fresh ground pepper

Heat a large saucepan or soup pan over medium-high heat and add 1 tablespoon of the olive oil to coat the bottom of the pan. Add the carrots, onion, celery, and 1 teaspoon of salt and cook for about 5 minutes, until the vegetables begin to dry and soften. Reduce the heat to medium-low and cook for 5 minutes more, stirring occasionally, until the carrots are tender and the onion translucent. Add the garlic and cook briefly to release the aroma.

Add the lentils and stir while adding the water/stock and remaining 1 1/2 teaspoons salt. Increase the heat to high, bring to a boil, then reduce the heat to low and simmer for 1 hour, stirring occasionally, until the lentils crush easily and have a creamy texture. Mash some of the lentils in the pan using a whisk or a quick go with the immersion blender to thicken the soup slightly. Season with pepper. Taste and add more salt if needed.

Spatchcocked Flat-Roasted Chicken

5 Apr

IMG_0925

Buying a whole chicken is a great way stretch your dollar, as it is significantly cheaper than buying the chicken parts separately. The other day, I had 2 breasts in my hands 😉 ready to go and ended up switching them out for a whole chicken because it would save me a few bucks. I bought my chicken directly from my farmer’s market vendor, so I felt reassured that the chicken lived a relatively happy life. As Deb from the Smitten Kitchen says in her cookbook, the smaller, cleaner chickens from the greenmarket really do taste incredible, and there is no need to add anything extra.

With a whole chicken at my side, it was time to start SPATCHCOCKING. I only recently heard the term while listening to Tracy talk about it on the Joy the Baker Podcast. Basically, you cut the backbone out of the chicken with your kitchen shears and lay the chicken flat in a roasting pan (check out the Adam’s spatchcocked chicken while you’re at it, and Tracy’s great pictures. Hopefully they won’t gross you out too much). Doing this allows the chicken to cook evenly in a relatively short time, and the breasts won’t overcook before the legs are ready. A great idea for holiday entertaining.

As Deb points out in the head note for this recipe, from the Zuni Cafe Cookbook, she learned to have faith that chicken skin will crisp itself in a high-heat oven, and not to load it with oils and rubs. The only oil in this recipe is used for the potatoes. The chicken skin provides all of the lubrication that the chicken needs.

From Thomas Keller, Deb learned to rain the salt down on the outside of the bird and to trust that it won’t leave the chicken too salty, just perfect. Salt is key. While it gets a bad rep. these days, salt makes a huge difference in flavoring dishes cooked from scratch.

This chicken was simple and juicy. After I few days, I shredded some of the meat and ate it with brown rice, black beans, and sautéed peppers and onions. A nice way to repurpose the leftovers.

I see a lot more spatchcocking in my future…!

IMG_0674

Spatchcocked Flat Roasted Chicken

recipe from the Smitten Kitchen Cookbook

One chicken, about 3 pounds

salt and pepper

Two handfuls of tiny yellow potatoes, washed and sliced in half

2-3 garlic cloves, peeled

2 tablespoons olive oil, for the potatoes

Preheat the oven to 450 degrees. Using a pair of sharp kitchen shears, remove the backbone of the chicken and discard it (or freeze and save it for making stock). Season the cavity generously with salt and freshly ground black pepper. Lay the chicken, breast side up, in a roasting pan (I used my cast-iron skillet), and gently pat the breast skin dry with a paper towel. Generously season the top of the bird with more salt and freshly ground black pepper. Nestle the potatoes and garlic cloves around and under the chicken, and drizzle them lightly with olive oil. Sprinkle the potatoes with salt and pepper.

Roast the chicken for 30-45 minutes, or until a thermometer inserted into the thigh registers 165 degrees. Toss the potatoes after about 20 minutes, so that they cook evenly. When the chicken has finished cooking, let it sit for about 10 minutes. Transfer the potatoes to a serving platter. Remove the legs, thighs, wings, and breasts from the spatchcocked chicken, and arrange them with the potatoes. Enjoy with another vegetable side dish for a balanced meal.

Update 9/25/14: new photo of the spatchcocked chicken baked in a pyrex. Delish!

Processed with VSCOcam with f2 preset

Easy DIY Recipe: Homemade Vegetable Stock

13 Mar

IMG_0845

For the last month or so, I have been saving my vegetable scraps in the freezer with a plan to make my very own VEGETABLE STOCK!!!

All of the carrot tops and parsnip nubs, the onion peels and fennel fronds that I normally would discard/compost are actually quality components of an unctuous stock. Thrown into a pot with a little water and good simmer on the stove, and I had my own preservative-free stock ready in an hour’s time (hands-off time!).

I froze my stock in ice cube trays, noting that 6 cubes is the equivalent of about half a cup of stock. Now I have flavor at my hands, ready-to-go whenever I am in a pinch. I see risotto in my future…

Here’s to getting one more bang for my buck.

IMG_0847

Homemade Vegetable Stock

via vegetarianventures

4-5 cups vegetable scraps (you can use them right from the freezer)

flavoring (bay leaf, Parmesan cheese rinds, herbs, salt, peppercorns…)

garlic (if you don’t already have scraps of garlic in your frozen veggie bag)

Place all ingredients in a large pot and cover with cold water (just enough so all the veggies are covered). Bring water to a boil and let simmer for an hour (don’t let it simmer for much more or it starts to lose flavor.

Strain the vegetable mixture and discard the scraps. Let cool completely and either use right away or freeze/refrigerate in quantities that will suit you best (ice cube trays was a genius idea, I also did some in pint size containers).

Store in fridge for up to 5 days and in freezer for up to 3 months.

Rigatoni Bolognese (with ground turkey)

24 Feb

IMG_0816

This was my first time making bolognese at home, and dang, it made me realize that it is high time to start expanding my horizons in the kitchen. Bolognese is just too easy and too good not to have made before.

Bolognese is a meat-based sauce originating from Bologna, Italy. As the sauce simmers on the stove, the strong notes of red wine and tomato complement the already savory-delicious smell of meat. The ultimate meal for these dog days of winter…

I chose to follow Jackie Newgent’s recipe, which uses ground turkey instead of the traditional ground beef. She also adds in some green tea and orange juice to replace some of the traditionally heavier bolognese ingredients like cream. These help build a more complex flavor without weighing the sauce down.

Jackie Newgent is a classically trained chef, registered dietitian, cookbook author, and media personality. Her latest book is full of quick, healthy recipes that “focus on filling ingredients with a contemporary edge.” I have had the pleasure of meeting Jackie in person and corresponding with her through email and social media. She is the nicest person, who truly understands the meaning of good food.

I purchased my ground turkey from Di Paola Turkey Farm. They have a stand at the Columbia farmer’s market (in NYC) every Sunday. I also threw in some mushrooms that I had on-hand from Madura Farms (based in Orange County, NY). Mushrooms go great with tomatoes and meat. I won’t go into detail here, but it involves glutamates and nucleotides…check out this interview with the editors of the newest Cooks Illustrated Cookbook to learn more…

IMG_0660

Rigatoni Bolognese (with ground turkey)

recipe adapted from 1,000 Low-Calorie Recipes by Jackie Newgent, RD

**This made a LOT of sauce; but it was great for leftovers for the next few days…probably got about 8 servings worth??  

1 tablespoon extra-virgin olive oil, divided

1 pound ground turkey

1 large onion, chopped

1/2 cup cremini mushrooms, chopped

1/2 cup dry red wine

1 1/2 teaspoons salt, divided

3 garlics cloves, minced

1 teaspoon dried oregano

1 jar marina sauce or 1 28-oz can crushed tomatoes

1/4 cup fresh squeezed orange juice

1/2 cup unsweetened green tea (or water)

Add ons: fresh parsley, chopped + Parmesan + black pepper

1. Heat 1/2 tablespoon of oil in a large skillet or saucepan over medium-high heat. Add the turkey and cook, stirring until fully cooked, about 5-7 minutes. Transfer the turkey to a plate.

2. Heat the remaining 1/2 tablespoon of oil in the skillet. Add the onion, mushrooms, 1 tablespoon of the wine, and 1/4 teaspoon of salt and saute until the onion is soft, about 5 minutes. Stir in the garlic and dried oregano and continue cooking for 30 seconds. Slowly pour in the remaining wine, scrape up any browned bits in the pan, and cook while stirring for 1 minute.

3. Return the turkey to the skillet and add the marinara, orange juice, green tea, and remaining 1 1/4 teaspoons salt.

4. Cover, reduce heat to medium-low, and simmer for about 25 minutes. While the bolognese simmers, get your rigatoni boiling.

5. Once your pasta is done cooking, spoon some bolognese over the noodles, adding fresh chopped parsley and some Parmesan cheese.

Pan-Seared Mahi Mahi With Sautéed Leeks

16 Jan

IMG_0629

I don’t cook fish very often at home. When I do, I usually opt for salmon, and I usually roast it. I decided to try something new this time…

Mahi-mahi has very little fat, so while it is not the best choice to get those omega-3 fatty acids, it is still a great choice for a low-fat, high protein meal.

While I would have preferred to purchase my fish at the farmer’s market, I didn’t get my act together in time this week, so I purchased my fish from Whole Foods. They sell frozen, wild-caught mahi-mahi there, nicely portioned into 2 6-oz fillets. I defrosted them in the fridge overnight on a covered plate.

IMG_0747

Pan-searing was a lot easier than I thought it would be. With a hot skillet, the fish was done in about 6-7 minutes. And the best part is that I got nice, golden sear marks.

I ate the fish with some sautéed leeks and a quick fennel orange salad (literally fennel, orange slivers, and a touch of OJ + olive oil/salt/pepper).

I brushed the fish with a little bit of teriyaki sauce that I had leftover from last night’s dinner (I made teriyaki bok choy over brown rice with an egg on top!) . You could also just mix together 1 tablespoon of soy sauce and a little fresh lime juice for a quick savory sauce.

IMG_0632

Pan-Seared Mahi-Mahi

Cooking method adapted from Mark Bittman’s Fish

serves 2

2 6-oz fillets mahi-mahi (I cut each fillet in half to have 4 small pieces of fish)

canola or coconut oil

fresh ground pepper

teriyaki sauce (see recipe below)

Make sure the fish fillets are at room temperature and pat them dry with a paper towel. Grind the pepper on both sides of the fillets.

Heat a 12-inch nonstick or cast-iron skillet for about 10 minutes, until smoking slightly. Add the oil, and place the peppered fish on the pan. Cook until browned on 1 side, about 3 minutes. Turn, and brown on the other side. Turn off the heat, brush the fish with the teriyaki sauce, and turn the fish in it a few times.

Teriyaki Sauce

recipe from Chloe’s Kitchen

makes a relatively large amount (maybe about a cup?); store in a jar if you have leftover sauce

3/4 cup water

3 tablespoons soy sauce

1/2 teaspoon fresh grated ginger

1 garlic clove

2 tablespoons maple syrup or brown sugar

1 tablespoon cornstarch

In a medium saucepan, whisk together all of the ingredients. Heat the sauce over medium-high heat, whisking frequently until it comes to a boil. Reduce the heat to medium-low and cook, whisking frequently, until the mixture has thickened and big, syrupy bubbles appear on the surface.

Sauteed Leeks

2 large leeks, green parts removed, washed

1 tablespoon olive oil

salt, to taste

Slice the leeks in half lengthwise, and then slice in half again. Chop the leeks into small pieces.

Heat the oil on a skillet. Add the leeks and saute for about 7-10 minutes, until soft and lightly browned. Add salt to taste.

You could even add a little parmesan or some teriyaki for more flavor. I think these leeks would be great on top of a slice of toasted bread, like a crostini.