I feel lucky. I feel very lucky. I feel very lucky to have just spent the last week in the suburbs of Paris, France with a lovely French family. A lovely French family who gave me a bed to sleep in at night, a clean shower, and home-cooked meals. Let’s just say that I have eaten well this past week, eaten well with great company (and don’t forget about the wine!!).
Let us start from the beginning, shall we? I have a friend, her name is Alex (pictured below on the right). Alex is from France.

Alex and I worked/lived together last summer (2009). We worked together in Berkeley, California at a cooking camp for children.
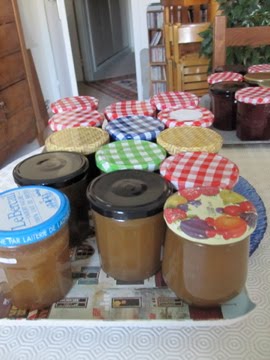
This summer (2010) I went on a 3-week Euro-trip where I spend my last week with Alex and her family in Paris, France. Actually, they live right outside Paris in a town called Vincenne. Just before I arrived, Alex was at her family’s country home where she picked fruits and made jams with them: rhubarb, cassis (black currant), groseille (red currants), apricot, apple, raspberry…
 Groseille (red currant) jam
Apparently Alex and her family have NEVER had to buy jam before. They always make it in abundance with the summer fruits from their country home. And every morning they eat their jam on a toasted baguette. What a life, eh?
 Rhubarb jam
Speaking of rhubarb, check out this piece of rhubarb:
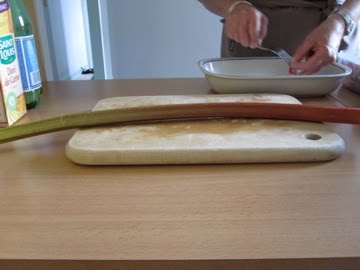
It is huge! And green! Totally different than the rhubarb that I am familiar with back in the states. I have made rhubarb jam before, it was red. Their jam is green. “C’est la vie.”

Pictured below is Alex’s mom, Catherine. She is making rhubarb jam and she is literally the queen of her kitchen, my taste buds can attest to that:

Alex recently celebrated her 22nd birthday. Bon anniversaire! (that means “happy birthday” in French). Of course we had to celebrate with good food and good drinks. We had a multi-course meal with a bottle or two of wine for each course!
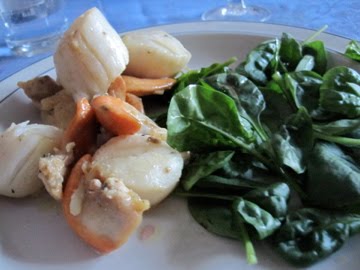
This multi-course meal, however, was as simple as can be. It all started with fresh scallops. During the winter months, Alex’s family buys fresh scallops, shucks them, and freezes them. Her mom defrosted these scallops over-night in milk so that they would not dry out or smell. A sprinkle of oil in a hot pan with a dash of fresh garlic, sauteed two minutes on each side and these babies are done! Accompanied with a fresh baby spinach salad, I found such joy in the hot/cold, soft/crunchy balance of foods. Mmm summer!
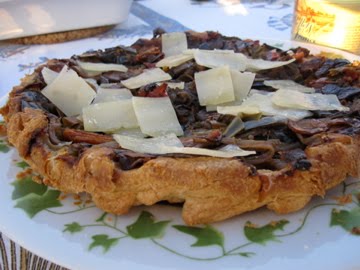
Next, we had a little somethin’ called “tarte tatin,” which is sort of like an upside-down tart. Typically, you see a tarte tatin for dessert, made with fruits such as apples. But Catherine prepared a savory tarte tatin with a confit of ratatouille-style vegetables, topped with slivers of fresh Parmesan cheese.
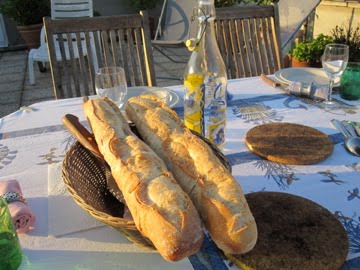
And with every great meal there is always fresh baguette…
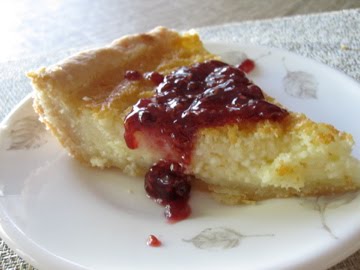
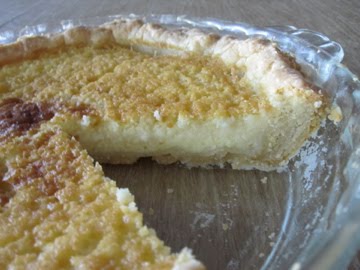
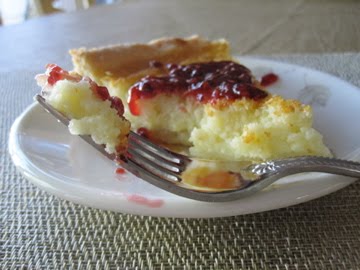
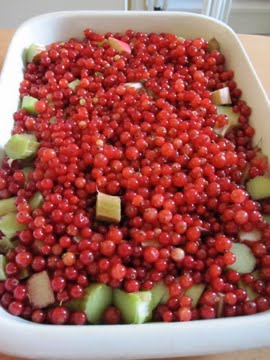
Now lets talk dessert. I sat with Catherine as we picked through a big bucket of fresh red currants, separating stem from fruit.

We were adding these currants to a fresh fruit crumble. Rhubarb and red currant crumble. No sugar was added to the fruit. I couldn’t believe it. Seriously? Yes, why add sugar when you can just taste how good the fruits are as is?
Topped with a pastry crust: 200 grams each of flour, ground almonds, sugar, and butter.
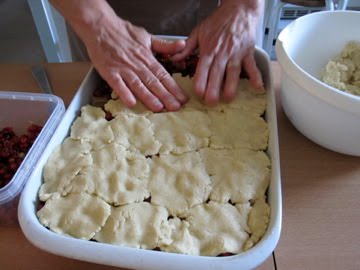
Pat it down and Voilà! We added a little special touch to the crumble by making the number “22” out of the pastry.

And after it baked, the currants just exploded over the pastry top and all that was left was this special “22.” Yum-o! I love the tart fruit mixed with the sweet pastry crust. Really just so simple and not too much sugar.

Now, last year when Alex came to Berkeley, she made this cake that I have since dreamed about all year long. This cake is of the chocolate variety. It is called Fondant au Chocolat and is the best darn chocolate cake I have ever tasted. It only works if you use very good chocolate. There is only about 2 tablespoons of flour in the whole cake. So easy to whip up and so quick to bake. The key is timing and temperature of the oven. Oh how I adore this cake.
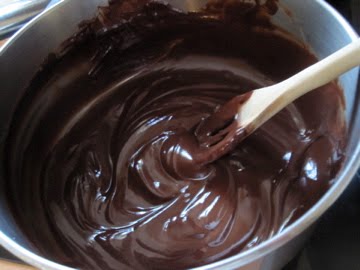
Alex’s mom probably could have prepared the cake with a blind-fold on and one hand tied behind her back. It was like a little dance watching her bake with such easy and joy.
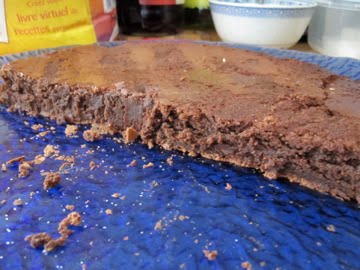
Let us meet dad now, yes? Everyone, meet Emmanuel. The wine connoisseur, the grill master, the cheese aficionado, the jokester. This man knows everything and more about French wine. We even tasted a very special red wine that is supposed to be eaten ONLY with really good chocolate (yes, we drank this wine with our fondant au chocolat). Below, Emmanuel grills pork and lamb on the rooftop of their flat.
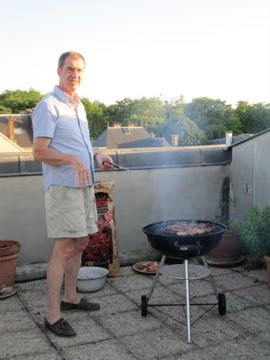
What a beautiful summer evening, the perfect night for another perfect meal…

Roasted potatoes, perfectly browned…

Special French salt called “fleur de sel.” It’s great for sprinkling as a final touch to any dish…

On my last night in France, Alex hosted a barbecue for friends. On the menu was a simple tabouleh salad: cucumbers, tomatoes, couscous, lemon juice, olive oil. There was also a salad with fresh sliced tomatoes, hericot vert (French green beans), and feta cheese.
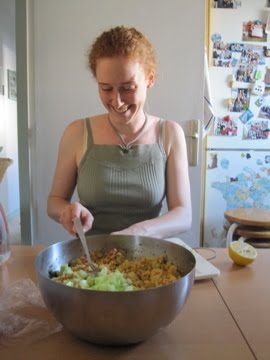 Prepping the tabouleh
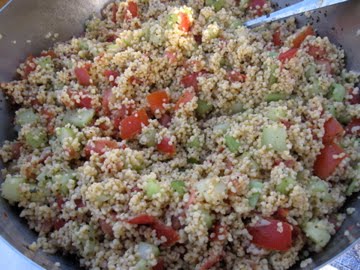 Tabouleh Salad
 Hericot vert, tomato, and feta cheese salad
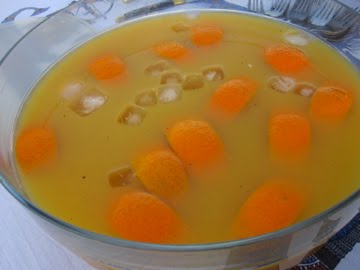
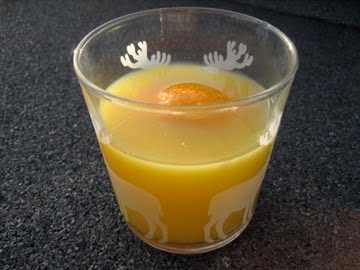
Alex made a lovely fruity rum cocktail with fresh orange slices and vanilla beans:
And then the meat…chicken and ribs. Dude.
 Poulet (chicken)
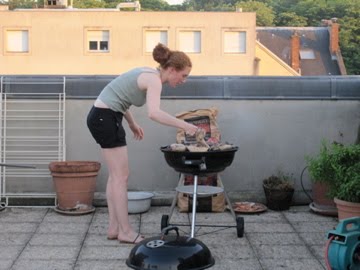 Alex at the grill
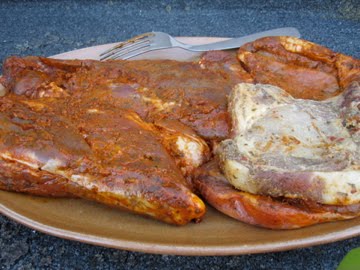 Meeeeeaaaaaat!
Wow, what a week. I really admire Alex’s family for not having “snack” foods around. Not even cereal or oats or crackers. Everything was fresh. Lots of yogurts, fruits, cheeses, and everyday more baguettes appear. After every meal, I would “cleanse” my palate with strong French cheeses. I miss those cheeses already!
Until next time, Paris!