Archive | dinner RSS feed for this section

Mediterranean Orzo Salad

16 Nov

I could eat bowl after bowl after bowl of this orzo salad. It’s got a salty yet creamy flavor, a nice balance of texture: crunchy, slippery, chewy, crumbled, and a beautiful color scheme.

You know those specialty markets that sell prepared “gourmet food?” Yeah, any little market or deli like Whole Foods (or the Bay Area’s Pasta Shop, Market Hall, Mill Valley Market)…Most of these markets sell some version of an orzo salad, and I will almost always buy some; I simply can’t resist!

What is orzo anyway? Orzo literally translates to “barley” in Italian. It looks like rice but is actually a pasta made of hard wheat semolina.

I love to make salads and throw practically anything and everything I possibly can into them. This orzo salad is indeed very versatile, throw in what you have on-hand in the fridge or pantry! Experiment and get creative!

Mediterranean Orzo Salad
adapted from me eating this salad at any and every specialty market

Ingredients:
  • 8 oz dry orzo
  • handful garbanzo beans
  • handful sun-dried tomatoes
  • handful chopped olives
  • handful chopped artichoke hearts
  • handful fresh spinach
  • handful cherry tomatoes (if in season)
  • handful fresh basil, either whole or cut into a chiffonade
  • handful feta cheese (omit if you want this salad to be vegan)
  • handful chopped or slivered almonds
Directions:

1. Boil water. Once it starts to boil, salt it. Salt it like an ocean. Pour in the orzo and cook until it is done. Drain. (Optional: reserve some of the pasta water in case you want to add it back later if the orzo sticks together).
2. Combine orzo, and rest of the ingredients. Stir it all up and eat! Simple as that.

Homemade English Muffins

23 Oct


I did it! I made English muffins from scratch!

They were even poofy and had the little holes in the center, just like the store-bought kind—but better of course! I think that I exclaimed, “Oh! These are soooo cute!” at least 10 times while I was making them.


Growing up, my mom used to toast me an English muffin spread with butter before school. Oh memories…

What’s not to love about puffy, light, and fluffy English muffins?! Split in half, perfectly toasted, and spread with the topping of your choice (butter, jam, cheese, honey, peanut butter, lemon curd…), these griddle-cooked buns are just a dream!


One of the many perks of living in a house with sixty people is that we have access to a huge industrial kitchen complete with two ovens, six stovetop burners, and a large griddle. When I was ready to cook these little guys I just plopped them onto the hot griddle and bam! Done in just minutes!


Simple, on-hand ingredients and no kneading necessary! What more could I ask for?!

Check out the foamy yeast, water, sugar mixture! It’s aliiiivvvvvveeee!


And here is the dough after the 40 minute rise!

Very sticky!

I made two versions of these English muffins—in one I used nonfat milk and the other batch I made vegan and used soymilk (both tasted great, I could barely tell the difference). If you want to get fancy you could mix in cinnamon and raisins, or maybe you are feeling festive and want to toss is some pumpkin puree!

As a nice finishing touch, you could dust the muffins with some cornmeal for added texture!

English Muffins
Adapted from BakingBites

Makes 10-12 muffins

1/3 cup water, warm (110F)
1 tbsp sugar
2 1/2 tsp active dry yeast
1 cup nonfat milk (or soymilk), slightly warm (100-110F)
3/4 tsp salt
2 cups all purpose flour

  • In a large bowl, whisk together water, sugar and yeast and let mixture stand for 10 minutes, until slightly foamy (my mixture got super foamy; it was totally awesome!).
  • Using a wooden spoon, stir in remaining ingredients and mix until smooth (At this point, if you want, you can add in whatever mix-ins your heart desires–raisins, pumpkin puree, chocolate chips…).
  • Cover with plastic wrap and set aside for 40 minutes.
  • Heat a griddle/nonstick frying pan over medium/medium-high heat (water dropped on the griddle evaporates very quickly). Lightly grease with cooking spray.
  • Drop dough by scant 1/4 cupfuls onto greased surface and cook until medium brown on the bottom. The top with look set and the sides will appear somewhat dry. The exact time depends on the temperature of your griddle and the size of your muffins, but expect this to take several minutes. Flip over and cook 2nd side until brown.
  • Cool on wire rack for at least 15 minutes or until completely cool.
  • When ready to serve, split muffins with a fork and toast. Serve with butter, jam, or any topping of your choice.

>Lamb Roasted with Garlic, Fresh Herbs, and Red Wine

11 Oct

>

“I’d rather make something and blow your mind than make something and blow my mind.”
–Michael Wild, Baywolf Restaurant

My mom is a funny woman. Whenever I make her taste something out of her normal eating pattern she will say, “I don’t usually like ____, but this is great!” or “I don’t usually eat ____, but wow is this good!”

Like mother like daughter, today I will say, “I don’t usually eat lamb, but wowza this is mmm mmm good!” Super tender. Marinated overnight with fresh mint and rosemary, garlic, cumin, red wine, and vinegar. Slow roasted in the oven. Butchered to perfection.

Back in the day I used to say that I would never cook meat because I did not like to touch, smell, or look at the raw meat. Let’s just say I conquered that fear. Actually, I quite enjoy rubbing my hands all over a piece of raw meat. It is really soft and almost therapeutic?! Sometimes I even feel like a doctor preparing for surgery. Okay, that may be taking it too far…

Anyway, this was my first attempt at making lamb, and I successfully did it for a house of 60 people! I wish I could have captured a more decent picture of the lamb, sliced and plated and garnished with fresh herbs; however it was devoured before I had the chance.

So here you go, a picture of the huge hunk of meat just before we sliced it.


I decided to use cumin in my marinade because I was making some other dishes that incorporated the spice. Feel free to experiment and add whatever you like to your marinade. You could go for a more Asian style and add chili paste and orange juice, or you could go Italian and add artichoke hearts, olives, and oregano.

This was my menu:
• Cubed melon, cucumber, and red onion salad dressed with balsamic
• Lamb Roasted with Garlic, Herbs, and Red Wine
• Cumin and Turmeric mashed sweet potatoes with spinach, onions, and chickpeas, topped with a peanut-sauce
• Roasted Kale “chips”
• Roasted Parsnips and Beets

Some key tips that I found helped me throughout the process:
(thanks to Alice Waters and her book The Art of Simple Food)

-Cut slats into the meat and shove crushed garlic and herbs in between the slats.

-Make sure that you marinate the lamb for at least a few hours, best if overnight.

-Let the meat come to room temperature before placing in the oven; otherwise it will cook unevenly (aka the outside will be fully cooked before the inside has even had a chance to warm up). Take the meat out at least 1-2 hours ahead of time.

-Keep basting and turning so as to ensure juicy meat.

-The lamb will be done when a meat thermometer reads 128°F.

-After you take the meat out of the oven and before slicing it, you should let the meat rest for about 20 minutes to let the internal temperature stabilize. This is so all of the juices do not leak out, leaving you with unevenly cooked and overly dry pieces.

Roast Lamb with Garlic, Fresh Herbs, and Red Wine
Adapted from The Silver Palate

serves 6-10

*Fresh rosemary, about a tablespoon or so
*Fresh mint leaves, about ½ a cup
*5 garlic cloves, crushed
*½ cup of vinegar (I used half balsamic and half red wine vinegar)
*¼ cup of soy sauce
*½ cup of dry red wine (I used “Two-buck Chuck,” half Cabernet and half Merlot)
*1 Tablespoon of cumin
*black pepper
*1 big hunk of lamb (I think I used the thigh?), about 5 pounds or so

*2 Tablespoons Dijon mustard

1. Cut slats in the lamb. In other words, use a sharp knife to make a few slits (about 3-5) in your hunk of lamb.
2. Combine herbs, garlic, vinegars, soy sauce, red wine, cumin, and black pepper in a bowl. Add the lamb and turn to coat with the marinade. Shove some of the garlic and herb-y pieces in the slits.
3. Marinate the lamb, covered, in the refrigerator, overnight.
4. The next day, take the lamb out of the refrigerator and place it in a shallow roasting pan with all of the marinade. Let it come to room temperature.
5. Preheat oven to 350°F.
6. Spread the mustard over the meat.
7. Bake for 1 ½ hours, or 18 minutes per pound, basting occasionally. The roast will be medium rare (Bake for another 10-15 minutes for well-done meat).
8. Let the roast stand 20 minutes before carving. Serve with the pan juices.

Hearty Grain Soup With Beans and Greens

18 Sep


This is my all-time favorite soup to make. It takes very little time and is so healthy and wholesome. It is a great winter soup that will warm your heart on a chilly day. Even in 80 degree weather, this soup proves to be a winner with its mixture of color and fresh flavor combination!

You can use any grain that you have on-hand: barley, brown rice, quinoa, kasha…Same goes for the beans–I prefer kidney beans but you can use a mixture of kidney, black, garbanzo, white beans…

I have made this soup at least 6-10 times and it never disappoints. One time, I accidentally used 3 times the amount of rice and rather than cry/freak out/kick and scream (which I did a bit of at first), I transformed the soup into risotto! Brilliant, just brilliant! Continue reading

Challah Bread

18 Sep

IMG_3895
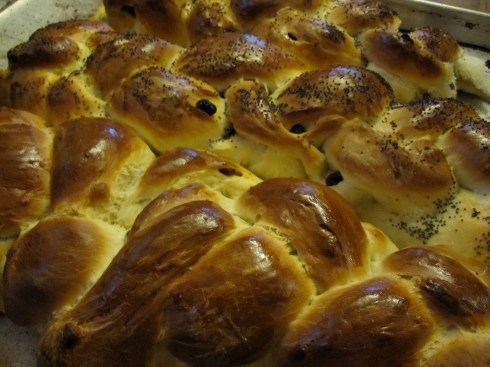
Rosh Hashanah, the Jewish New Year, is just around the corner. To celebrate, I made 8 loaves of this comforting, traditional egg-bread known as “challah.”

The smell of warm homemade bread just fills the whole house and makes everyone smile! Crisp and browned on the outside, soft and doughy on the inside, loaded with raisins and topped with seeds, this bread will make you hoot n’ challah.

Growing up, my mom’s best friend would invite my family over for dinner and her homemade challah bread was always a huge hit! I dedicate this post to her for inspiring me to make yummy, yummy Jewish food!
IMG_3896
Usually when I make challah bread, I throw all of my ingredients in a bread machine and let it do all the kneading for me. Easy peasy.

This time, however, I had no bread machine and kneaded the dough with my super human arm strength. Actually, it was very easy and came out better than my bread machine challah because I could control how much it really “needed to be kneaded (hehe)!”

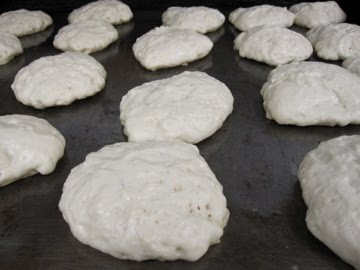
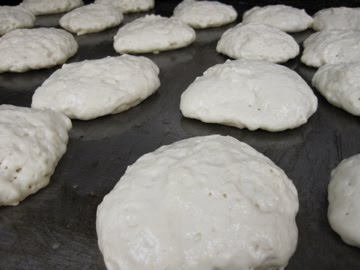
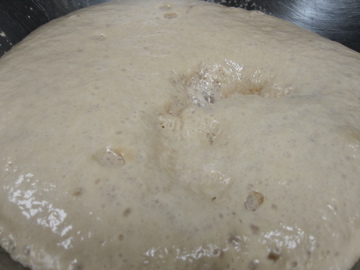
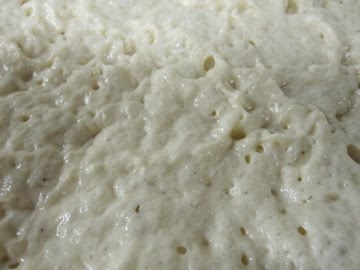
Here is some dough in the process of rising! So light and fluffly!

In order for challah to be challah and not just egg-bread, you must tear off a small walnut-size piece of dough and say a blessing. Ok, repeat after me:

“Baruch ata Adonoy, Eloheinu melech ha-olam, asher kidishanu bimitzvo’sav, vitzivanu lihafrish challah min ha-issa.Blessed are You God, King of the Universe, Who made us holy with His commandments, and commanded us to separate challah from the dough.”

Got it? Ok. Thought so. Good.

IMG_4953

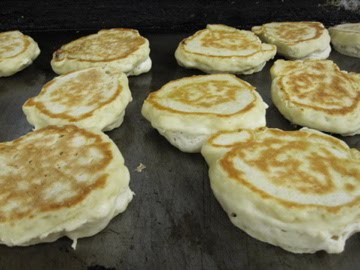
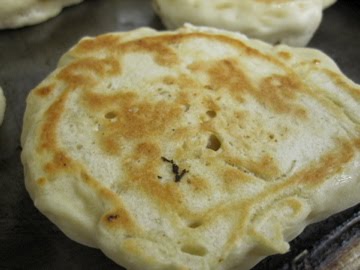
My 60+ housemates gobbled these loaves up!

Also on the menu this evening was:

The Silver Palate’s Chicken Marbella (chicken with prunes, olives, artichoke hearts, oregano, and white wine)
-Beet salad with shallots, feta, and red wine vinegar
Hearty bean soup with barley, kale, and tomatoes
-Sautéed green beans

Boy am I stuffed!

IMG_3897

Hoot n’ Holla Challah (Egg Bread)

Adapted from SmittenKitchen
Time: about 1 hour, plus 2 1/2 hours’ rising
Yield: 2 loaves (multiply the recipe by 4 if cooking for 60 hungry college students)

1 ½ packages active dry yeast (1 1/2 tablespoons)
1 tablespoon plus ½ cup sugar
½ cup olive or vegetable oil, plus more for greasing the bowl
5 large eggs (1 is used at the end for egg wash)
1 tablespoon salt
8 to 8 ½ cups all-purpose flour
½ cup raisins per challah, if using
Poppy and/or sesame seeds for sprinkling.

1. In a large bowl, dissolve yeast and 1 tablespoon sugar in 1 ¾ cups lukewarm water.

2. Whisk oil into yeast, then beat in 4 eggs, one at a time, with remaining sugar and salt. Gradually add flour. When dough holds together, it is ready for kneading.

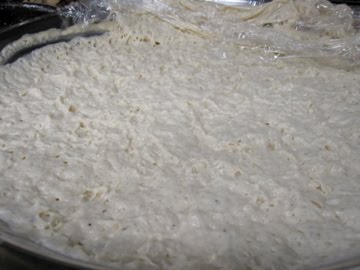
3. Turn dough onto a floured surface and knead until smooth (~ 5-10 minutes). Clean out the bowl and grease it, then return dough to bowl. Cover with plastic wrap, and let rise in a warm place for 1 hour, until almost doubled in size (Dough may also rise in an oven that has been warmed to 150°F then turned off). Punch down dough, cover and let rise again in a warm place for another half-hour.

4. To make a 4-braid challah, take half the dough and form it into 4 balls (take off a little tiny piece for the blessing and bake it with your loaves but DO NOT eat it). With your hands, roll each ball into a strand about 12 inches long and 1 ½ inches wide. Place the 4 in a row, parallel to one another. Pinch the tops of the strands together. (***At this point, if you decide to use raisins or chocolate chips, you can put them into the middle of each strand, pinching the strands closed to make sure the raisins are not too exposed to the outside).

4 ½. Move the outside right strand under 2 strands. Then take the second strand from the left and move it over one to the right. Take the outside left strand and move it under 2. Move second strand from the right over one to the left. Start over with the outside right strand. Continue this until all strands are braided. Tuck the ends underneath. Make a second loaf the same way.

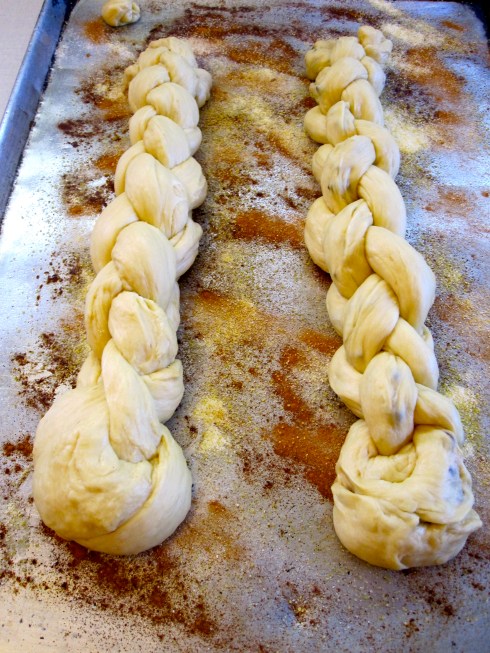
5. Grease a cookie sheet and sprinkle with cinnamon and cornmeal. Place braided loaves on the cookie sheet with at least 2 inches in between. Spray saran wrap with cooking spray and cover the loaves. Let rise another hour.

6. Preheat oven to 375°F and brush loaves with beaten egg. Sprinkle bread with seeds, if using (I HIGHLY recommend the seeds).

7. Bake in middle of oven for 30 to 40 minutes, or until golden. I like my challah bread served with a sprinkle of salt and some roasted garlic!