Archive | chocolate RSS feed for this section

Homemade Oreos

23 Nov

It was a lazy Friday afternoon. I was up at 6 am to go to work. I came home with the intention of going to class but due to the crumby weather and my lack of sleep from the night before, I chose to snuggle up with my temperpedic bed instead. Oh so comfy!

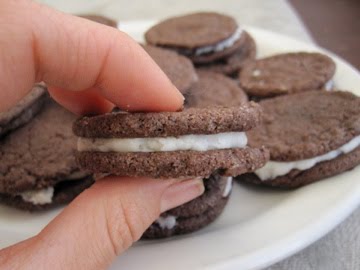
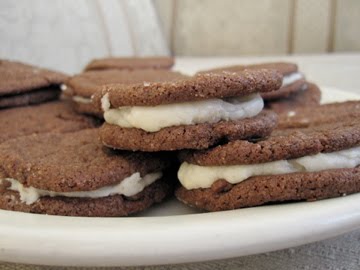
A few hours later, I awoke with a hankering to make oreos. Yes, oreos.


Oreos have been on my mind lately. My boss made them a few times at work, she even made an orange colored filling for Halloween. Too cute!

Warning, I shoved two big oreos in my mouth on my way out to ballet rehearsal. Do not do this. Tummy ache + having to jump and turn and look pretty and graceful= bad combo.

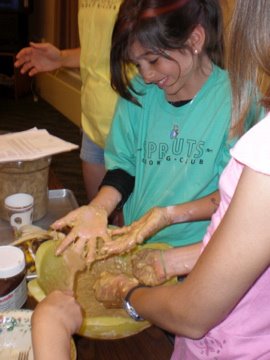
There are many ways to approach the dough. I used a food processor, but using a kitchen aid would be nice if you own one, and making the dough by hand is also easy.


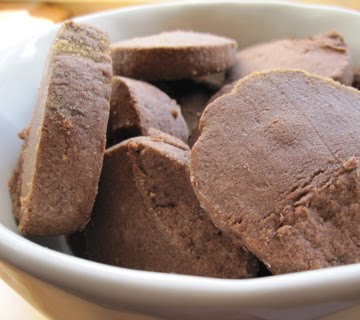
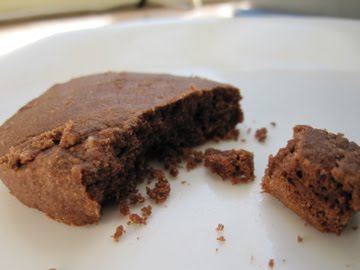
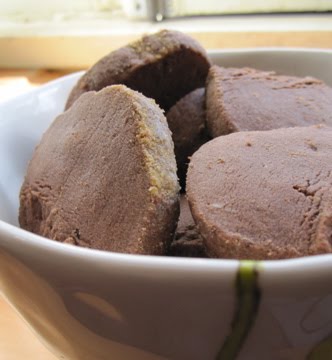
Deb from smittenkitchen told me to drop the dough by teaspoonful onto a cookie sheet and then gently press down to flatten. A small melon-baller/ice cream scoop works well. I decided to roll out my dough and cut it into small circular shapes (due to lack of a cookie cutter, I used a shot glass instead). My boss told me that sometimes she will roll the dough into a log, refrigerate it, and then just slice and bake. The world is your oyster people so just experiment and find your method of choice.

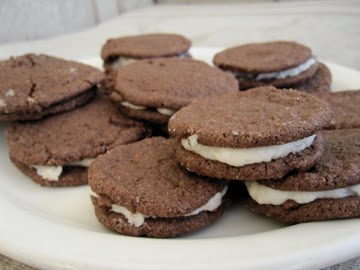
Oh, yes, and to pipe the frosting between the cookies, I used a ziplock baggie and cut off a tiny piece from one end, scooped my filling in, and squeezed it out. You can use a pastry bag if you own one, or just a knife or a spoon, or your fingers…

Have fun!


Homemade Oreos

Adapted from SmittenKitchen

Makes 25 to 30 sandwich cookies

For the chocolate wafers:
1 1/4 cups all-purpose flour
1/2 cup unsweetened Dutch process cocoa
1 teaspoon baking soda
1/4 teaspoon baking powder
1/4 teaspoon salt
1 to 1 1/2 cups sugar [or less if you like your cookie less sweet]
1/2 cup plus 2 tablespoons (1 1/4 sticks) room-temperature, unsalted butter
1 large egg

For the filling:
1/4 cup (1/2 stick) room-temperature, unsalted butter
1/4 cup vegetable shortening
2 cups (sifted) confectioners’ sugar
2 teaspoons vanilla extract
a few drops of water

  1. Preheat to 375°F.
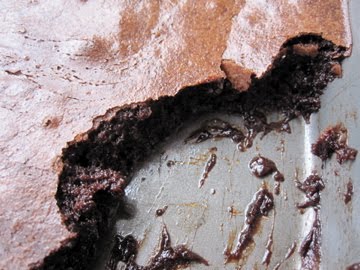
  2. In a food processor, or bowl of an electric mixer, or by hand, thoroughly mix the flour, cocoa, baking soda and powder, salt, and sugar. While pulsing, or on low speed, add the butter, and then the egg. Continue processing or mixing until dough comes together in a mass.
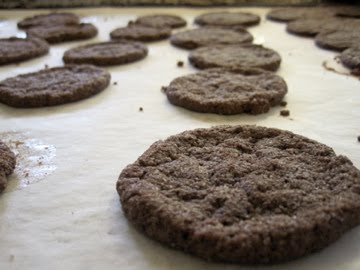
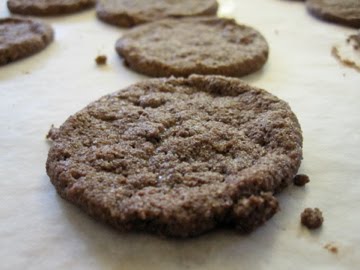
  3. Take rounded teaspoons of batter and place on a parchment paper-lined baking sheet approximately two inches apart. With moistened hands, slightly flatten the dough. OR: Roll out your dough and use a small cookie cutter to cut into circular shapes. OR: Use the log method. Bake for 9 minutes, rotating once for even baking. Set baking sheets on a rack to cool.
  4. To make the cream, place butter and shortening in a mixing bowl, and at low speed, gradually beat in the sugar and vanilla. Turn the mixer on high and beat for 2 to 3 minutes until filling is light and fluffy.
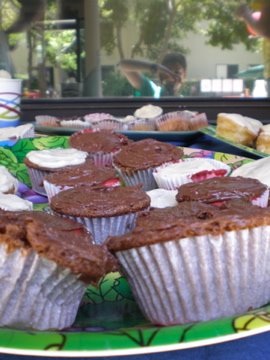
  5. To assemble the cookies, in a pastry bag with a 1/2 inch, round tip, pipe teaspoon-size blobs of cream into the center of one cookie. Place another cookie, equal in size to the first, on top of the cream. Lightly press, to work the filling evenly to the outsides of the cookie (OR: use the ziplock baggie method or just spread the cream around with a knife). Continue this process until all the cookies have been sandwiched with cream.
  6. Dunk generously in a large glass of milk. I also like to split my oreo in half and lick out the filling! Mmm.

>Chocolate and PEPPER Cookies

25 Oct

>
My roommate’s last name is Pepper. In honor of his birthday, I made “chocolate and pepper” cookies.

Yes, that is right, pepper. Black pepper—as in the thing you usually associate with salt. Pepper, as in cayenne pepper, the red spice where a little goes a long way. Yes, pepper, as in chocolate and pepper, together, baked in a cookie.


This particular cookie recipe comes from a darling little cookbook that I bought for $5 at a half-price bookstore. Great find. It is called Cookies: Irresistible recipes for cookies, bars, squares, and slices by Pippa Cuthbert and Lindsay Cameron Wilson. I got sucked into buying the book due to the pictures and cuteness of all the cookies.

There is really something about a good, crumbly butter cookie that just falls apart on your tongue, slowly melting, the flavor lingering in your mouth, clinging to your taste buds.


These chocolate and pepper cookies only call for a touch of black pepper and a pinch of cayenne. When you first take a bite, you can really taste the chocolaty buttery goodness; it reminds me a bit of chocolate mousse, only in cookie form…Swallow. Wait a second. Ok, right there. Whew. Spicy. As JoytheBaker always says, “Hot Dang! These are good!”

Paired with some milky Mexican hot chocolate or coffee, mmm mmm mmm! ¡Ay, caramba!

Now I will leave you with a great quote that sums up my weekend pretty nicely:
“Good conversation is as stimulating as black coffee, and just as hard to sleep after.”

–Anne Morrow Lindbergh


Chocolate and Pepper Cookies
Adapted from Cookies

Makes about 20-30 (depending on how thick you slice them and how much batter you eat!!)

**Note: scant means that you do not have to be super exact. No need to level off with a knife; you want it to slightly overflow over the top of the cup measurer.

Ingredients

1 cup unsalted butter (2 sticks), softened
¾ cup confectioners (aka powdered) sugar
1 tsp vanilla extract
scant 2 cups all purpose flour
scant ½ cup cocoa powder
½ tsp freshly ground pepper
1/8 tsp cayenne pepper

optional: 2-3 Tbsp demerara sugar, for rolling (I opted out of doing this step but it would have added a nice yummy texture…)

Directions:

• Cream the butter and confectioners sugar for 3-4 minutes, until light and fluffy. (I just used a fork to mix it all up). Add the vanilla extract and beat until smooth.

• Sift the flour, cocoa powder, black pepper, and cayenne together. Add to the butter mixture and stir until smooth.

• Tip the dough onto a work surface and shape into a log (they suggested a 6 inch long log, mine was much long, it just depends on your preference—bigger thinner cookies or smaller fatter ones…).

• Roll the log in demerara sugar, if using, pressing gently so the sugar will adhere. Cover with plastic wrap and chill for about 1 hour. **Alternatively, tightly wrap the dough in plastic wrap and freeze for up to 1 month. Defrost in the refrigerator before slicing and baking.

• Preheat the oven to 350°F. Line a baking sheet with parchment paper, or lightly grease.

• Slice the log into ¼ inch thick slices (mine were more like ½ inch slices…). Place on the baking sheets and bake for 12-15 minutes. Allow to cool.

Can be stored in an airtight container for up to 5 days.

>Brownie Pudding Amazingness!

5 Sep

>
“Close your eyes the next time you eat a piece of chocolate cake; did it really taste like chocolate or did the fudgey-looking icing just trick you into thinking it would taste like chocolate? The best chocolate desserts have a depth of flavor that hits you in a few ways—both sweet and bitter, with a winey complexity—and it’s my goal to bring out that complexity to reveal the true essence of chocolate…”

–Ina Garten

Not quite a brownie, not quite a pudding, not quite a soufflé—just a beautifully rich and decadent chocolate filled dessert!

The top of this treat is thin and crisp, but once you stick your fork in, oozing molten chocolate amazingness seeps out!


Check out the lovely mound of sifted cocoa powder/flour!


Everything that I have made from Ina Garten’s Back To Basics cookbook has turned out exquisite. She really focuses on cooking with ingredients that bring out the essence of the natural flavor in food. It is all about taking ordinary, on-hand ingredients and cooking or pairing them in a way that really brings out the taste! She is very aware of weaving her menus together and adding that extra “umph” to her dishes by finishing them off with a sprinkle of course sea salt, a splash of lemon juice, or a gorgeous herb…!

I made this brownie pudding dessert as a gift for my friend Natasha’s going away party. She is leaving to study in Scotland for the YEAR! Natasha is the QUEEN of chocolate/dessert/sweets, so I saw this as a prime opportunity to make a rich dessert to send her off! I just hope the Scots will be able to accommodate her sweet tooth!

Ina bakes her brownie pudding in an oval shaped dish, however the co-op where I live only had a rectangular shape pan. Despite the change from circular to square, this baby came out just perfect!


This dessert is baked in a water bath. A water bath is typically used when baking delicate foods—especially dairy and egg-based custards, soufflés and cheesecakes—as they can curdle and overcook very easily. A water bath acts as a way to insulate whatever you are cooking to maintain a smooth and even texture. This way, the oven will cook the center of the cake/custard/etc. without overcooking the sides. Genius!

Warning: Do not leave me alone with a big pan of chocolate dessert, or I might just eat it all and you will have to retrieve me from the doctor for having an overdose of goodness! But seriously, I have very little self-control these days…


Brownie Pudding
Amazingness
Adapted from Ina Garten’s Back to Basics

Ingredients

½ lb. (2 sticks) unsalted butter

4 extra-large eggs, at room temperature

2 cups sugar

¾ cup good cocoa powder

½ cup all-purpose flour

seeds scraped from 1 vanilla bean

Optional: 1 Tablespoon of framboise liqueur (or any liqueur of your choice; espresso would be great, too!)

1. Preheat oven to 325°F. Lightly butter a 2-quart (9x12x2 inch) oval baking dish (I used a 9x13x2 inch rectangular and it came out great!)
2. Melt the butter and set aside to cool.
3. Beat the eggs and sugar until very thick and light yellow (Ina uses an electric mixer with paddle attachment and beats for 5-10 minutes, but I utilized my super arm strength and used a hand whisk instead!).
4. Sift the cocoa powder and flour together and set aside.
5. When the egg/sugar mixture is ready, add in the vanilla bean seeds, the liqueur (if using), and the cocoa powder/flour mixture. Mix until just combined.
6. Slowly pour in the cooled butter and mix again just until combined.
7. Pour the brownie mixture into the prepared dish and place it in a larger baking pan. Add enough of the hottest tap water to the pan to come halfway up the sides of the dish.
8. Bake for exactly 1 hour. A cake tester inserted 2 inches from the side will come out ¾ clean. The center will appear very under-baked.
9. Allow to cool and serve with sifted powdered sugar, vanilla ice cream, whipped cream, raspberries, or on its own. Mmmmmmmmmmmm!

>Bonjour! Now let’s eat crepes!

17 Jul

>
I’m learning to speak French. Well, sort of.

So far, I have mastered how to say, “where is the bathroom?” and “did you sleep well?”

Although my French speaking abilities are quite limited, I am learning a thing or two about French cooking these days. What I am realizing is that most desserts are really simple—just eggs, milk, sugar, and flour. This is the basis for famous clafoutis (just add cherries), Moelleux au Chocolat (just add chocolate), and of course, crepes!

The French rarely use baking powder or baking soda, either. The key is to whip the eggs really well!

When I think of crepes, I imagine a burly man standing on the cobblestone streets with a cart, using his special tool to spread the batter very thinly over the hot pan.

Many different cultures have a variation of the pancake-like crepe—the Italians have crespelle, the Jewish blintz, Dutch babies, African injera, the tortilla, the Indian dosa, and the Mexican sope…

When making the first crepe of the batch, it is bound to get messed up, but have no fear! It still tastes great and the rest of them come out looking beautiful—very delicate, lacy, and lady-like, almost like an edible doily!

So for your next Saturday morning pancake and mimosa breakfast, why not impress your friends and family with some simple and light homemade crepes enjoyed on the porch with the shining morning sun?!

Crepes
Adapted from the Joy of Cooking

Makes about 5-8 large crepes depending on the size of your pan

Wet ingredients:
2 eggs, beaten well
2/3 cup milk
½ cup water
a pinch of salt

Dry Ingredients:
¾ cup flour
2-3 Tablespoons of sugar (optional)

1. Beat eggs. Add the rest of the wet ingredients, including salt.
2. Slowly sift the dry ingredients over the wet ingredients and whisk in a quick motion to be sure there are no lumps.
3. Let the batter rest. It is best to rest the batter for one or more hours in the fridge, but we did not have the patience and rested the batter for a mere 10 minutes! (the crepes still turned out great!)
4. Spray a nonstick skillet or crepe pan with cooking oil spray (we tried some with butter, but found that the butter burned too fast).
5. Place on ladle-full of batter into the pan and swirl quickly to cover the pan, getting the batter as thin as possible.
6. With a spatula, slowly check the under edges for doneness.
7. Flip the crepe over and cook a few more minutes.
8. Transfer to a plate and cook up the rest of the crepes.
9. Sprinkle a topping of your choice over the crepes, fold it up, and eat!

Sweet Topping ideas:
-butter and salt with a pinch of sugar
-jam
-fruit: strawberries, figs, bananas nectarines…
-lemon and powdered sugar
-Nutella spread
-honey

Savory egg and cheese crepes

1. Follow directions for crepe batter but omit the sugar.
2. Cook one crepe on both sides.
3. With the crepe still on the hot pan, add cheese and crack an egg in the middle.
4. Fold it over and let everything get gooey and melted!
5. Repeat with remaining batter.

More savory crepe ideas:
-Cooked spinach, onion, mushroom and cheese
-Add some pesto
-Fresh herbs and cheese
-Chicken with the works
-Artichoke hearts and sun-dried tomatoes
-Scrambled or fried egg with crumbled sausage

>Crispy Chewy Ooey Gooey Chocolate Cupcakes

4 Jul

>

Once I start, I can’t stop.
I started making muffins (peanut butter and jelly muffins and banana crumb muffins) and cupcakes and now I’m on a roll.

Cupcakes are just so darn easy to make, they cook up real fast, and they are portion controlled (well, if you can eat just one)…

The kids go crazy over these little gems, too!

There are just so many options—traditional chocolate and vanilla, red velvet, filled cupcakes, coconut, banana, green tea…


And the frosting—cream cheese frosting, pink, purple, white, red, chocolate, vanilla, maple…

Don’t forget the decorations: sprinkles, a dusting of cocoa powder, crushed graham crackers, oreos, life savers, mints, chocolate chips, chopped nuts, fresh fruit, mint leaves…


I must say that today my cupcake of choice was the chocolate cupcake with brown sugar cream cheese frosting. The top of the cake has a melt-in-your-mouth texture with a slightly crispy yet delicate and chewy consistency. And these little treasures have just the right amount of chocolate to win a girl over!


Just for kicks, here is a picture of a vanilla bean cupcake with vanilla bean frosting that I made a few weeks ago…You can see the flecks of the bean which earn gold stars in my book!

Chocolate Cupcakes (makes 12, or less…) Adapted from Hummingbird Bakery Cookbook

¾ cup plus 2 tablespoons all-purpose flour

2 ½ tablespoons unsweetened cocoa powder

a scant ¾ cup sugar

1 ½ teaspoons baking powder

a pinch of salt

3 tablespoons unsalted butter, room temperature

½ cup of whole milk

1 egg

¼ teaspoon pure vanilla extract

1 recipe of brown sugar cream cheese frosting (or any frosting of your choice)

1. Preheat oven to 325° F.
2. Combine flour, cocoa, sugar, baking powder, salt, and butter in a bowl and whisk together until you get a sandy consistency and everything is combined. (feel free to use an electric mixer if you have the luxury to do so).
3. Whisk the milk, egg, and vanilla together.
4. Slowly add half the milk mixture into the flour mixture. Mix until no lumps form. Add the rest of the milk mixture and mix until the batter is smooth (but do not overmix).
5. Spoon batter into prepared muffin tins and bake for 20-25 minutes. (warning: they may collapse in the center a bit so do not over-fill the tins).
6. Cool completely and frost!

Brown sugar cream cheese frosting (this makes a LOT of frosting but hey, the more the merrier!) Adapted from Joythebaker

1 1/2 cups butter, softened

8oz cream cheese, softened

1/4 cup light brown sugar, packed

1 teaspoon vanilla extract

pinch of salt

4-6 cups powdered sugar

2-4 tablespoons milk

Beat the cream cheese until really soft. Add the butter. Add the brown sugar, pinch of salt and vanilla extract, and beat until incorporated. Add 2 cups of powdered sugar. Slowly add more sugar alternately with the milk until you reach your desired consistency.