Archive | chocolate RSS feed for this section

>Caramel Ice Cream with Sliced Almonds and Heath Bar

23 Aug

>
Making caramel can seem very intimidating at first. You are playing with science. You are playing with fire. You are playing with sugar–hot bubbling sugar. There are different types of caramels that can be made: wet caramel is made by heating a combination of sugar and water in a pan and dry caramel is simply sugar heated without any liquid. Wet caramel is used mostly for sauces and drizzling. This particular caramel ice cream recipe uses the dry caramel technique.

The 2 main things to take note of when making caramel are recrystallization (lumpy clumpy sugar crystals) and burning the sugar. You can avoid recrystallization by making sure that your pan and your sugar have no impurities in them and that you are cooking your sugar in a fairly even layer. Limiting the amount that the sugar is stirred can also help prevent recrystallization (point: do not over-stir). To prevent burning the sugar, it is important to stand guard and hover around the pot. Right when the sugar turns an amber color and starts smoking and foaming a bit, you must remove the pan from heat immediately to stop the sugar from darkening further. Usually, a liquid is added (cream, coffee, orange juice/water…) at this point to help stop it from continuing to cook.

Look, if you mess up, just try again with a new batch of sugar. Sugar is pretty inexpensive and you can think of the process as an educational lesson in cooking and science.

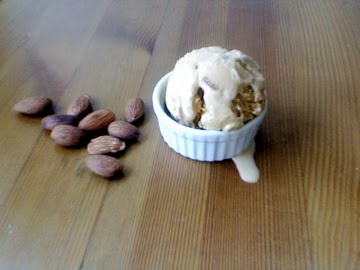
Caramel ice cream is a real treat. This recipe is just a basic dry caramel mixed with a milky creamy custard, but there are all sorts of fun ways to play with caramel ice cream mix: burnt caramel ice cream, salted caramel ice cream, salted butter caramel ice cream (I had this flavor at a shop in Paris, caramel burree sale, mmmmm!)…

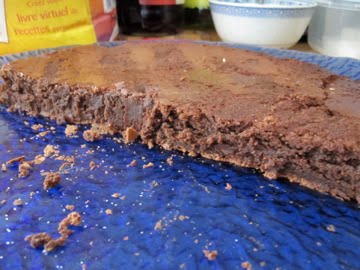
I also chose to mix in heath bar candy and chopped toasted almonds. I actually wish that I hadn’t done the heath bar thing because it took away from the actual caramel taste, but it was still absolutely delicious regardless. Next time I think I will pair the ice cream with a flourless chocolate cake or maybe some chewy gingersnap cookies and make ginger caramel ice cream sandwiches. Uh. Yea.


Caramel Ice Cream

from David Lebovitz’s Ready for Dessert

makes about 1 quart (1 liter)

1 cup sugar
2 cups whole milk
1/4 to 1/2 teaspoon sea salt
1 cup heavy cream
5 large egg yolks
1/2 teaspoon vanilla extract

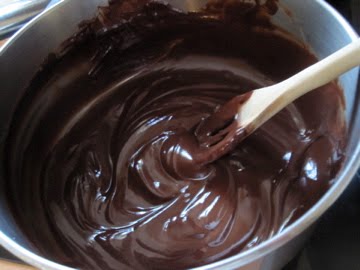
Spread the sugar in an even layer in a large, heavy-bottomed saucepan and cook over medium heat, without stirring, until the sugar begins to melt around the edges. Using a heatproof utensil, slowly drag the liquified sugar to the center and stir gently until all the sugar is melted. Continue to cook, stirring infrequently, until the caramel turns dark amber in color and starts to foam a bit. Remove from heat and immediately add the milk (SLOWLY!). The caramel will bubble up vigorously (WATCH OUT, STAND BACK/WEAR OVEN MITS), then the bubbling will subside.

Set the saucepan over low heat, add 1/4 teaspoon salt, and stir until almost all of the hardened caramel has dissolved into the milk. A few bits may remain, but don’t worry; they’ll melt later on.

Pour the cream into a medium bowl and set a mesh strainer across the top.

In a separate bowl, whisk the egg yolks, then gradually add some of the warm caramel mixture, whisking constantly as you pour. Pour the warmed yolks back into the saucepan. Cook over low heat, stirring constantly and scraping the bottom of the pan with a heatproof spatula, until the custard is thick enough to coat the spatula. Pour the custard through the mesh strainer into the heavy cream. Stir in the vanilla, then taste, and add up to 1/4 teaspoon more salt, if desired.

Set the bowl containing the custard over a larger bowl of ice water. Stir the custard until cool, then cover and refrigerate until thoroughly chilled.

Freeze in an ice cream maker according to the manufacturer’s instructions.

**Optional: Stir in 1 to 2 cups of mix-ins just after churning–chopped chocolate or candy bars (I did chopped toasted almonds with heath bar), bits of broken caramel, crumbled brownies, praline…

or

Make cookies and make caramel ice cream sandwiches!

French Home Cooking in the Suburbs of Paris

10 Jul

I feel lucky. I feel very lucky. I feel very lucky to have just spent the last week in the suburbs of Paris, France with a lovely French family. A lovely French family who gave me a bed to sleep in at night, a clean shower, and home-cooked meals. Let’s just say that I have eaten well this past week, eaten well with great company (and don’t forget about the wine!!).

Let us start from the beginning, shall we? I have a friend, her name is Alex (pictured below on the right). Alex is from France.


Alex and I worked/lived together last summer (2009). We worked together in Berkeley, California at a cooking camp for children.

This summer (2010) I went on a 3-week Euro-trip where I spend my last week with Alex and her family in Paris, France. Actually, they live right outside Paris in a town called Vincenne. Just before I arrived, Alex was at her family’s country home where she picked fruits and made jams with them: rhubarb, cassis (black currant), groseille (red currants), apricot, apple, raspberry…

Groseille (red currant) jam

Apparently Alex and her family have NEVER had to buy jam before. They always make it in abundance with the summer fruits from their country home. And every morning they eat their jam on a toasted baguette. What a life, eh?

Rhubarb jam 

Speaking of rhubarb, check out this piece of rhubarb:


It is huge! And green! Totally different than the rhubarb that I am familiar with back in the states. I have made rhubarb jam before, it was red. Their jam is green. “C’est la vie.”


Pictured below is Alex’s mom, Catherine. She is making rhubarb jam and she is literally the queen of her kitchen, my taste buds can attest to that:


Alex recently celebrated her 22nd birthday. Bon anniversaire! (that means “happy birthday” in French). Of course we had to celebrate with good food and good drinks. We had a multi-course meal with a bottle or two of wine for each course!

This multi-course meal, however, was as simple as can be. It all started with fresh scallops. During the winter months, Alex’s family buys fresh scallops, shucks them, and freezes them. Her mom defrosted these scallops over-night in milk so that they would not dry out or smell. A sprinkle of oil in a hot pan with a dash of fresh garlic, sauteed two minutes on each side and these babies are done! Accompanied with a fresh baby spinach salad, I found such joy in the hot/cold, soft/crunchy balance of foods. Mmm summer!


Next, we had a little somethin’ called “tarte tatin,” which is sort of like an upside-down tart. Typically, you see a tarte tatin for dessert, made with fruits such as apples. But Catherine prepared a savory tarte tatin with a confit of ratatouille-style vegetables, topped with slivers of fresh Parmesan cheese.


And with every great meal there is always fresh baguette…


Now lets talk dessert. I sat with Catherine as we picked through a big bucket of fresh red currants, separating stem from fruit.


We were adding these currants to a fresh fruit crumble. Rhubarb and red currant crumble. No sugar was added to the fruit. I couldn’t believe it. Seriously? Yes, why add sugar when you can just taste how good the fruits are as is?


Topped with a pastry crust: 200 grams each of flour, ground almonds, sugar, and butter.


Pat it down and Voilà! We added a little special touch to the crumble by making the number “22” out of the pastry.


And after it baked, the currants just exploded over the pastry top and all that was left was this special “22.” Yum-o! I love the tart fruit mixed with the sweet pastry crust. Really just so simple and not too much sugar.


Now, last year when Alex came to Berkeley, she made this cake that I have since dreamed about all year long. This cake is of the chocolate variety. It is called Fondant au Chocolat and is the best darn chocolate cake I have ever tasted. It only works if you use very good chocolate. There is only about 2 tablespoons of flour in the whole cake. So easy to whip up and so quick to bake. The key is timing and temperature of the oven. Oh how I adore this cake.


Alex’s mom probably could have prepared the cake with a blind-fold on and one hand tied behind her back. It was like a little dance watching her bake with such easy and joy.


Let us meet dad now, yes? Everyone, meet Emmanuel. The wine connoisseur, the grill master, the cheese aficionado, the jokester. This man knows everything and more about French wine. We even tasted a very special red wine that is supposed to be eaten ONLY with really good chocolate (yes, we drank this wine with our fondant au chocolat). Below, Emmanuel grills pork and lamb on the rooftop of their flat.


What a beautiful summer evening, the perfect night for another perfect meal…


Roasted potatoes, perfectly browned…


Special French salt called “fleur de sel.” It’s great for sprinkling as a final touch to any dish…


On my last night in France, Alex hosted a barbecue for friends. On the menu was a simple tabouleh salad: cucumbers, tomatoes, couscous, lemon juice, olive oil. There was also a salad with fresh sliced tomatoes, hericot vert (French green beans), and feta cheese.

Prepping the tabouleh
Tabouleh Salad
Hericot vert, tomato, and feta cheese salad

Alex made a lovely fruity rum cocktail with fresh orange slices and vanilla beans:


And then the meat…chicken and ribs. Dude.

Poulet (chicken)
Alex at the grill
Meeeeeaaaaaat!


Wow, what a week. I really admire Alex’s family for not having “snack” foods around. Not even cereal or oats or crackers. Everything was fresh. Lots of yogurts, fruits, cheeses, and everyday more baguettes appear. After every meal, I would “cleanse” my palate with strong French cheeses. I miss those cheeses already!

Until next time, Paris!

>Chocolate Cupcakes Big and Small with Assorted Frostings and Toppings

14 Jun

>
Above you can see the traveling cupcakes. I carefully placed the little frosted cakes into a nice tupperware and boarded an airplane from Los Angeles to San Francisco. 5 twenty-something men and myself successfully gobbled these up by the next day.

Chocolate cupcakes. VEGAN chocolate cupcakes (one would never know they were vegan, especially with all that buttery frosting on top!).


Peanut butter frosting.

Peanut butter frosting atop of a chocolate cupcake with:

  • crushed oreo cookie crumbs **NOTE: I used mini oreos
  • with chopped candies (chocolate covered espresso beans and peanut butter cups and m&m’s…) **NOTE: Trader Joe’s sells mini peanut butter cups which are perfect for these cupcakes
  • with chocolate sprinkles
  • with a swirl of Nutella spread
  • with a dollop of jam


Chocolate cupcakes with vanilla frosting and rainbow sprinkles.


The cake part makes a LOT of cupcakes. I got 14 big ones and 24 babies (remember, the babies will take less time to bake…think 10-12 minutes instead of 20-25).
***NOTE: click on the links above for the recipes…

Classic Chocolate Chip Cookies

13 May


My last final was at 7pm. I had all day to kill before this test. Rather than spend my entire day in angst, trying to cram my brain, I made cookies.

Just your classic chocolate chip cookie. Buttery, soft, chewy, thick, and crispy. Oh, and chocolately, duh! The perfect cure for an anxious day of studying, for a celebration of being done, for a yearning for classic comfort food.


This entire recipe makes a ton of dough in just a short amount of time. In just under half an hour, I made my dough, baked my cookies, and cleaned up my dirty dishes. BAM. Instant craving fix.


Giving someone a gift of just a simple, classic chocolate chip cookie will brighten their day. I left a plate of cookies for my housemates with a friendly note saying “Good luck with finals, everyone.” I tempted my friend Michelle with a few celebratory cookies, my study-buddy/friend Alison indulged (her mama made her a finals care-package of which I had a few nibbles: homemade chocolate chocolate chip cookies with candied orange peel, coconut oat and nut cookies, and chocolate dipped dried apricots), and I brought a few over to some hungry young lads in San Francisco. I’ve still got a few more cookies to give out, so come n’ get em or else my greedy self might overcome me and may end up eating them all!


Crispy, Chewy Chocolate Chip Cookies

From SmittenKitchen, adapted from AllRecipes.com

SmittenKitchen says, “…when I’m looking for a classic cookie, kind of like the old school Toll House recipe but better, even, this is what I go for.”

As always with cookies, you can scoop, flash freeze, and then freeze the cookies until you’re ready to bake them, or to bake a few off at a time. You can bake them straight from the freezer, adding a few minutes to your baking time, of course, or let them thaw out on a tray for a while.

2 cups all-purpose flour
1/2 teaspoon baking soda
1/2 teaspoon salt
3/4 cup unsalted butter, melted
1 cup packed brown sugar
1/2 cup white sugar
1 tablespoon vanilla extract
1 egg
1 egg yolk
2 cups semisweet chocolate chips

1. Preheat the oven to 325°F (165°C). Grease cookie sheets or line with parchment paper.

2. Sift together the flour, baking soda and salt; set aside. In a medium bowl, cream together the melted butter, brown sugar and white sugar until well blended.

3. Beat in the vanilla, egg, and egg yolk until light and creamy. Mix in the sifted ingredients until just blended.

4. Stir in the chocolate chips by hand using a wooden spoon. Drop cookie dough 1/4 cup at a time (for giant cookies) or a tablespoon at a time (for smaller cookies) onto the prepared cookie sheets. Cookies should be about 3 inches apart.

5. Bake larger cookies for 15 to 17 minutes, or 10 to 12 minutes for smaller ones (check your cookies before they’re done; depending on your scoop size, your baking time will vary) in the preheated oven, or until the edges are lightly toasted. Cool on baking sheets for a few minutes before transferring to wire racks to cool completely.

Peanut Butter Banana Bread

5 May


I used to think I couldn’t bake. I could not make a good cookie for the life of me. Now I work as a pastry cook. Funny how that happens.

I used to think I did not like peanut butter. My parents claimed they didn’t like peanut butter, so I just followed their lead. All of those childhood years where I could have brought a pb&j sandwich to school for lunch, I was packin’ rye bread with cream cheese and cucumber. Now pb is one of my favorite foods–crunchy, creamy, flavored, skippy, or all-natural, on toast, in a shake, with some ice cream, or right off the spoon–I love it every way.

This peanut butter banana bread was one of the first baked goods that I had made successfully when I was a novice baker. The banana, yogurt, and peanut butter combo help keep the bread/cake very moist. Easy to throw together, hard to mess up, tasty to the tongue.


Peanut Butter Banana Bread with Choco Chips

Ingredients

1 cup whole-wheat pastry flour (I have used regular whole wheat flour and all purpose flour before, and both work fine)

3/4 cup light brown sugar or raw sugar

1 tsp. baking powder

1/2 tsp. baking soda

1/4 tsp. salt

2 medium bananas, mashed

1/3 cup unsweetened crunchy peanut butter (Skippy brand is a winner for me here)

1/4 cup plain fat-free yogurt

1 large egg

2 Tbs. canola oil

3/4 cup semisweet chocolate chips


Directions

Preheat oven to 350F. Coat standard loaf pan with cooking spray. Combine flour, sugar, baking powder, baking soda and salt in large bowl.

Whisk together mashed bananas, peanut butter, yogurt, egg and oil. Stir banana mixture into flour mixture until combined. Fold in chocolate chips. Scrape batter into prepared loaf pan.

Bake 40 to 50 minutes, or until toothpick inserted in center comes out with a few moist crumbs clinging to it. Cool on rack 15 minutes before unmolding. Cool completely, then slice and serve.