Archive | December, 2009

Brown Sugar Buttermilk Waffles

17 Dec

These are some sexy waffles.

They can be drizzled with maple syrup, slabbed with butter, dolloped with ice cream, smothered with yogurt, dusted with powdered sugar, spread with jam (or lemon curd) and peanut butter, dipped in coffee…

Sometimes when I’m feelin’ a little devilish, I will even add walnuts, dates, and bananas to my batter! Jeepin’ Jilipers that’s good!

I want to eat my waffles groove by groove.

You can smell these waffles from down the street.

These waffles kick Eggo Waffles booty!

These waffles contain buttermilk and brown sugar. Now is that sexy or what?

They only take 10 minutes to prepare and about 2 minutes to cook, and my belly is satisfied for hours!

Go make these waffles, top and fill with the condiment of your choosing, start the day off right.

Brown Sugar Buttermilk Waffles
Recipe from JoyTheBaker

Ingredients

3 cups all purpose flour

1 Tablespoon baking powder

1 teaspoon baking soda

1 teaspoon salt

¼ cup brown sugar

¾ teaspoon cinnamon

¼ teaspoon freshly grated nutmeg

4 eggs

2 ½ cups buttermilk

2/3 cup oil

2 teaspoons vanilla

Directions

Set up your waffle iron on a level, clean surface and turn on to preheat.

In a large bowl combine flour, baking powder, baking soda, salt, brown sugar, cinnamon, and nutmeg. Whisk to blend. In a medium bowl, whisk together eggs, oil, buttermilk and vanilla extract. Add the wet ingredients to the dry ingredients and fold. (If you choose, once almost fully incorporated, add walnuts, bananas, or dates to your batter; chocolate chips are fun, too!). Stir. Try not to over mix the batter or the waffles will become tough. It’s ok if a few lumps remain in the batter.

Cook according to your waffle machine

Homemade Croissants, Part II: Rolling, Baking, Eating

15 Dec

Ok folks, so now that you have gone through part I of the adventure in homemade croissants, you’ve got your laminated dough ready to be rolled and shaped and eaten!

This was the scary part for me. How can I possibly roll these little guys out to look the way they do in a real French bakery (well, I’ve still never been to France but I have a very distinct image in my head)?

How big should I make my triangles? Should they be equilateral, isosceles…? Do I pinch my ends together or leave them open?

Stephanie. Calm down. Breathe. You can do this. Lets take it step-by-step, shall we?

To begin, you should have ready a baking sheet lined with parchment paper and a rolling pin and pizza cutter nearby.

Step 1: Take you laminated dough out of the refrigerator. It should look like this:

Step 2: On a lightly floured surface, roll your dough out into a large rectangle about ½ an inch thick and maybe 2 feet wide. Using a pizza cutter, I cut my rectangle in half the long way, so that I had two rectangles, each about 2 feet wide and 6 inches tall.

Step 3: Using your pizza cutter, cut your dough into long isosceles triangles. At the restaurant, we way out each triangle to roughly 3 ¾ oz., but I just eyeball it when I make them at home. Your triangles should look similar to this:

Step 4: Cut a tiny slit at the base of each triangle. Also, I like to stick any extra leftover end pieces of dough inside some of the triangles. Nothing goes to waste!

Step 5: With the base closest to you, begin to roll your croissant outward, your right hand rolling to the right, your left hand rolling to the left. Then, turn your triangle so the tip faces you and simultaneously stretch the dough with your right hand and roll it toward you with your left hand. Tuck the end of the tip underneath and pinch your sides together.

Optional: You can fill your croissants with prosciutto and cheese, with chocolate, with anything you like! Plain are a good place to start, though.

Step 6: Place your croissants on a baking sheet lined with parchment. Either wrap in saran wrap and stick them in the fridge overnight, or let your croissants sit at room temperature until they are nice and springy when you touch them.
**If you stick your croissants in the fridge, just pull them out about 40 minutes before you want to bake them so that they can come to room temperature and proof.

Step 7: When you are ready to bake, preheat your oven to about 400-425°F. Crack an egg and beat it with a touch of cream. Brush your croissants with the egg wash. Bake for about 20-25 minutes until golden everywhere.

OMG eat them eat them eat them…yum yum yum, they are so beauuuuttttiiiiifffffullll and delicious and flaky and warm! Gah!!!!

**NOTE: Rolling these out takes a bit of practice. The first time I made these all on my own, I did not pinch my ends together nor did I make sure the tip of my triangle was tucked underneath. Alas, here is what my first batch came out looking like:


Not too shabby, but I like the pinched ends look better!

Homemade Croissants Part I: Laminating the Dough

14 Dec

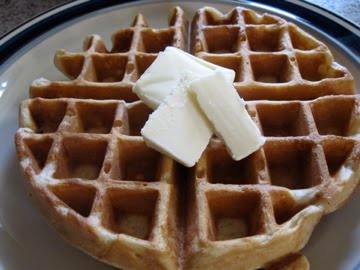
Homemade croissants. The ultimate guide. Arrrrrreeeee yooooooouuuuu reeaaaaaaddddddy?!

I think we may need to do a warm-up before we start.

Drop and give me 20 push ups. Ok, now lets see those arm muscles go to work!

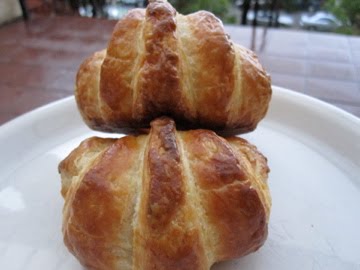
Homemade croissants are very simple (I know you think I’m crazy for saying that making croissants are simple, but keep reading). Only a few ingredients needed to make a big, flaky, buttery pastry. What makes the process so daunting is the amount of time it takes; not necessarily on-hand time, just waiting around time. Rolling out your dough, folding it, refrigerating for an hour. Rolling out your dough, folding it, refrigerating. Etc. etc. etc.

Ok people, really, it is sooooooo worth it! You can make a bunch of dough and just freeze the amount that you are not using right away.

I want to make this dough again and again and again (and I will).

Alright, pop quiz. What does it mean to laminate dough? Laminate means alternating layers. In the culinary world, this means alternating layers of dough-butter-dough in the case of puff pasty, flaky pastry, Danish or croissant dough.

I made a LOT of dough. Like a LOT. I used roughly 12 cups of flour and 3 pounds of butter. Yes people, 3 pounds of butter! (Just remember, those 3 pounds got spread over many many many croissants).

Here I give you an abbreviated version of my dough recipe. Shout out to my boss, Kiri, who showed my the ways of croissant making!

You ask: Stephanie, how dooooo you do it?
I answer: why LOVE of course!

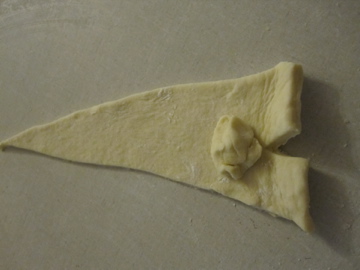
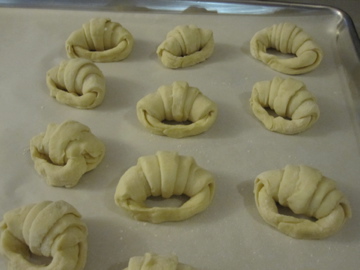
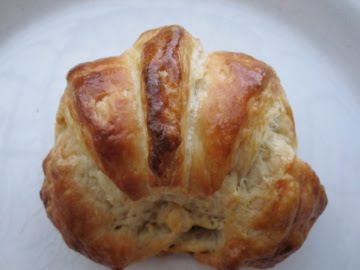
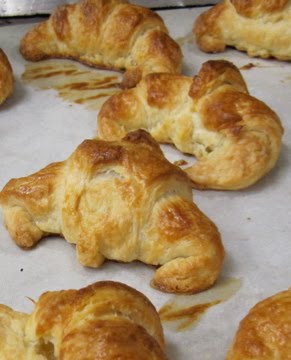
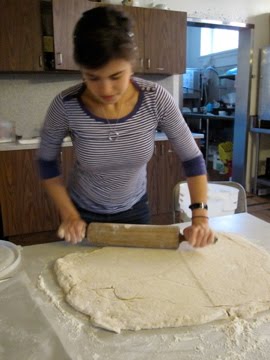
What follows is a quick overview of the process, step-by-step, picture-by-picture (the actual recipe is below):

Yeasty, sugary, milky, foamy mixture

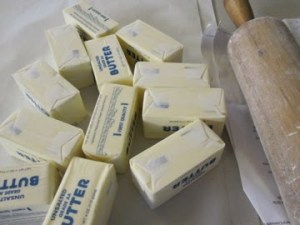
Yes I used 3lbs. of butter


I got a little help from one of my housemates to pound out the butter (here is where the push-ups begin to come in handy)!


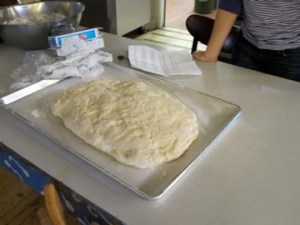
Yeasty flour mixture ready to be rolled out


Here is the yeasty flour mixture rolled out into a rectangle


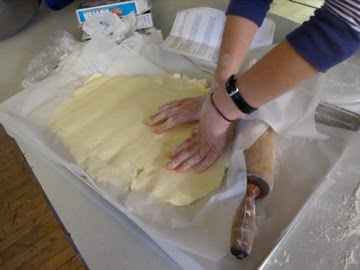
Lay your block of butter on top of the flour mixture like so


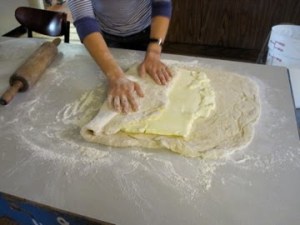
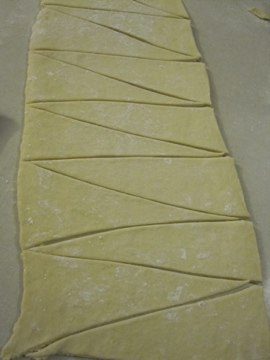
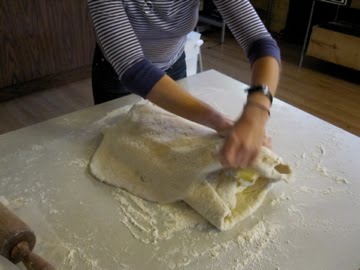
Fold it like a letter (in thirds)

Nice!

Once again, push-ups are helpful to build up the arm strength

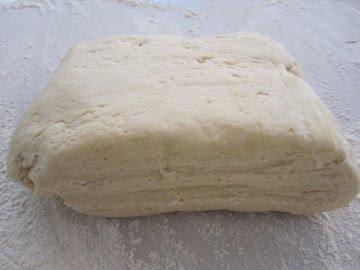
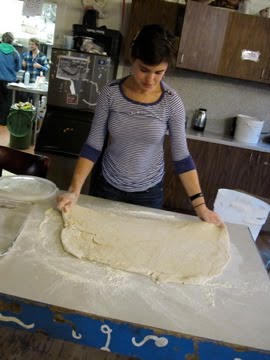
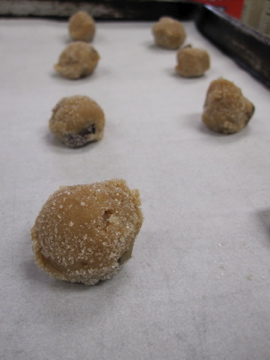
This is what your dough should look like when done! Yahoooo!
Croissant Dough
Recipe from Kiri, adapted from Nancy Silverton

Yield: about 2 1/2 lbs. of dough (aka about 20 croissants?)
Ingredients

* 1 1/2 cups whole milk, heated to warm (105°F–110°F) (You should be able to comfortably stick your finger into the warm milk)

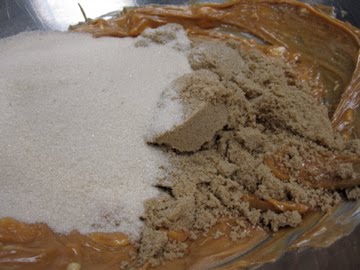
* 1/4 cup sugar (I used half brown, half white)

* 1 tablespoon plus 1/4 teaspoon active dry yeast (from two 1/4-oz packages)

* 4 cups unbleached all-purpose flour (you may need to add more or less depending on your dough)

* 1 Tablespoon kosher salt

* 3 sticks (1 1/2 cups) cold unsalted butter

Make dough:
Stir together warm milk, sugars, and yeast in bowl and let stand until foamy, about 5 minutes. (If it doesn’t foam, discard and start over.) Add your flour and salt and mix by hand until dough is smooth and very soft, about 7 minutes (or if you own a standing Kitchen Aid mixer, you can mix the dough with a dough hook).

Transfer the dough to a work surface and knead by hand 2 minutes more, adding more flour as necessary, a little at a time, to make a soft, slightly sticky dough. Form dough into a roughly 1 1/2-inch-thick rectangle and chill, wrapped in plastic wrap, until cold, about 1 hour.

Prepare and shape butter:
After dough has chilled, arrange sticks of butter horizontally, their sides touching, on a work surface. Pound butter with a rolling pin to soften slightly (butter should be malleable but still cold). Scrape butter into a block and put on a kitchen towel or piece of parchment paper, then cover with other towel or parchment. Pound and roll out on both sides until butter forms a uniform 8- by 5-inch rectangle. Set aside for now.

Roll out dough:
Unwrap dough and roll out on a lightly floured surface, dusting with flour as necessary and lifting and stretching dough (especially in corners), into a 16- by 10-inch rectangle. Arrange dough with a short side nearest you. Put butter in center of dough so that long sides of butter are parallel to short sides of dough. Fold as you would a letter: bottom third of dough over butter, then top third down over dough.

Turn dough so a short side is nearest you, then flatten dough slightly by pressing down horizontally with rolling pin across dough at regular intervals, making uniform impressions. Roll out dough into a 15- by 10-inch rectangle, rolling just to but not over ends.

Fold in thirds again like a letter, as above, stretching corners to square off dough, forming a 10- by 5-inch rectangle. (You have completed the first “fold.”) Chill, wrapped in plastic wrap, 1 hour.

Make remaining “folds”:
Make 3 more folds in same manner, chilling dough 1 hour after each fold, for a total of 4 folds. (If any butter oozes out while rolling, sprinkle with flour to prevent sticking.) Wrap dough tightly in plastic wrap and chill at least 8 hours but no more than 18 (after 18 hours, dough may not rise sufficiently when baked).

****NOTE: Since I made about 3 times this recipe, I cut my dough into thirds at the end, wrapped each one in saran wrap, stuck one in the freezer, and the rest in the fridge.

>Magnolia Bakery’s Peanut Butter Cookies, Veganized

4 Dec

>
As a devout fan of Sex and the City, when I went to New York a few years ago, I signed myself up to go on the official Sex and the City tour of New York City. Yes, it was amazing, pretty much everything I could ask for.

A huge bus filled with crazy fans like myself. There were young women, grandmothers, sisters, best friends, even mom and kids, boyfriend and girlfriend, people visiting from all over the world.

We stopped at the Pleasure Chest where Charlotte bought her “rabbit,” we drank cosmopolitans at a speak easy, we stopped by Miranda’s gym, Samantha’s place in the meat-packing district, the church where Miranda and Steve get married, the restaurant where Carrie went to meet Aidan’s parents…

Two of my favorite stops were at 1. Carrie’s stoop…


and 2. Magnolia Bakery.

Oh, the famous Magnolia Bakery. This is where the cupcake craze all began (at least in my book). Man oh man oh man. I want to go back there soooo bad! Let’s go to NYC right now ok?

I must go back to this cute Greenwich Village bakery and try something other than their cupcakes! The quaint little store is just filled with glorious cakes and cookies and confections!

I made their peanut butter cookies for my house mates. I made them vegan. You do not need to make them vegan (just use real butter and a real egg). These peanut butter cookies are so good, and I ate so much batter it’s ridiculous.

Chewy and peanut buttery with little surprises of cranberries and chocolate= LOVE!


I actually put whole peanuts in these cookies as well…next time I think I may omit them…they kind of just fell out and were not what I was looking for…

Another NYC hot spot that I have been dreaming about is Serendipity. Let’s go get some $9 frozen hot chocolate, shall we?

Magnolia Bakery’s Peanut Butter Cookies, veganized
adapted from Smitten Kitchen

1 1/4 cups all-purpose flour
3/4 teaspoon baking soda
1/2 teaspoon baking powder
1/4 teaspoon salt
1/2 cup earth balance butter, softened
1 cup peanut butter at room temperature (smooth is what we used, but I am pretty sure they use chunky at the bakery)
3/4 cup sugar
1/2 cup firmly packed light brown sugar
1 Ener-G egg replacer equivalent of an egg, at room temperature
1 tablespoon soymilk
1 teaspoon vanilla extract
1/2 cup dried cranberries
1/2 cup chocolate chips

For sprinkling: 1 tablespoon sugar, regular or superfine

1. Preheat oven to 350 degrees. In a large bowl, combine the flour, the baking soda, the baking powder, and the salt. Set aside.

2. In a separate bowl, beat the earth balance butter and the peanut butter together until fluffy. Add the sugars and beat until smooth. Add the “egg” and mix well. Add the milk and the vanilla extract. Add the flour mixture and beat thoroughly. Stir in the cranberries and chocolate chips.

3. Place sprinkling sugar — the remaining tablespoon — on a plate. Drop by rounded teaspoonfuls into the sugar, then onto ungreased cookie sheets (I lined my sheets with parchment paper), leaving several inches between for expansion. Using a fork, lightly indent with a crisss-cross pattern.


4. Bake for 10 to 12 minutes. Do not overbake. Cookies may appear to be underdone, but they are not.